| |
Changing Emulsion
toobs FZR1000 Exup (all models)
Information & images
supplied on forum by Joeboy, creedxup & Teego
|
 |
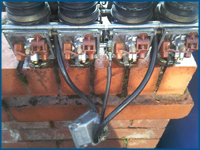
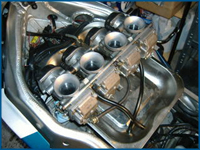
Let's start with the
basics...its alot easier to remove the carbs to undertake
this task so its off with the tank and airbox ( make
a note of where the screws for the clamps face on the
carb rubbers......usually they face towards the middle
at the top for ease of access. Remove fuel, breather
pipes, throttle and choke from carbs.
Loosen screws on lower clamps of inlet rubbers (pain
in the R's to reach and see without an inspection lamp).
Lift carbs off and put rags in inlet stubs to stop anything
nasty / valuable dropping in. Remove & rest carbs
in large baking tray. This will catch petrol plus any
parts that come off while you are doing the work. |
 |
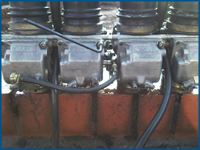
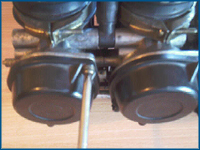
Loosen screws on tops
and bowls of all carbs. You'll find out if any have
siezed and can do something about it. Take your time
and use the correct size screwdriver. It really DOES
help and make a difference!. (Mark the carbs 1,2,3 &
4 to help on assembly if you intend on doing them all
together.)
Make life easier in the future by replacing the screws
with hex heads. |
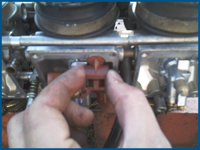 |
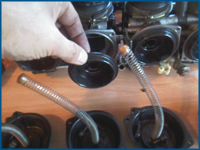
Now do each carb one at
a time so you don't get confused. Take the float bowl
off. To make access easier, take the float mechanism
off by removing the slide in pin.
|
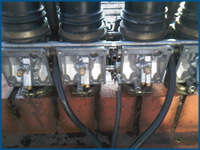 |
Undo the 6mm brass nut
you see in the middle (there's only one and this secures
the emulsion tube and jet holder). It DOES
matter were they came from the 2 middle ones have smaller
jets in
Remove it and the brass collar. Thats all for the float
chamber for now...... |
 |
Take the top off carefully
so the spring doesn't dance off down the road. Make
sure not to lose the rubber 'O' ring
Everything will come out in one unit.....Place it safely
to one side. |
 |
Then remove the diaphrams
with the needles in... |
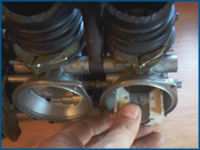 |
Then push on the tube from
the bottom and remove the grey slides with the jets in..like
this.. Note which way round it was. The lip at the top
faces away from the engine with the carbs on the bike.
|
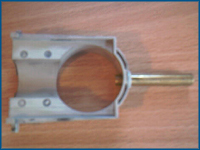 |
It now looks like this...pop
the tube out and
replace with your new one..Just slide the new tube in
and push down as far as it will go. Replace the jet holder.
Replace the brass collar and 6mm nut. Screw it up gently
but firmly. It will pull the emulsion tube into place.
Replace the float bowl. Replace the needle, diaphragm
and spring unit; whilst guiding the needle is in to the
emulsion tube.
Replace the carb top.
Make sure the carb slide moves freely up and down and
there are no clicks and snags from a badly aligned spring.
Tighten up all fasteners. |
 |
While you're at it, take
the chance to check float heights, balance the carbs
and make sure your pilot screws are set. Screw down
untill they stop and back out 3 turns (6 half turns
is easier to count)..They are easier to get at with
the carbs off. Also if you've the equipment, take this
chance to balance the carbs.
With everything back together - cross fingers that
it will work. Took a bit of time to fire up at first
and blasted a shedload of crud out of the exhaust, but
it settled down and now starts and idles on the choke
as it should.
When warm adjust the tickover. Now starts with a stroke
on the button and idles cleanly. Revs up cleanly with
a touch of throttle. White rag test at exhaust outlet
- clean as a whistle |
|
| Return
to Needles & toobs » |
