BLOWN HEAD GASKET - OUCH!

The place to come to share your technical expertise, or just find out what the little springy thing is that's just pinged out of sight under the work-bench.
Post Reply
User avatar
kboehringer
Spanner Monkey
Spanner Monkey
Posts: 124
Joined: Sun Jun 30, 2019 9:39 pm
Location: Peachtree City, GA USA

BLOWN HEAD GASKET - OUCH!

Post by kboehringer »

FZR Friends,
Everyone here has been extremely helpful as I have been trying to return my bike into proper running condition. It is (Was?)very close to perfectly running. Just the slightest tap of the starter and she comes to life, idles perfectly, and is an unbelievable powerhouse!!.....

I had been chasing a couple oil leaks and a minor cooling fluid leak for some time. I ASSUMED that one of my new radiator hoses wasn't sealing properly but just couldn't find the leaker...... I FOUND IT.

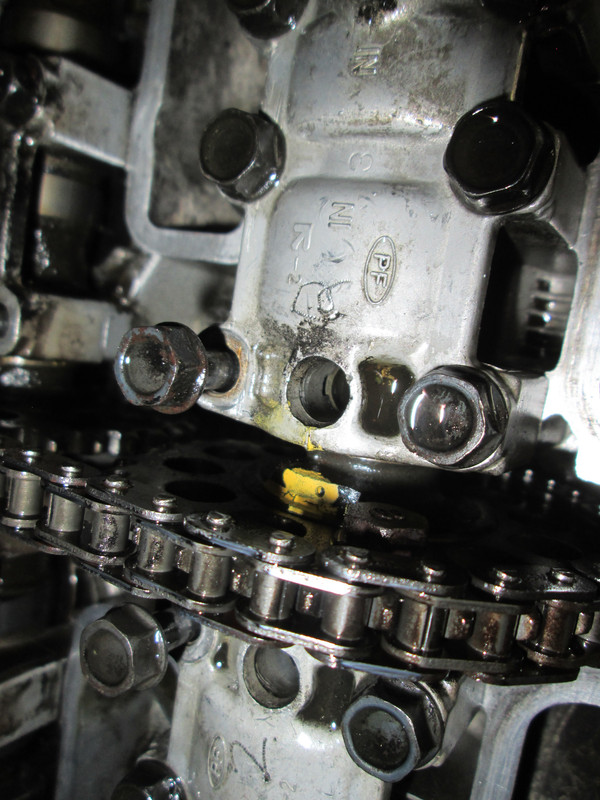
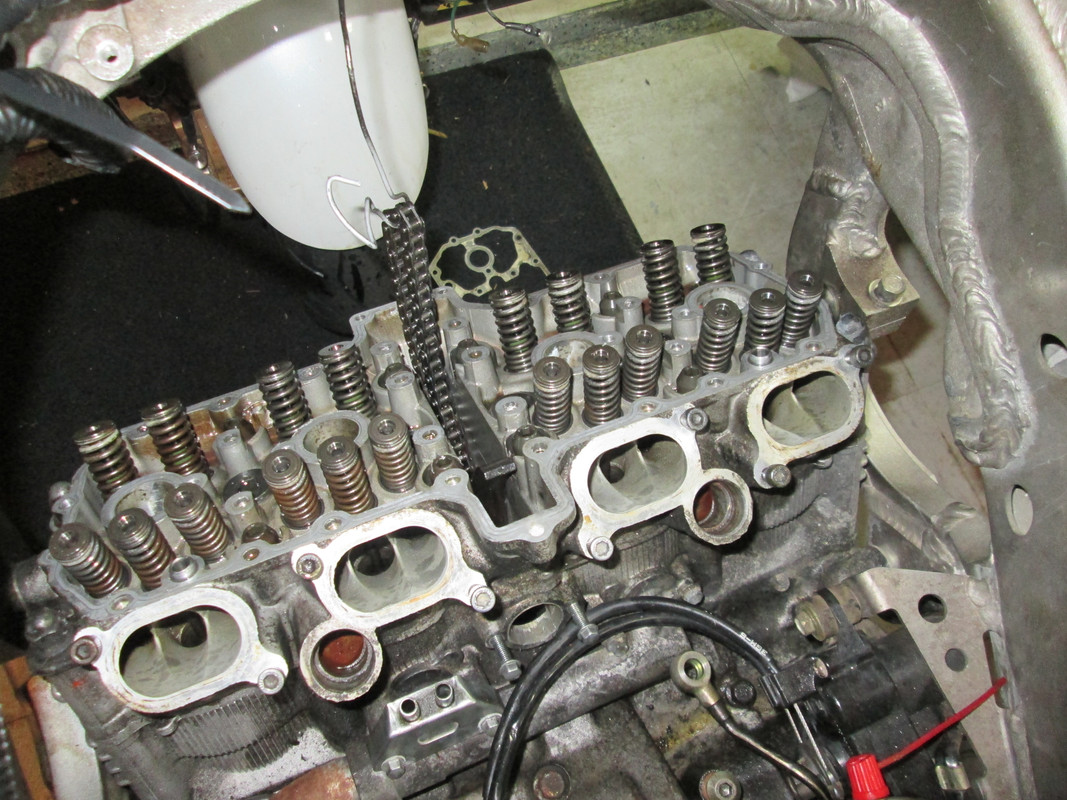
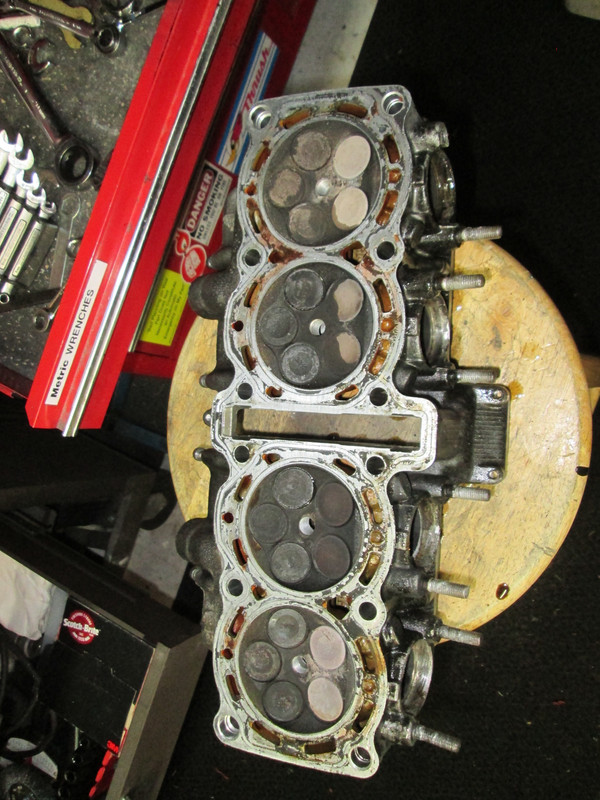
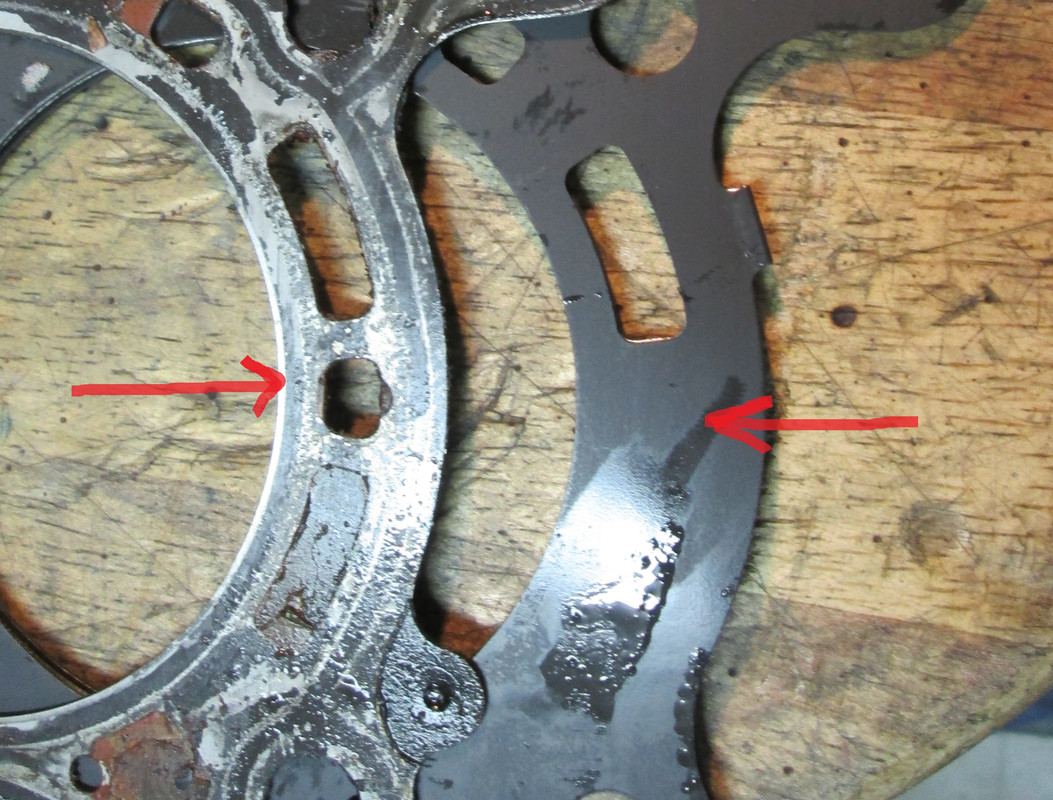
After a nice 45 mile ride I came to find my coolant reservoir more than half empty. I see a bit of a drip from the main cylinder head on the side of cylinder #1. :mad: :mad: :mad: :mad: :mad: :mad: :mad: I can't be losing this much coolant and continue to ride. I also see a bit of the aftermath on the rear tire. A slippery rear tire is a recipe for disaster!

When I acquired this machine the "Coolant" was really only rusty H20 so there is a chance this machine froze in the un-heated garage it was stored in. That will certainly damage a head gasket!

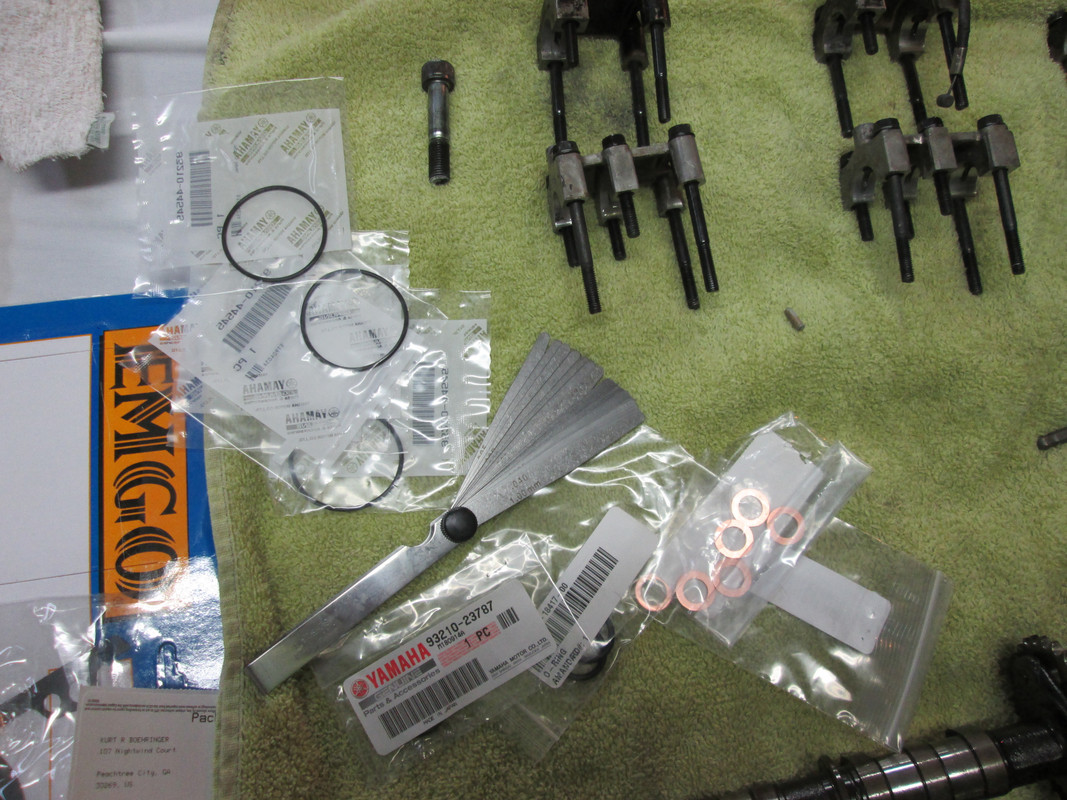
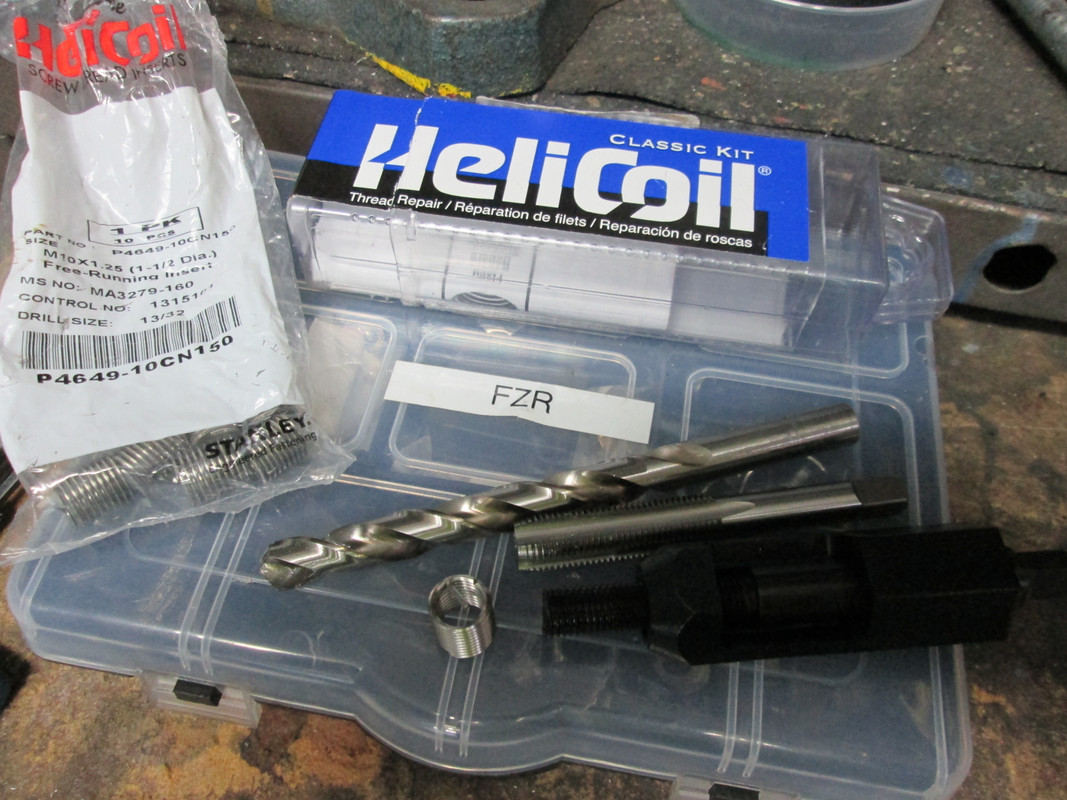
Fortunately, I have a full gasket set and plan to start tearing it apart tomorrow evening. I have a HARD deadline of 9/23/19 to have this machine up to tip top shape to attend an Annual Vintage Yamaha Rally.

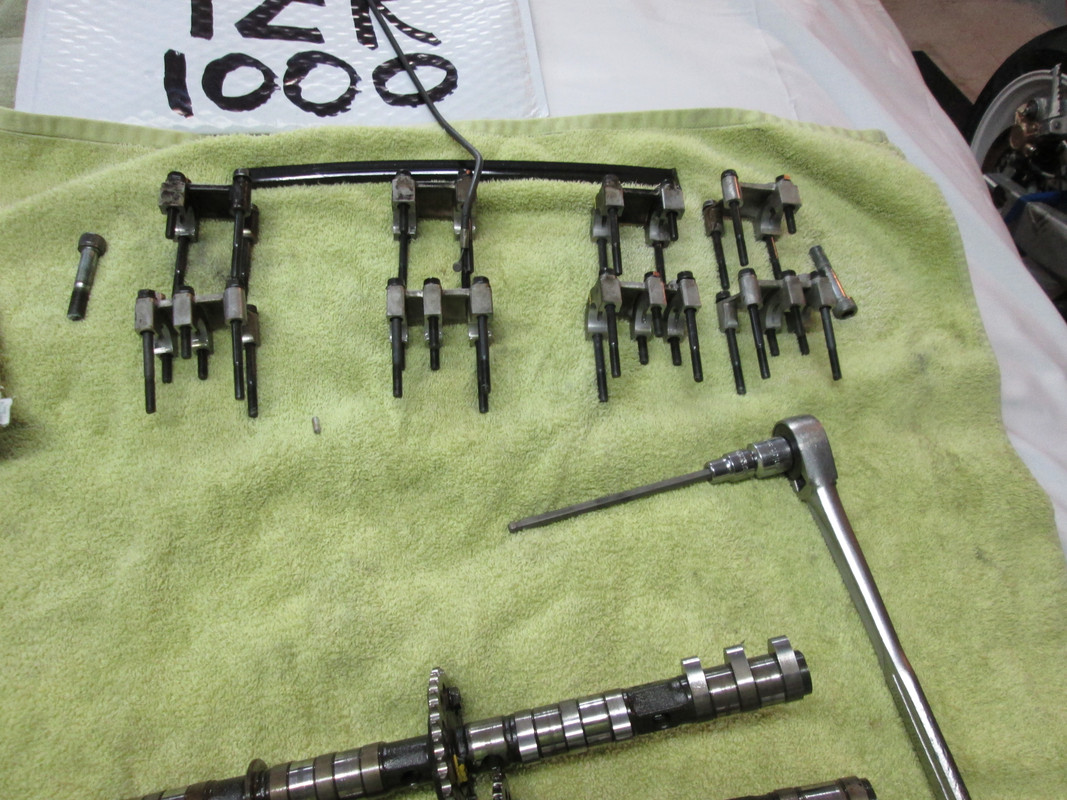
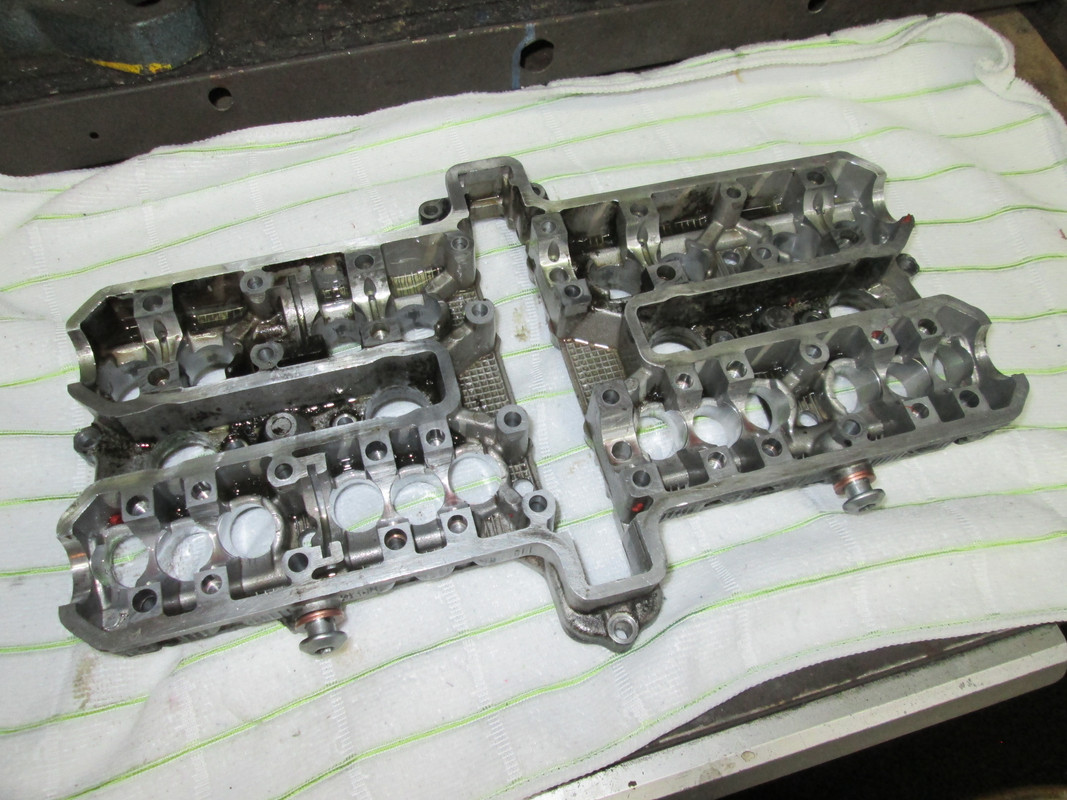
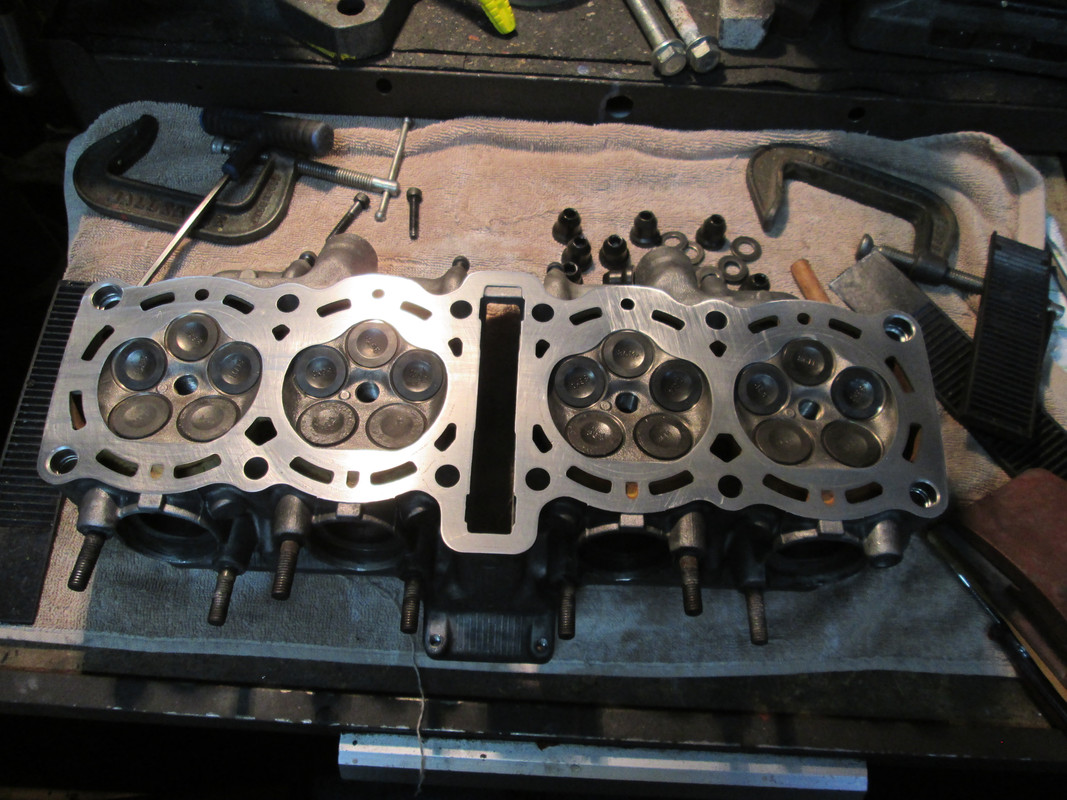
I did a search here on the forums and found one or two mentions of a bad head gasket. I've done this type of work before but this GENESIS is a complicated motor. I have a factory service manual and an aftermarket manual although I have already found mistakes in the aftermarket manual including the wrong float settings which I followed and caused we a week or more of delay in getting the carbs correct.

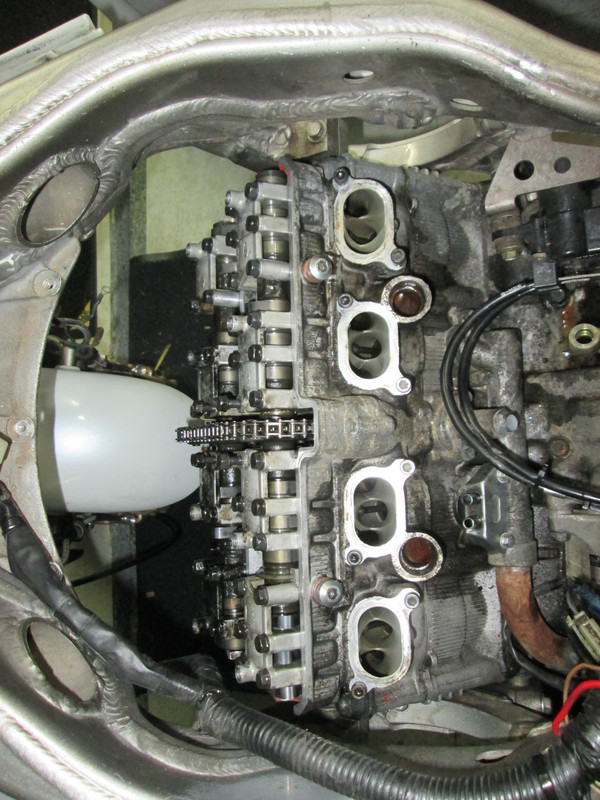
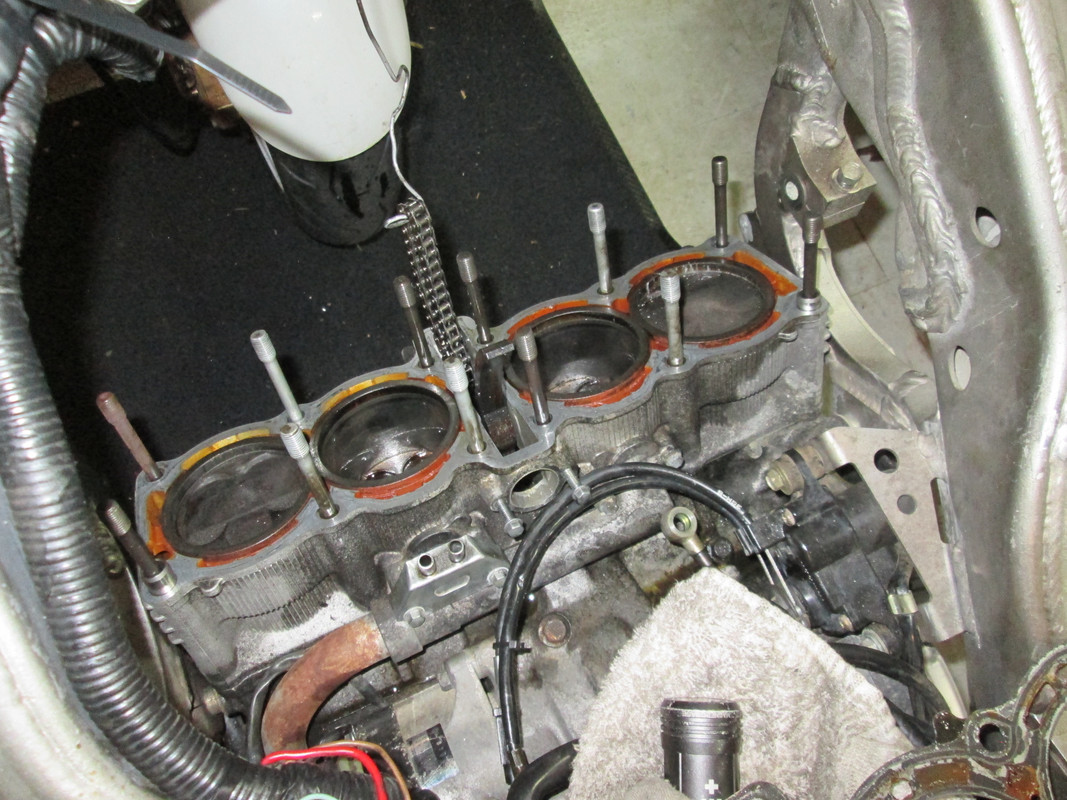
I did find here that it is possible to perform the repair with the motor in the frame so that's good news and although I am sure it will be more difficult, less difficult than removing the motor all together.

ANY special bits of instructions as always very much appreciated.
Pending the look of the gasket, I may pull the cylinders and replace those lower gaskets as well.....I'm already 90% there anyway?

Thoughts?

Disgusted and discouraged in Georgia (USA)......

KURT
Kurt Boehringer
Peachtree City, Georgia USA
1992 - FZR1000 - Genesis
User avatar
Stig
Site Admin
Site Admin
Posts: 11786
Joined: Wed Sep 28, 2005 7:54 am
Location: Searching for my bike

Post by Stig »

Careful of the timing marks. Few folk have had issues trying to set it up. Mark it out with dobs of white paint before you strip it

Good luck 👍
AKA Bald headed b'stard
User avatar
YAMAEXUP
Commentary Team
Commentary Team
Posts: 948
Joined: Wed Dec 09, 2009 10:13 pm
Location: NW Kent

Post by YAMAEXUP »

I wanted to try & cure the excessive oil consumption so decided to do the valve guide seals & the piston rings. While I had the valves out I cleaned up the ports with some emery cloth. I didn't hog out the ports attempting to massively increase the flow, just removed the rough casting.

I didn't remove the engine. I removed the exhaust, carbs etc & the upper engine mounts. Then I pivoted the engine forward by loosening off the lower rear engine mount.

I forget which gasket kit I used but it wasn't cheap & it wasn't OEM. I think it was by the same maker of those rubbish brake pads, the name of which evades me atm. The kit came with all of the parts required to do a top end overhaul.
Bikes-they're in the blood.


www.blood.co.uk
User avatar
kboehringer
Spanner Monkey
Spanner Monkey
Posts: 124
Joined: Sun Jun 30, 2019 9:39 pm
Location: Peachtree City, GA USA

Disassembly in full swing....

Post by kboehringer »

FZR Friends,
Disassembly is moving along (Slowly) as I move slowly and deliberately to get this work done and done correctly.

Without the proper crank rotation tool from the mothership (Yamaha) getting everything aligned was difficult. Once I was SURE everything was set the alignment marks were match-marked and the starter disabled.
Image
Those with a good eye for details will note the hand engraved scribbled numbers on the bearings caps. Those are from the PO not me. The PO was too stupid to realize that Yamaha stamped the cap numbers into the webs of the caps.

Although the process is just beginning, I've already found a couple additional concerns. At some point this motor accumulated some moisture, possibly from the bad gaskets. Several items have RUST inside the motor! As a result, the upper cam chain guide is SHOT! A replacement has been ordered and should be here before the weekend when re-assembly should be in progress.
Image

I also found that two of the o-rings under the intake manifolds were improperly installed, probably leaking (vacuum), and certainly removed by a PO. Mothership doesn't do work like this.
Image

I've also ordered express delivery all the o-rings for the water jackets & intakes. The "COMPLETE KIT" I purchased doesn't include these? Wonder how those guys define "Complete" Kit without normal o-rings for the water jackets or the intakes?

Having found these abnormalities I'm hopeful there are no other surprises.

Gonna read the manuals AGAIN and then pull the cams and the head tomorrow evening.

Hard to believe I had this machine running 135mph just a couple days ago!

Respectfully,
Kurt Boehringer
Peachtree City, Georgia USA
1992 - FZR1000 - Genesis
User avatar
Stig
Site Admin
Site Admin
Posts: 11786
Joined: Wed Sep 28, 2005 7:54 am
Location: Searching for my bike

Post by Stig »

Good reading and great progress. Carry on 👍
AKA Bald headed b'stard
User avatar
kboehringer
Spanner Monkey
Spanner Monkey
Posts: 124
Joined: Sun Jun 30, 2019 9:39 pm
Location: Peachtree City, GA USA

Camshaft Case - Parts EVERYWHERE

Post by kboehringer »

FZR Friends,
Making progress and wanted to make a quick update before I get too involved this morning with the rebuild. With the time difference it's better for me to post early.

I determined that although it is not NECESSARY to pull the camshaft case to replace the head gasket it would be much easier to (and SAFER) to pull the recessed allen head cap bolts that secure the head with this off. In my searching and reading I found a couple post (on other sites) of people really messing up these bolts and basically ruining the motor.

To pull those bolts, a very long 6mm allen socket would be required. The bolts seem to be at EXTREME torque and the heads are easily damaged. I have several extended 6mm allen sockets but none appeared to be hardened. Seemed easier to pull the cam case..... Maybe not.

All the books simply say after pulling the bolts, "remove the cam case" like this is an easy thing. ABSOLUTELY NOT. The valves are angled outward "PINCHING" the cam case. I pulled and tugged (lightly) to no avail. Obviously, if this part is damaged in ANY WAY the motor is likely junk or all the upper components will need to be replaced with a complete matched set.

I'll explain later how I did it..... If anyone is interested... There is NO ONE on YouTube or anywhere else that explains how to do it. Not sure how many folks here have been this deep in the motor?

I do have parts all over the place and organized in such a way that HOPEFULLY I can get this beast up and running again tomorrow!!! I'll be at it all day and all night..... Wish me Luck~!

Gotta go turn a wrench!!!

We all love photos so here are some..

Image
Shims organized. All shim sizes recorded.

Image
Cam retainers ready to pop back in.....

Image
Getting this off is a BASTARD!! Fear of damage during the process is real heart wrenching.... But is's off and ready for cleaning and a new gasket.

Image
Just a few more bolts and the head is off!!!

Image
Fortunately, I live only a 100 miles from the Partzilla warehouse. All the o-rings and seals arrived in one day....(those missing from the "Complete" kit.
I also received a new NARROW feeler gauge to adjust the valves later.

GOTTA GET BACK ON IT!!!!
Kurt Boehringer
Peachtree City, Georgia USA
1992 - FZR1000 - Genesis
User avatar
kboehringer
Spanner Monkey
Spanner Monkey
Posts: 124
Joined: Sun Jun 30, 2019 9:39 pm
Location: Peachtree City, GA USA

ITS OFF!

Post by kboehringer »

Now for the hard part?

Found the front head bolt in the area of the leak was loose.

Image

Image
Kurt Boehringer
Peachtree City, Georgia USA
1992 - FZR1000 - Genesis
User avatar
kboehringer
Spanner Monkey
Spanner Monkey
Posts: 124
Joined: Sun Jun 30, 2019 9:39 pm
Location: Peachtree City, GA USA

EMGO 13-80284 Gasket Kit - DO NOT BUY THIS KIT!!!!

Post by kboehringer »

Image

FZR Friends,
Had a heck of a day yesterday trying to get the machine back together. I had mentioned I was displeased with the gasket kit I purchased for rebuild as it was missing items I thought should be in a "Complete Kit". That was just the beginning of the troubles with this kit.

The head gasket is not properly drilled in the corners for the alignment pins.
Image
Fortunately, I used a STEP DRILL and opened these holes (2) up to a point that they would accept the alignment pins. Without that step drill, not a chance this was gonna work.

The Cam Case gasket if made improperly:
Image

There is a difference in the ports for cooling. These is a missing "hole". However, that "hole" is a actually a blind hold or not open in the cylinders so it is probably not an issue.. I do however like replacements that are an EXACT duplicate of the Mother Ship's products so I am apprehensive.

Image

I had to do this to make the Cam Housing gasket work.
Image
This is a non-pressure area at the rear of the cam chain area. I lathered this with a little YamaBond and it will be fine. But still, poorly made.

In a nutshell, This gasket set is CRAP! If I wasn't pressed for time I would have tossed this in the trash.

Once again, I learned that OEM Yamaha parts are the ONLY way to go on a job like this!!!

I was able to get the head and cam case back on last light. Hopefully, without damaging anything else. DO EVER PULL THE CAM CASE!

Image

KURT
Kurt Boehringer
Peachtree City, Georgia USA
1992 - FZR1000 - Genesis
User avatar
Teego
More Rabbit Than Sainsbury's
Posts: 2518
Joined: Tue Mar 14, 2006 11:48 am
Location: On the road again. Distance is the drug.

Post by Teego »

Kurt, I just hope you don't have to pull it all apart again when those supershit gaskets fail.
Don't you just want to throw bottles at the wall when you are half way through a job and realise it can't be perfect?
Keep on keepin' on.
User avatar
kboehringer
Spanner Monkey
Spanner Monkey
Posts: 124
Joined: Sun Jun 30, 2019 9:39 pm
Location: Peachtree City, GA USA

Another near catastrophe... FINALLY DONE?

Post by kboehringer »

Teego wrote:Don't you just want to throw bottles at the wall when you are half way through a job and realise it can't be perfect?
YES. It seems I've been in that positoin every day with this machine.... But I think I'm close to perfect now.

FZR Friends,
Yesterday, I found the culprit causing my oil leaks. During disassembly of the bike for the head gasket the Banjo fittings on the oil line were EXTREMELY tight. I suspect a bit of galling. The threads were damaged on the supply banjo in the top of the block. Only option was a Heli-Coil. I assume you have these in England although maybe not called the same name?

Image

I had to basically take the whole world apart again including the carbs, water supply/thermostat, and several of the carb boots just to get the thing out.. UGH! :(

This is a do or die situation as if this didn't work the engine case is junk and the bike is going to need a complete teardown to replace the upper case.

I had to drill out the old threads, tap the hole to accept the Stainless Steel insert, and then hopefully solve the problem.
Image

Looked successful.... But my butt was puckered up the whole time knowing that one screw up and this motor is junk.
Image
Once installed, the install tang at the bottom was broken off with a punch. I used a high power vacuum to keep all the bits out of the engine.

Image

Looks like the Head Gasket is done and although the gasket kit was total shit, there are no leaks and the machine is running well.

I thank you all for your help... I'll post a photo of today's ride elsewhere on the site.

Thanks again,
Kurt Boehringer
Peachtree City, Georgia USA
1992 - FZR1000 - Genesis
User avatar
Stig
Site Admin
Site Admin
Posts: 11786
Joined: Wed Sep 28, 2005 7:54 am
Location: Searching for my bike

Post by Stig »

Helicoils in such situations aren't for the faint hearted. Well done
AKA Bald headed b'stard
Post Reply