

Any hints and tips much appreciated.
I bought the restoration kit a couple weeks ago from Perfect Polish and it was explained to me then on what to do but that has since been forgotten. . :/
Iv never attempted anything like this before so I really don't have a clue and when I have read guides and watched videos there not all that informative in my eyes.
So this is what my kit contains ...
RESTORATION KIT
1 - 4" x 1" sisal mop,
1 - 4" x 1" coloured mop
1 - 4" x 1" white colouring mop
3 - 4" x 1" white stitched mops
Polishing compo includes: 1 bar of brown tripoli polish, 1 bar of green polish and 1 bar of grey Brilcut X polish
1 bar of each abrasive polish 180, 240 and 320 grit. 1 facemask, 1 adaptor and a free pair of gloves.
So I basically start with the 180 grit where there's scratches and that.. but what mop do I use ? What mop is for polishing?
There is instructions. . And I will have a read at some point .. just wanted people's here advice and tips cheers.
Polishing how too ..


Heres some info I put up ages ago to help folk out on another forum so have copied it over in its entirity
IF you start off from a cast surface, you'll need a stitched cloth mop (4" is best for a small machine or drill attachment). With that you get a paste that contains a grit. If the cast isn't too deep, you'll get away with med or fine grit. Apply it to a slow moving mop (fair bit of pressure slows the mop down nicely). Allow it to harden for 10 mins. Then work over the surface of the cast alu making sure you go accross any scratches coz if you go in the same direction.... it'll make the scratches deeper.
If you've started with the med grit, select a fresh mop and then apply the fine grit...again allow to set and then work accross any scratches left by the previous grade of grit. The secret is to remove ALL traces of the previous grade of grit.
Once you've got to an even surface, select a new mop...this time its s sisal mop (looks and feels like rope and is hard stitched so it'll take some pressure). This time you need some grey/black compound/wax (whatever you wish to call it). The grey has a high grease content that helps it to cut. Again, go accross the previous grit marks until completely removed.
Next layer/mop is a stitched cloth mop with either brown or white compound that don't contain grease.
As before, work accross the previous layers. By this point you should have a dull sheen effect with no imperfections. IF there are marks, go back a stage or 2 and retry...repeating the process
....still with me??????????
finally, you'll need a soft unstitched mop with white or light blue compound (whites more common...and don't be tempted to buy the cheap shite off ebay, its crap and turns to dust as soon as you apply it...speaking through experience here)
This is where you'll achieve the blueish chrome shine that you're after. This fianl stage doesn't remove any marks at all....it just polishes off the cloth marks from the previous mop and gives a high lustre to the finished piece
Few rules
....don't use the same mops on different metals coz the compound holds minute fragments that its removed during polishing. If the previous item was stainless steel, it'll scratch the hell outta alu
Don't use different compounds on the same mop....no mixing!
Don't have to apply too much pressure to remove the scratches from the previous layer, it'll overheat the work.
If you leave black snot on the work, don't worry, you can remove it with the mop or rub it off with lime powder afterwards.
Clean the mops regularly with a wire bruch
Make sure you wear a dust mask and eye protection. If you don't you'll look like you're wearing eye liner for a week and will be spitting black snot forever
If you need materials/help and advice, have a word with these folk. Top people they are. Eunice will talk you to death on the phone and you could have done the job by the time you've placed an order
http://www.perfectpolishingkits.co.uk/
Hope this helps
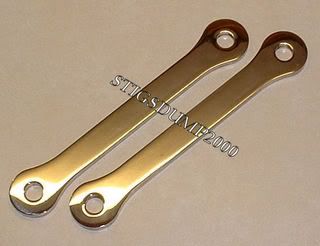
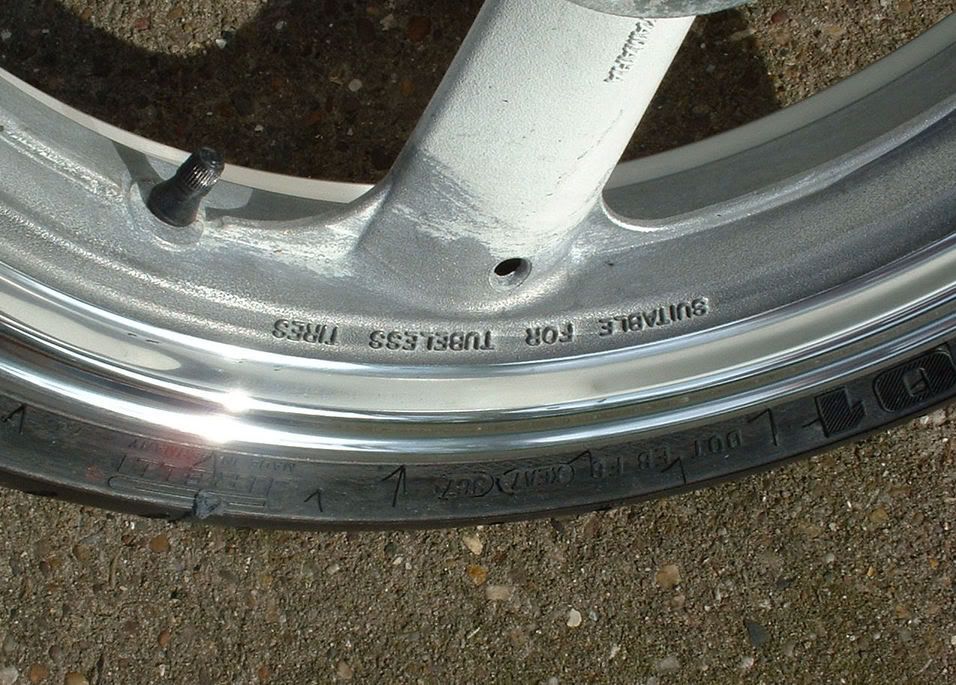
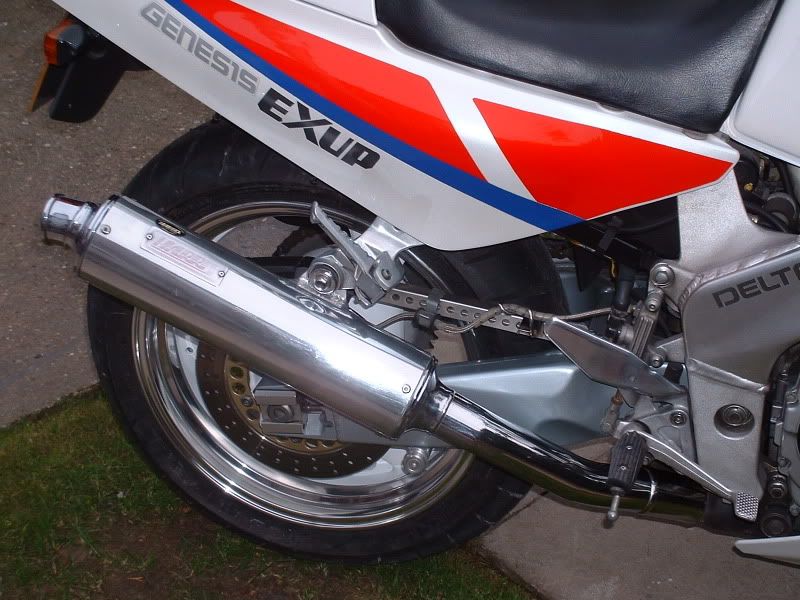
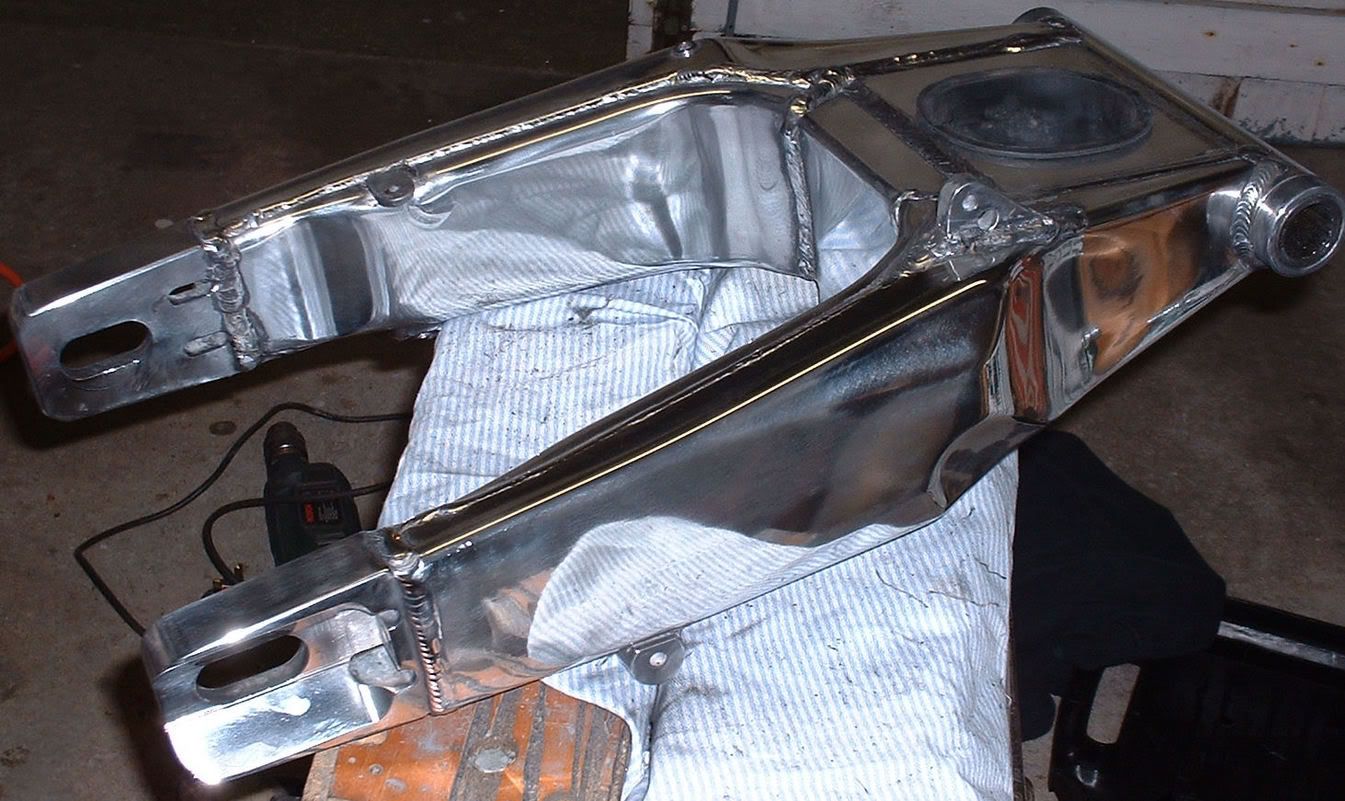
BTW, heres a few bits I did over time. I'm just an amateur who enjoys making things shiny in my spare time
stainless steel dogbones
Exup front wheel rim
EXUP rear end
swingarm
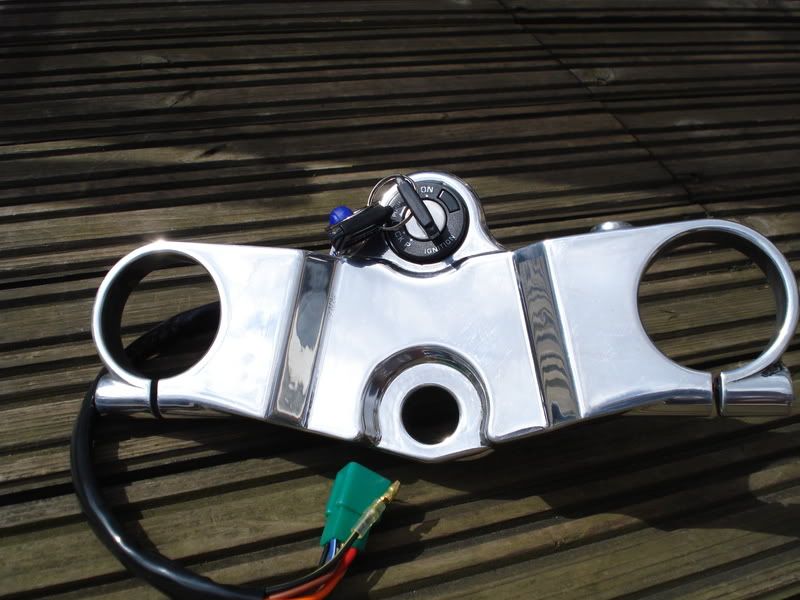
RG125F top yolk
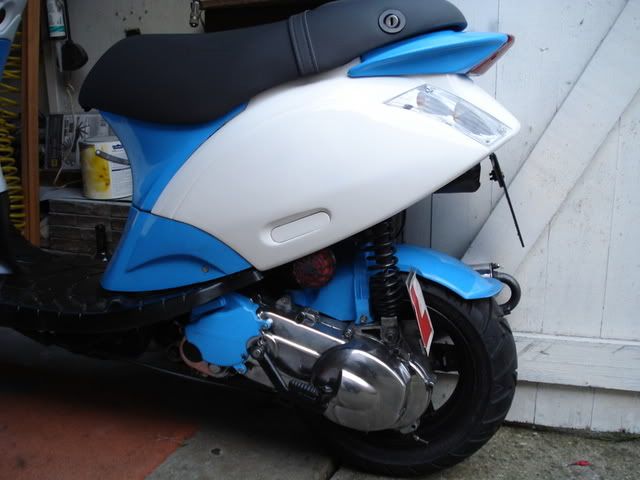
Also did this variator cover but here in the pic, it was covered in oil so don't look too shiney
IF you start off from a cast surface, you'll need a stitched cloth mop (4" is best for a small machine or drill attachment). With that you get a paste that contains a grit. If the cast isn't too deep, you'll get away with med or fine grit. Apply it to a slow moving mop (fair bit of pressure slows the mop down nicely). Allow it to harden for 10 mins. Then work over the surface of the cast alu making sure you go accross any scratches coz if you go in the same direction.... it'll make the scratches deeper.
If you've started with the med grit, select a fresh mop and then apply the fine grit...again allow to set and then work accross any scratches left by the previous grade of grit. The secret is to remove ALL traces of the previous grade of grit.
Once you've got to an even surface, select a new mop...this time its s sisal mop (looks and feels like rope and is hard stitched so it'll take some pressure). This time you need some grey/black compound/wax (whatever you wish to call it). The grey has a high grease content that helps it to cut. Again, go accross the previous grit marks until completely removed.
Next layer/mop is a stitched cloth mop with either brown or white compound that don't contain grease.
As before, work accross the previous layers. By this point you should have a dull sheen effect with no imperfections. IF there are marks, go back a stage or 2 and retry...repeating the process
....still with me??????????
finally, you'll need a soft unstitched mop with white or light blue compound (whites more common...and don't be tempted to buy the cheap shite off ebay, its crap and turns to dust as soon as you apply it...speaking through experience here)
This is where you'll achieve the blueish chrome shine that you're after. This fianl stage doesn't remove any marks at all....it just polishes off the cloth marks from the previous mop and gives a high lustre to the finished piece
Few rules
....don't use the same mops on different metals coz the compound holds minute fragments that its removed during polishing. If the previous item was stainless steel, it'll scratch the hell outta alu
Don't use different compounds on the same mop....no mixing!
Don't have to apply too much pressure to remove the scratches from the previous layer, it'll overheat the work.
If you leave black snot on the work, don't worry, you can remove it with the mop or rub it off with lime powder afterwards.
Clean the mops regularly with a wire bruch
Make sure you wear a dust mask and eye protection. If you don't you'll look like you're wearing eye liner for a week and will be spitting black snot forever
If you need materials/help and advice, have a word with these folk. Top people they are. Eunice will talk you to death on the phone and you could have done the job by the time you've placed an order
http://www.perfectpolishingkits.co.uk/
Hope this helps
BTW, heres a few bits I did over time. I'm just an amateur who enjoys making things shiny in my spare time
stainless steel dogbones
Exup front wheel rim
EXUP rear end
swingarm
RG125F top yolk
Also did this variator cover but here in the pic, it was covered in oil so don't look too shiney
AKA Bald headed b'stard
Grey is for roughing. It's a heavy grease compound used with sisal rope or heavy cloth stitched mops
White is polishing, especially good for allly, usually used on a stitched cloth mop
Blue or green are finals used on loose calico mops. They give the blueish high gloss and won't cut at all
Brown is usually for copper or brass as far as I know
White is polishing, especially good for allly, usually used on a stitched cloth mop
Blue or green are finals used on loose calico mops. They give the blueish high gloss and won't cut at all
Brown is usually for copper or brass as far as I know
AKA Bald headed b'stard
I didn't start with the face mask but I soon realised it was supplied for a good reason!! Lol
Here's a few pics of progress, I'm a bit annoyed I didn't get a proper before picture .. but this one's not long after I started can see got a few big marks and scratches ..
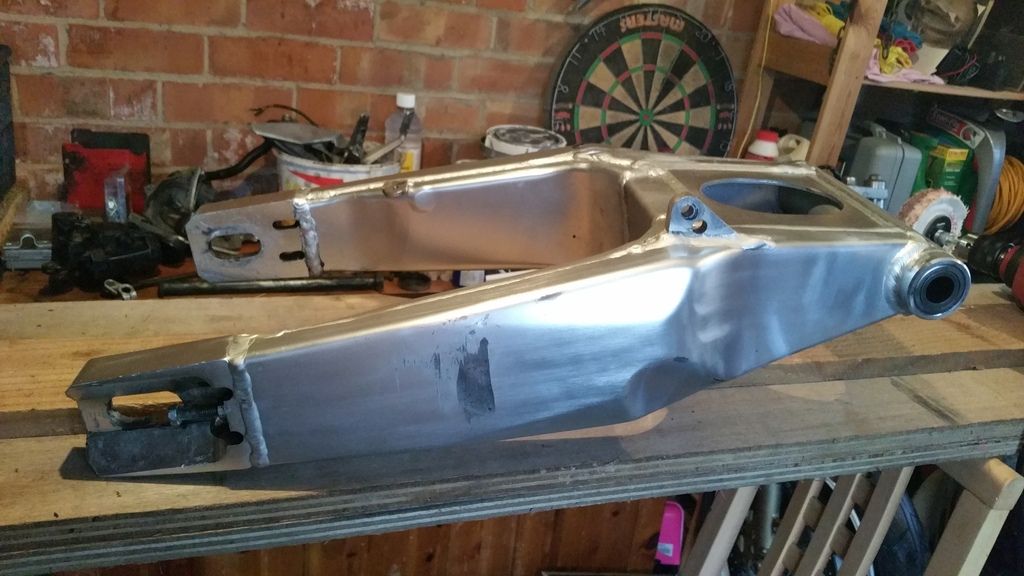
This is how it's looking now ..
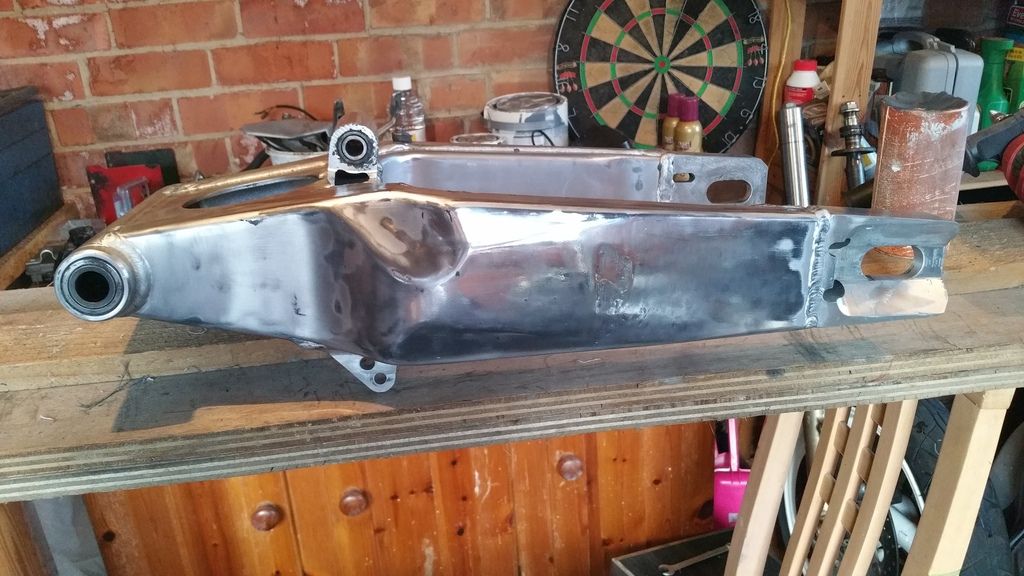
A massive improvement .. however. I know I've jumped the gun a bit and not done a good enough job with the fine abrasive leaving quite a rough uneven finish to the rest of the swing arm. .
Do I have to go over the whole thing with the fine abrasive in an effort to get it all looking the same or once the scratch is out will it all eventually polish up and finish the same ??
Here's a few pics of progress, I'm a bit annoyed I didn't get a proper before picture .. but this one's not long after I started can see got a few big marks and scratches ..

This is how it's looking now ..

A massive improvement .. however. I know I've jumped the gun a bit and not done a good enough job with the fine abrasive leaving quite a rough uneven finish to the rest of the swing arm. .

Do I have to go over the whole thing with the fine abrasive in an effort to get it all looking the same or once the scratch is out will it all eventually polish up and finish the same ??

Yes do the whole item with one grade to leave a dull uniform finish. Then go at an angle to the last grade with a finer grade to again leave a dull unifom but finer finish. The last change of direction with the blue of green polish will bring up the shine you're after. Til the last step you'll not have any shine worth shouting about
AKA Bald headed b'stard
So I'm back here again ... polishing is the bane of my life !! Haha
I have a question. .. and I think I know the answer but il ask anyway. .
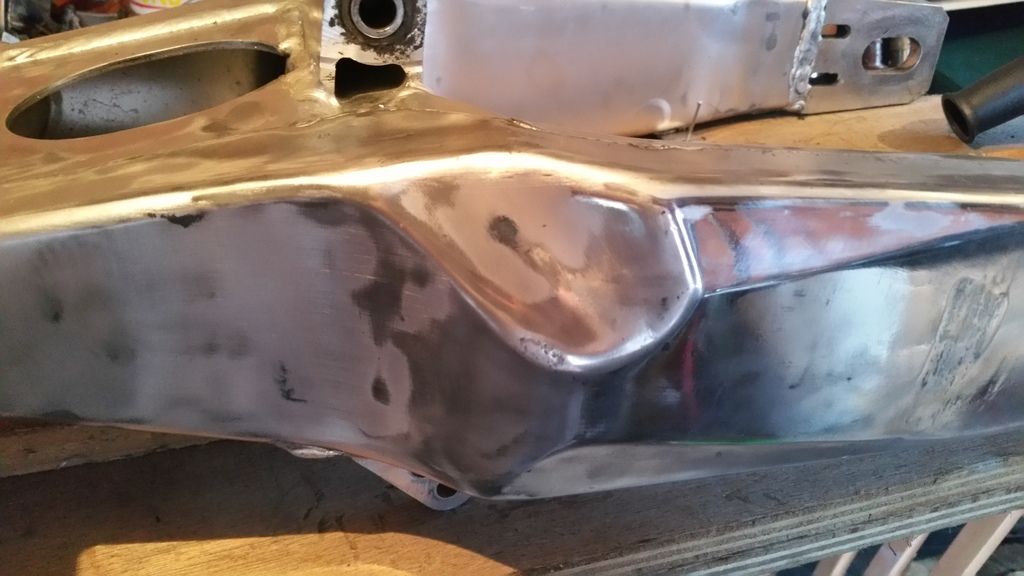
No matter how many times I go over it with the abrasives I'm left with blemishes like this ..
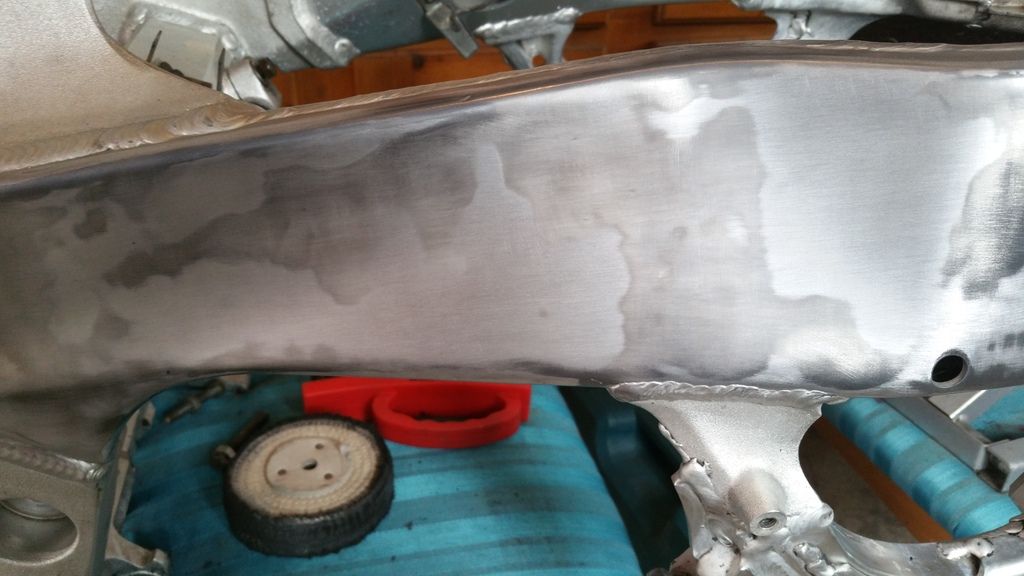
I thought I would just polish up 1 section of the frame to see how I got on and it does get rid of a few of the blemishes but still looks pants ..
Shield I just go over it a few more times with a fine abrasive and try get more of an even finish??
I have a question. .. and I think I know the answer but il ask anyway. .
No matter how many times I go over it with the abrasives I'm left with blemishes like this ..

I thought I would just polish up 1 section of the frame to see how I got on and it does get rid of a few of the blemishes but still looks pants ..

Shield I just go over it a few more times with a fine abrasive and try get more of an even finish??
Who is online
Users browsing this forum: No registered users and 5 guests