Fangs "new" toy!!

Post your pictures here: your bikes, meets you've attended, modifications you've made, x-rays you've had taken...
Post Reply
User avatar
fang
Pit-lane Reporter
Pit-lane Reporter
Posts: 741
Joined: Mon Jun 19, 2006 5:38 pm
Location: Bootiful Norfolk

Post by fang »

Not obvious from piccies but here you go.

Image

thats the advantage of swapping to another frame, I have something to referance to make sure I dont stuff up (In theory anyway) :D
Never Ever Bloody Anything Ever!!!
User avatar
fang
Pit-lane Reporter
Pit-lane Reporter
Posts: 741
Joined: Mon Jun 19, 2006 5:38 pm
Location: Bootiful Norfolk

Post by fang »

Going piccy and post crazy now!!

Donor bike
Image
"adapted" Frame
Image

Its quite handy actually cos I can look at the donor frame and see in advance what needs to but removed and what doesn't, would be miffed if I got her all together only to find I need an extra bracket tacked on some where!!!

Image

Hoping the garage is acceptably "lived in" enough for ya Stig :p :p :p

Laters :D
Never Ever Bloody Anything Ever!!!
User avatar
Stig
Site Admin
Site Admin
Posts: 11786
Joined: Wed Sep 28, 2005 7:54 am
Location: Searching for my bike

Post by Stig »

didnt want you to forget and the mount wasnt that obvious from the frame images :D

Garage looking OK there mister...mines nearly organized...keep doing a bit when I get time. Shes currently got me decorating :crybaby: Although, i managed to make a mess of the cutting in this afternoon and got a bollocking for it. Got to leave it alone and to my better half from now on ...thats a shame :lol: (no it wasn't done on purpose :paranoid: )

I've actually been to get some oil & filter ready to get the bike out, had my leathers repaired, got all my bits sorted ready to fit when it comes out its winter bag...then i may even ride it to the end of the drive....and back!
AKA Bald headed b'stard
User avatar
nuggitt
Moderator
Moderator
Posts: 5968
Joined: Fri May 22, 2009 9:45 pm
Location: North Yorkshire

Post by nuggitt »

Stig wrote:Then i may even ride it to the end of the drive....and back!
Make sure you take a flask of tea,a warm blanket and some Kendal mint cake just incase you lose your bearings mate. :lol: :lol: :lol: :lol:
Bit of advice. Buy a good bed and a good pair of shoes, because if you aren't in one you'll be in the other.
User avatar
fang
Pit-lane Reporter
Pit-lane Reporter
Posts: 741
Joined: Mon Jun 19, 2006 5:38 pm
Location: Bootiful Norfolk

Post by fang »

Another nice day here in Norfolk so I thought I'd tackle the rear brace issue.

After much pondering I hatched a plan.
Out came the bathtub frame again and the required parts aquired

Image
Image

The general idea was to mount the brace as simply as possible, with the minimum number of parts and thus avoid too many potential problems with multiple welds/angles and all the fun that can throw up.

so something like this

Image
Image

After much test fitting/altering/grinding I ended up with this ready to tack

Image
Image
Image

Drilled and tapped seat unit mounting points to hold it in place (better than rubber bands) to make sure the rear brace will line up right

Image

So welding done, test fitting to make sure I didn't cock it up.

Image
Image
Image


Whilst I was faffing about ( working, I call it) my wife took a few pics!!!

Image
Image

After trimming off the excess metal work and the original brace

Image
Image
Image

With everything fitted there is plenty of space to mount relays and CDI

Image
Image
Image

And the rear seat cover even lines up underneath as well

Image
Image

So there we have it, a bit more done

Image
Image

Next I think I'll tackle the rear seat hump mounting issue although there's plenty of other things too choose from!!!!

PS, do let me know if there are too many pics, I just get carried away :lol:
Never Ever Bloody Anything Ever!!!
User avatar
Stig
Site Admin
Site Admin
Posts: 11786
Joined: Wed Sep 28, 2005 7:54 am
Location: Searching for my bike

Post by Stig »

your just trying to use all my bandwidth aren't you :D :lol:

Bike coming on well :nod: Makes a hell of a difference to the overall appearance of the machine...lots more modern :nod:
AKA Bald headed b'stard
User avatar
fang
Pit-lane Reporter
Pit-lane Reporter
Posts: 741
Joined: Mon Jun 19, 2006 5:38 pm
Location: Bootiful Norfolk

Post by fang »

Stig wrote:Bike coming on well :nod: Makes a hell of a difference to the overall appearance of the machine...lots more modern :nod:
Hopefully, we'll see how it looks oncne its a rolling chassis, a way to go before we get to that stage, and going on the performance upto know that'll be about 3 years off!!! :crybaby:
Never Ever Bloody Anything Ever!!!
User avatar
fang
Pit-lane Reporter
Pit-lane Reporter
Posts: 741
Joined: Mon Jun 19, 2006 5:38 pm
Location: Bootiful Norfolk

Post by fang »

Not much to show for todays effort, had the day off work so set about attaching the seat hump.

After severals cups of tea and many varying plans I had a final solution.

Using an old FZR seat and subframe for parts I set to it.

Image
Image

First thing was to attach some box section to mimic the R6 subframe drilled with 13mm holes that the cover locates into.

Image

about an hour and a half was spent just getting these in the right place, body work on, clamp box section, place cover in place, check alignment, move clamps check again, etc etc.

once these were tacked in, i made a loop for the back of the cover to latch under and tacked that in place, again about an hour to do with all the checking etc.

Image

removed the latch mechanism fromthe FZR seat, cut it down to size, and welded that in.

Image
Image

Excellent, then it dawned on me, If I ever send the frame pff to cut powder coated I cant remove the latch, therefore it too will be powder coated making it useless. :retard:

Obviously I planned this, so told myself that all was OK, and that this was all just too get the catch in its final position so I could attach brackets between this and the frame. :D :D :D

So brackets were cut off the old FZR subframe altered and attached to the latch using the existing holes and tacked to the subby, including a release arm.

once this was done I had to cut the welded bits off by hand as there was no room to wield a grinder!!

Image
Image


makeshift release cable fitted, :unibrow:

Image
Image

So it took all day but the seat hump now fits securely, can be removed easilyand theres plenty of space under the seat hump as the catches are to either side leaving the centre clear for access, all I need now is a lock so I can attach the mechanism properly, but thats a finishing touch in the grand scheme of things.

Next job is number plate mount I think. :nod:
Never Ever Bloody Anything Ever!!!
User avatar
oldskoolexup
Motormouth
Motormouth
Posts: 1219
Joined: Sun Jul 19, 2009 11:45 am
Location: THE place...some are born here, some drawn here...Manchester

Post by oldskoolexup »

really impressed!

do you this for work??
Life begins at the end of your comfort zone,
Learn from the mistakes of others.............................
You can't live long enough to make them all yourself
&
Carpe Diem - seize the moment. Don't dream... Do!
User avatar
nuggitt
Moderator
Moderator
Posts: 5968
Joined: Fri May 22, 2009 9:45 pm
Location: North Yorkshire

Post by nuggitt »

Fang quoted Next job is number plate mount I think.


Well put the bloody thing on straight,not like yzfpaul :lol: :lol:
Bit of advice. Buy a good bed and a good pair of shoes, because if you aren't in one you'll be in the other.
User avatar
nasty
Pit-lane Reporter
Pit-lane Reporter
Posts: 765
Joined: Mon Feb 12, 2007 8:02 pm
Location: in dark room in the garden

Post by nasty »

Next job is number plate mount I think. :nod:[/quote]


see yzf paul :D :D :D :D :D :D :D :D :D :D :D :D :D :D :D :D :D :D :D :D :D :D :D :D :D :D :D :D :D :D :D :D :D :D :D :D :D :D :D :D :D :D :D :D :D :D :D :D :D :D :D :D :D :D :D :D :D :D :D :D :D :D :D :D :D :D :D :D :D :D :D :D :D :D :D :D :D :D :D :D :D :D :D :D :D :D :D :D :D :D :D :D :D :D :D :D :D :D :D :D :D :D :D :D the :p :p :p :p :p :p :p :p :p :p :p :p :p :p :p :p :p :p :p :p :p :p plate :lol: :lol: :lol: :lol: :lol: :lol: :lol: :lol: :lol: :lol: :lol: :lol: fitting : :lol: :lol: :lol: :lol: :lol: :lol: :lol: :lol: :lol: :lol: :lol: :lol: :lol: king :ninja:
nasty`s the name helmet paintins, the game

if not pink don`t lick it!
User avatar
fang
Pit-lane Reporter
Pit-lane Reporter
Posts: 741
Joined: Mon Jun 19, 2006 5:38 pm
Location: Bootiful Norfolk

Post by fang »

nuggitt wrote:Fang quoted Next job is number plate mount I think.


Well put the bloody thing on straight,not like yzfpaul :lol: :lol:
If that happens I'll just shorten or lengthen the sidestand to correct its appearance.

:lol: :lol: :lol: :lol:
Never Ever Bloody Anything Ever!!!
User avatar
fang
Pit-lane Reporter
Pit-lane Reporter
Posts: 741
Joined: Mon Jun 19, 2006 5:38 pm
Location: Bootiful Norfolk

Post by fang »

nasty wrote:Next job is number plate mount I think. :nod: see yzf paul the plate fitting king :
Careful Nasty, yzfpaul might jump out of that secret package and slap ya :D
Never Ever Bloody Anything Ever!!!
User avatar
yzfpaul
Commentary Team
Commentary Team
Posts: 937
Joined: Tue Feb 21, 2006 12:56 am
Location: paisley scotland

Post by yzfpaul »

i thought about leaving it wonky to make it look like im leaning over further than i actualy am :nod: :lol:
User avatar
fang
Pit-lane Reporter
Pit-lane Reporter
Posts: 741
Joined: Mon Jun 19, 2006 5:38 pm
Location: Bootiful Norfolk

Post by fang »

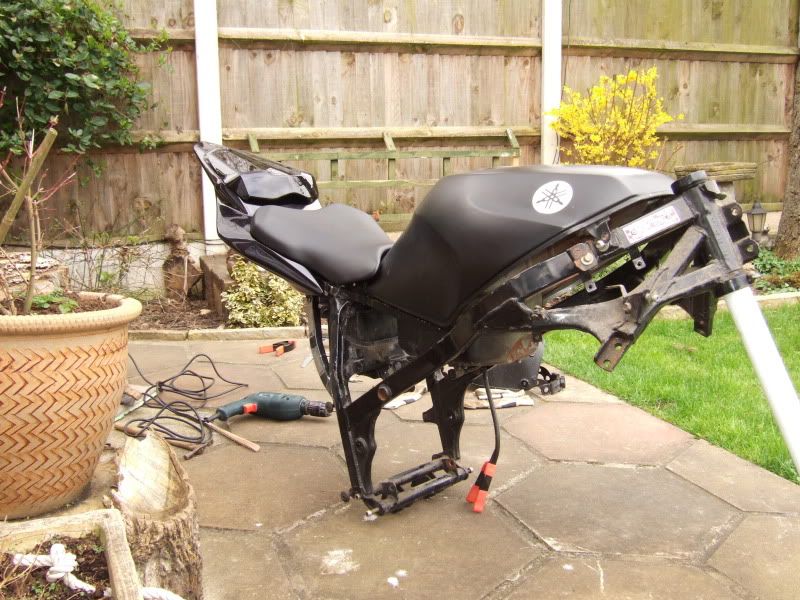
Another day, another update, as mentioned yesterday I thought I'd tackle the number plate mount today.

AND YES I WILL MAKE SURE ITS STRAIGHT :finger: :lol:

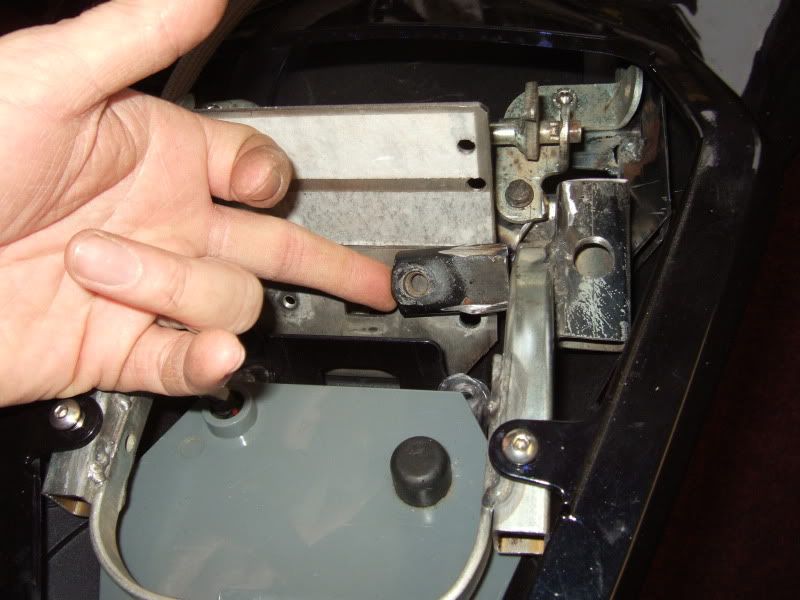
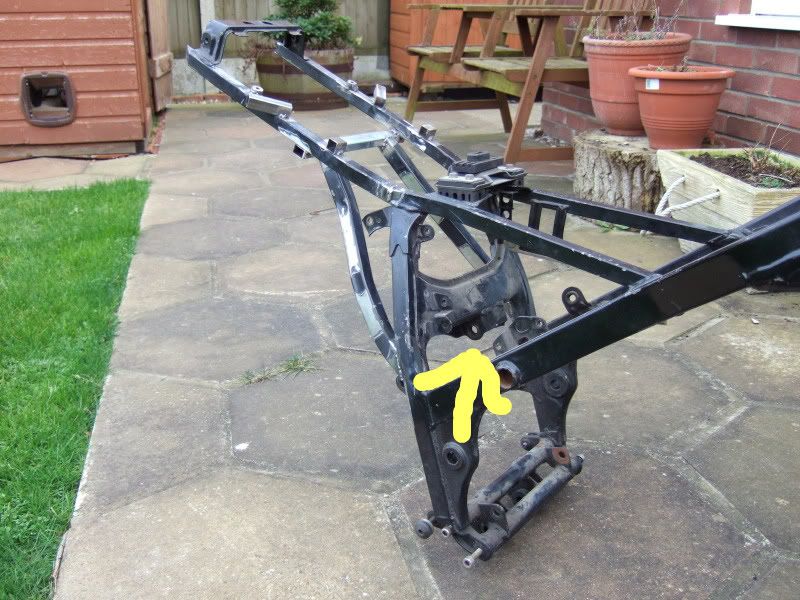
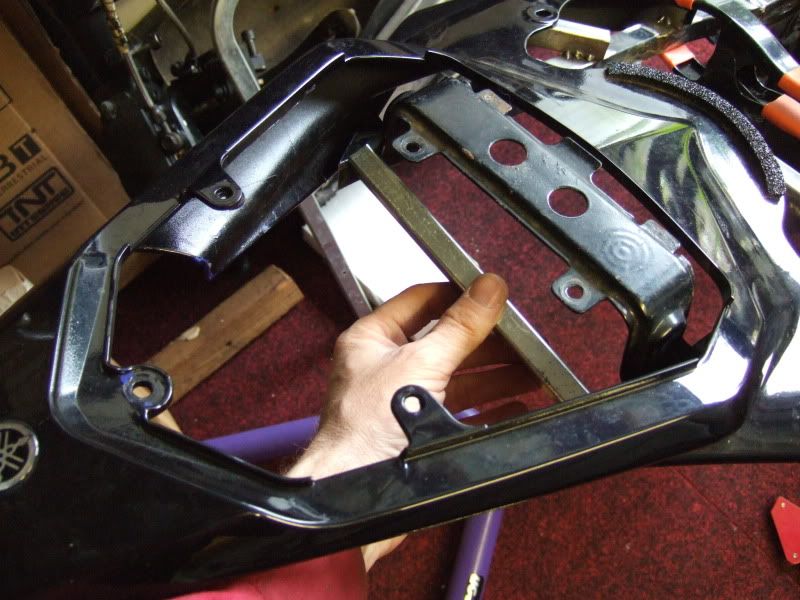
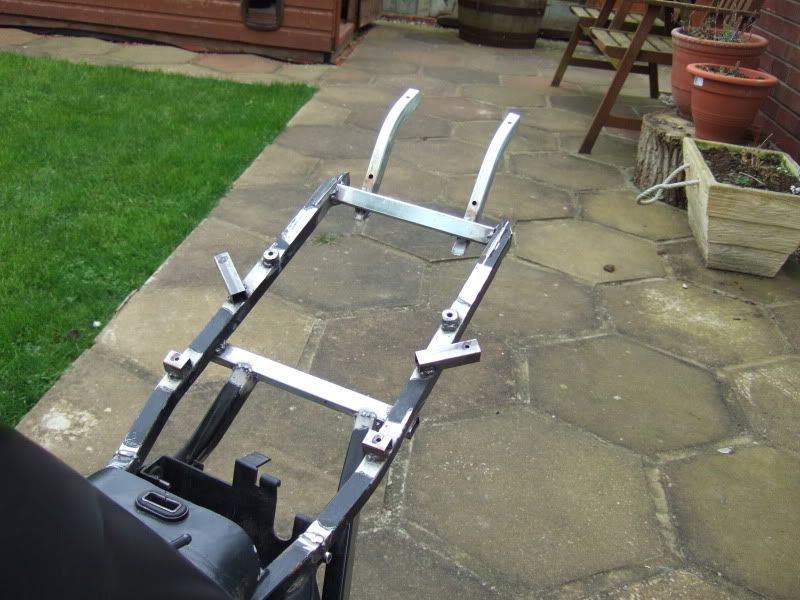
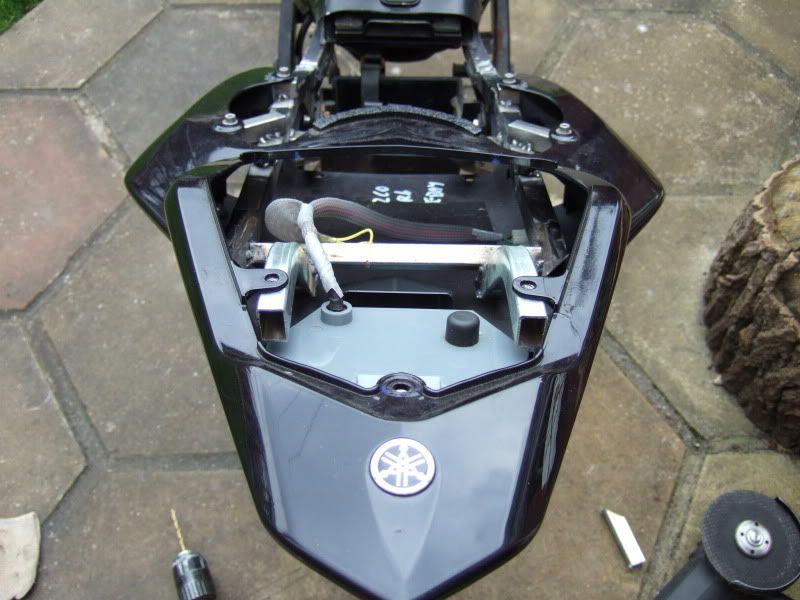
The idea was to attach it to the cross brace with bolts so as to make removing the tail unit simple.
The problem being the unit slots into itself at the rear light end, therefore making it akward to fit as its "hinged" at one end, not a top and bottom that are bolted together, so the two halves have to by pryed open enough to feed it over the sub frame.

This can be done at the moment but a welded on number plate mount would prevent this.

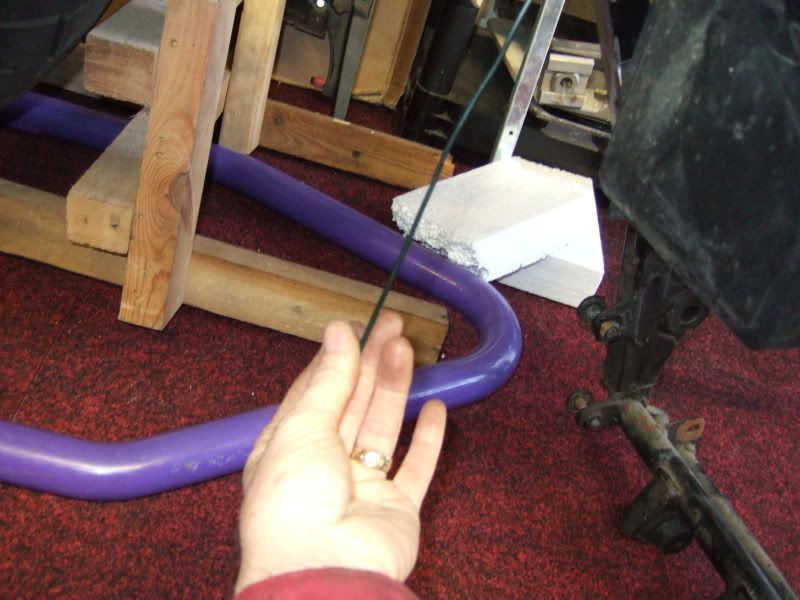
So started with a cardboard template to see what I could come up with.

Image
Image

I was going to make it out of Ally but didnt have anything thick enough, and seeing as the actual "tail tidy" underneath the bodywork may have to be legthened to avoid the plate hitting the rear wheel, theres going to be a fair amount of force exerted through it.

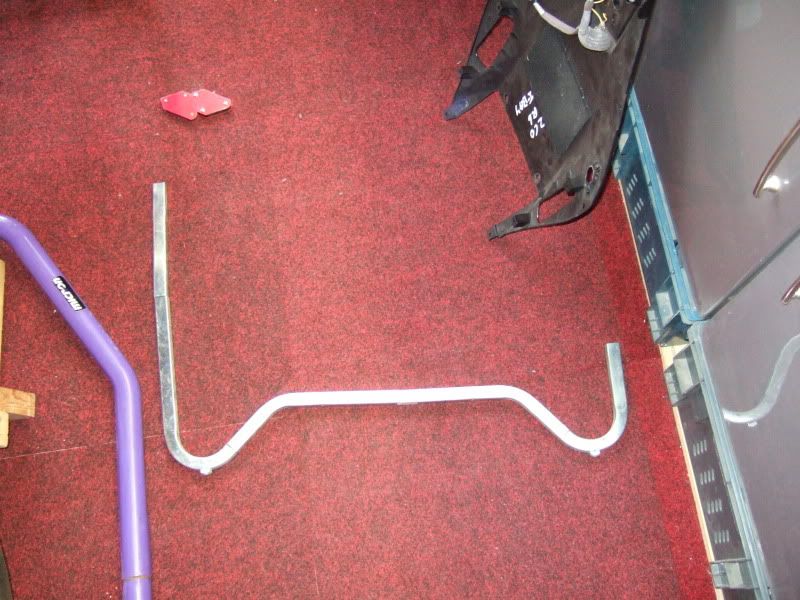
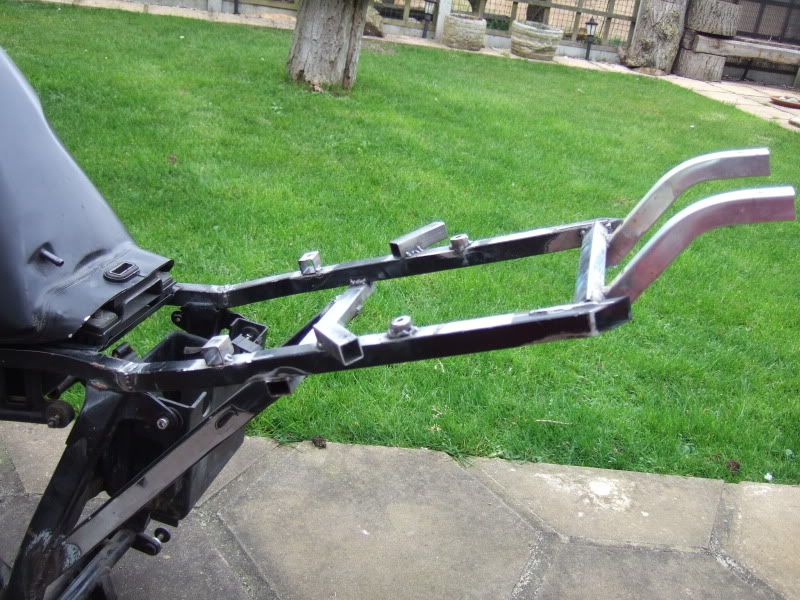
Then I remembered that I had purchased a tail tidy on Ebay about a year ago when I was amassing parts

Image

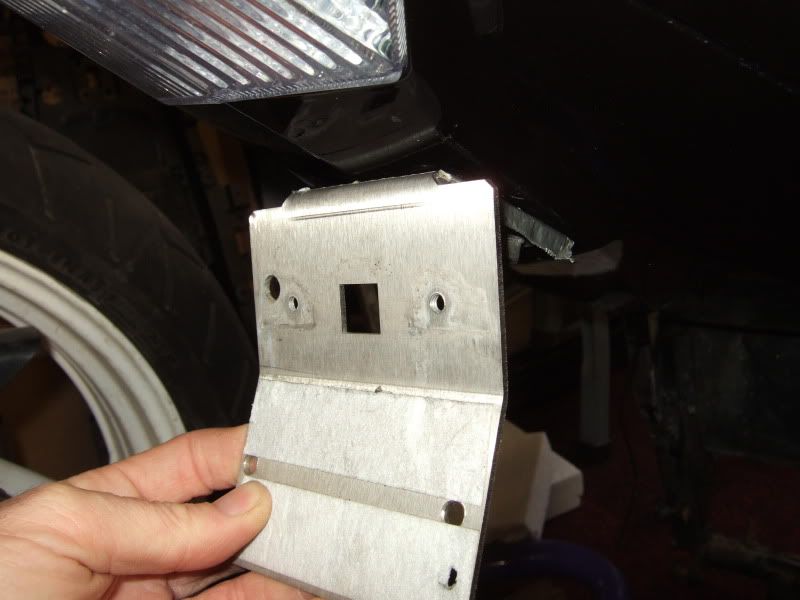
Its doesn't extend far enough rearwards for me but its made from stainless, plenty strong enough,and has 6mm threaded inserts in it so it can be bolted from inside the subby.

So, with a little alteration,why not turn it upside down and use this as the mount inside the subframe.

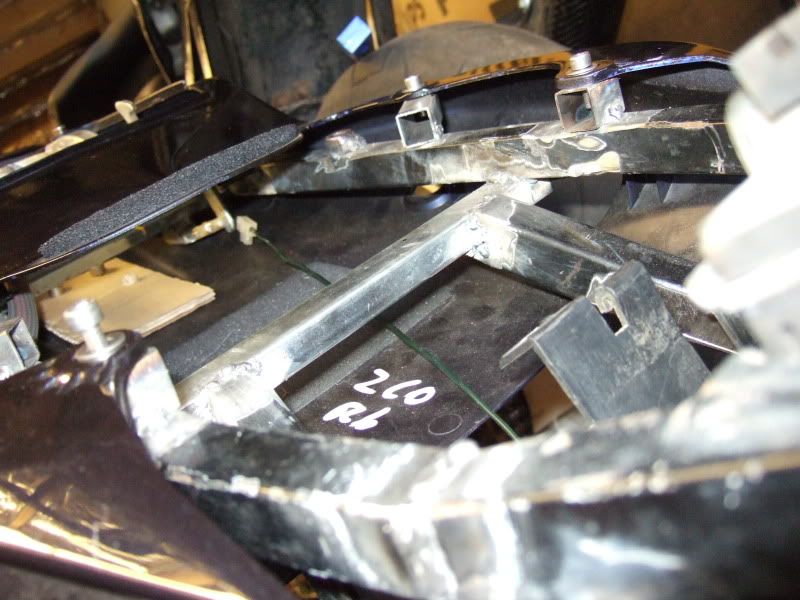
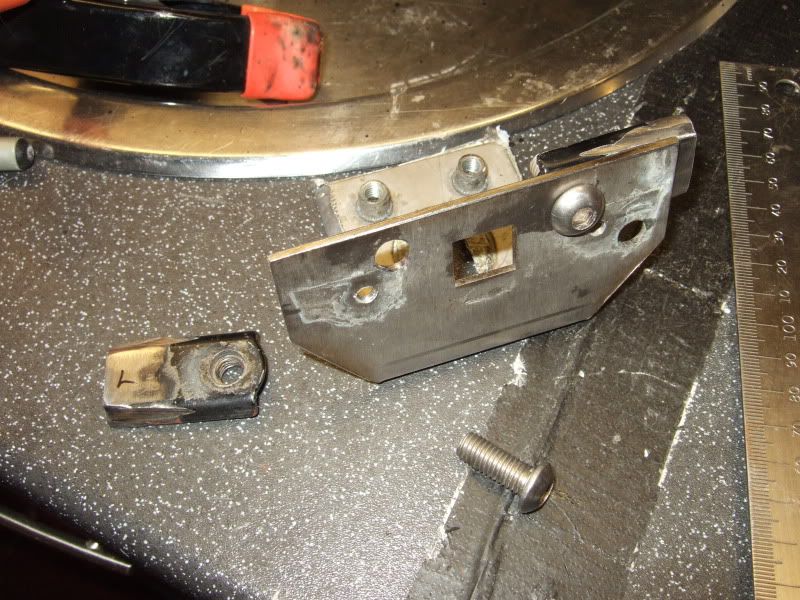
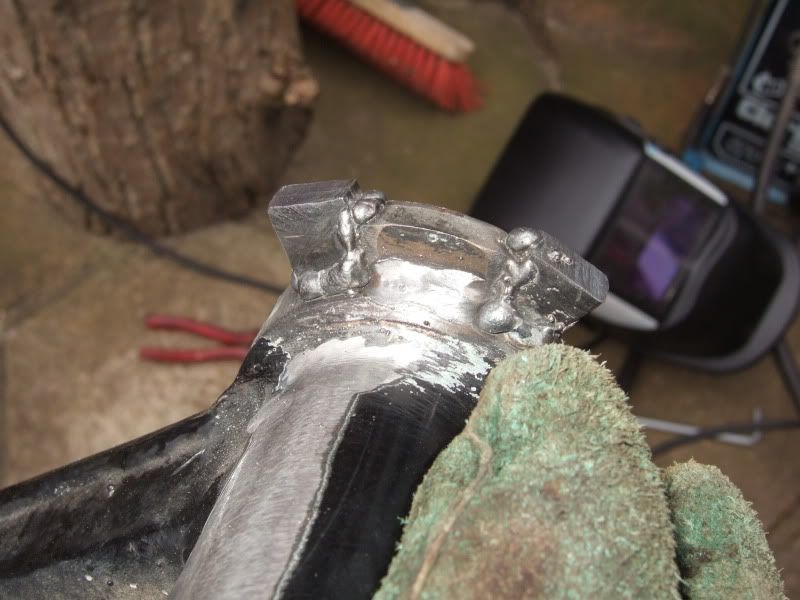
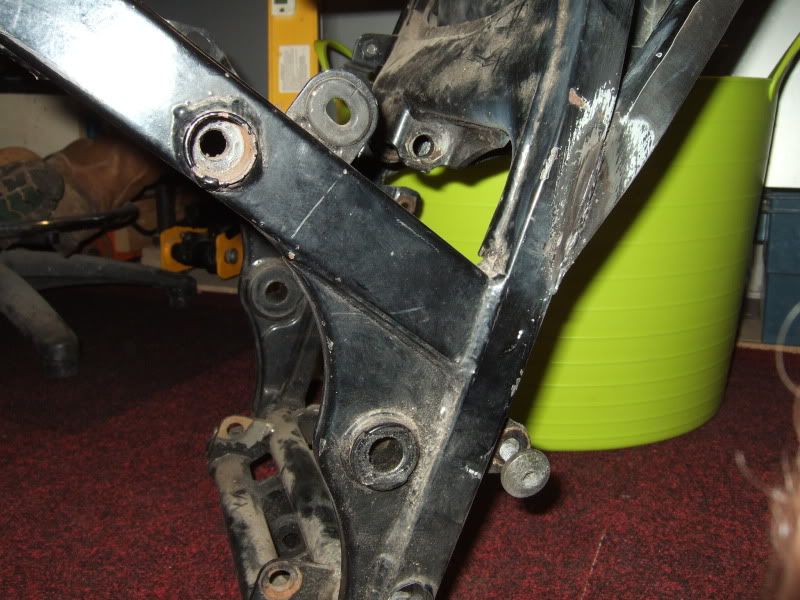
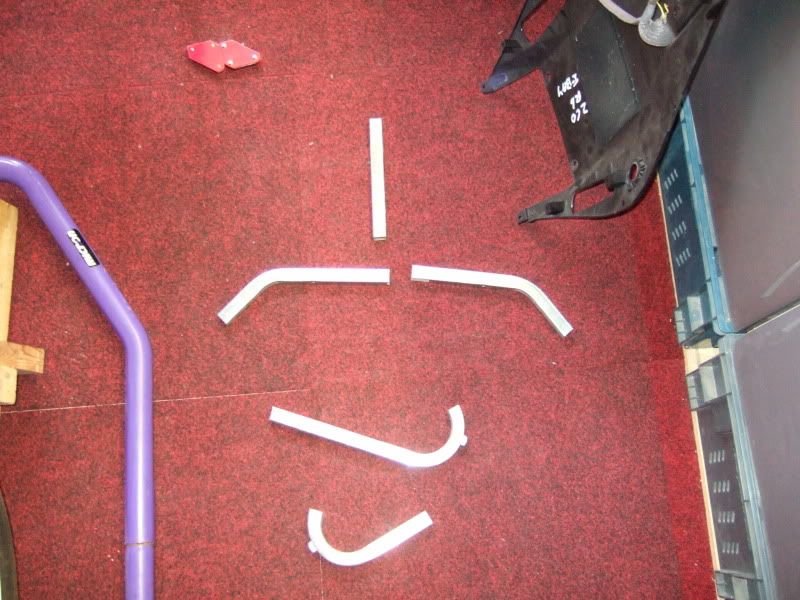
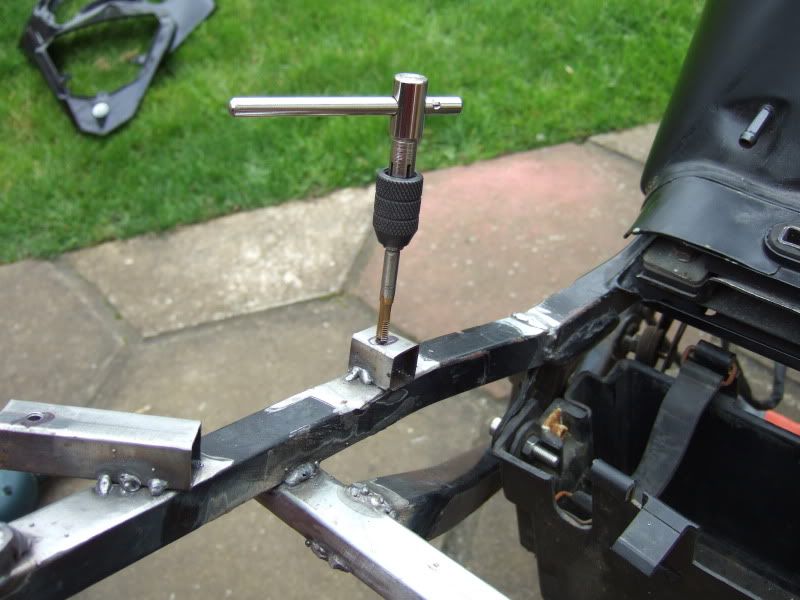
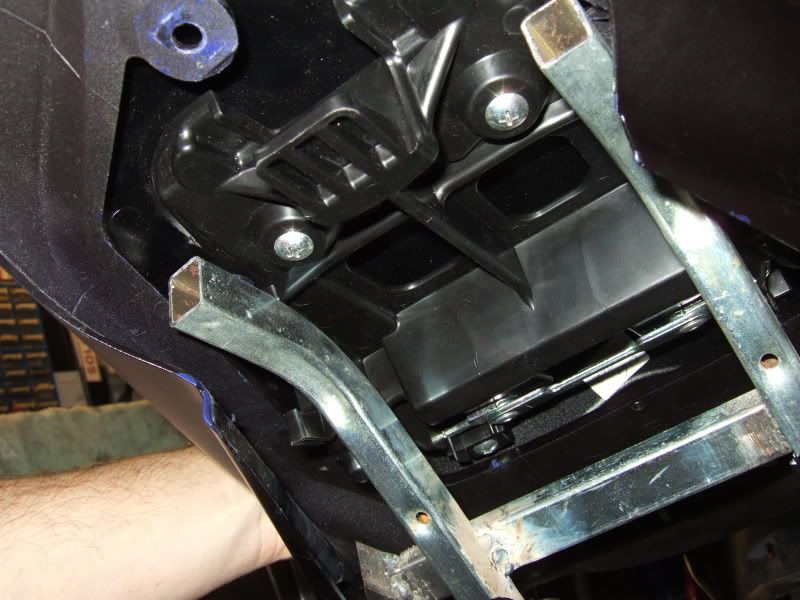
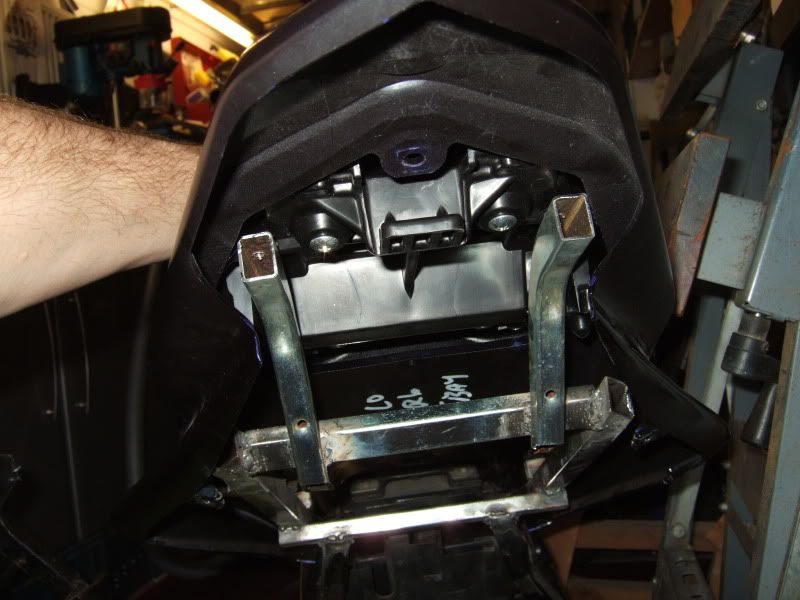
So back to my box of offcuts to look for suitable donor items, went for a nice couple of 8mm lugs with a vintage of around 86 , should compliment the overall appearance nicely :retard:

Image
Image
Image
Image

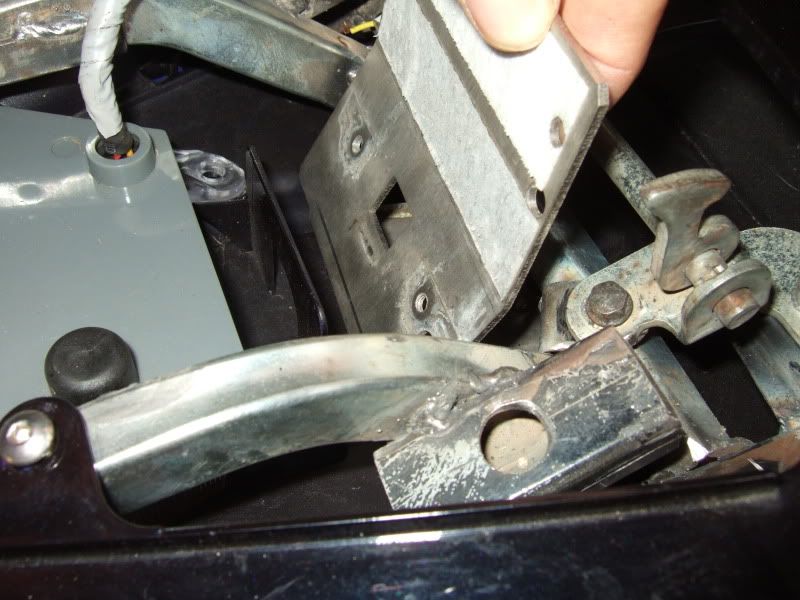
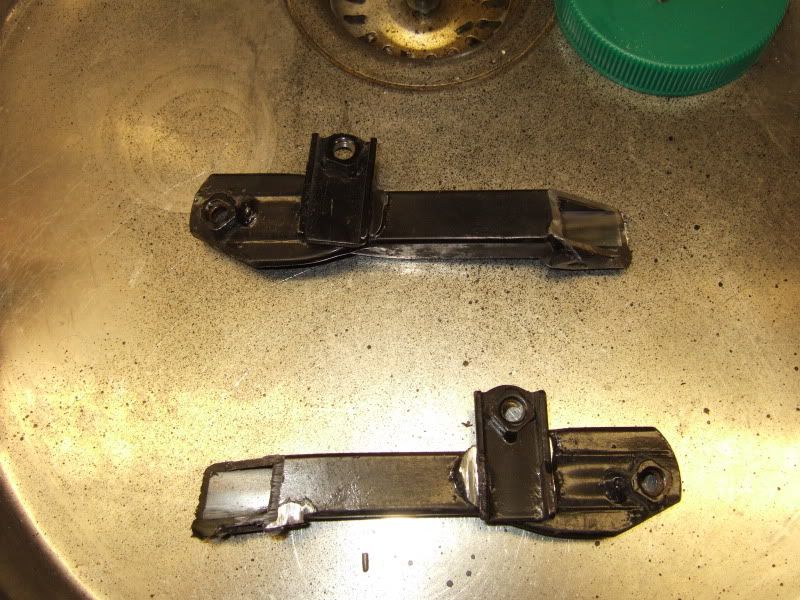
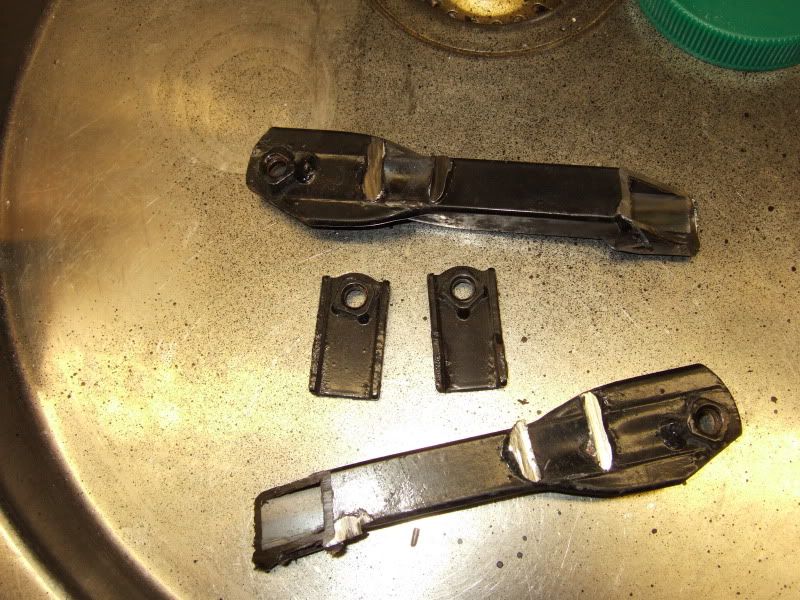
Drilling the mounting holes in the stainless was a bastard, but easier with the pillar drill than trying to do it with a hand drill.
Must invest in a proper drill clamp... :eek: :D

Image

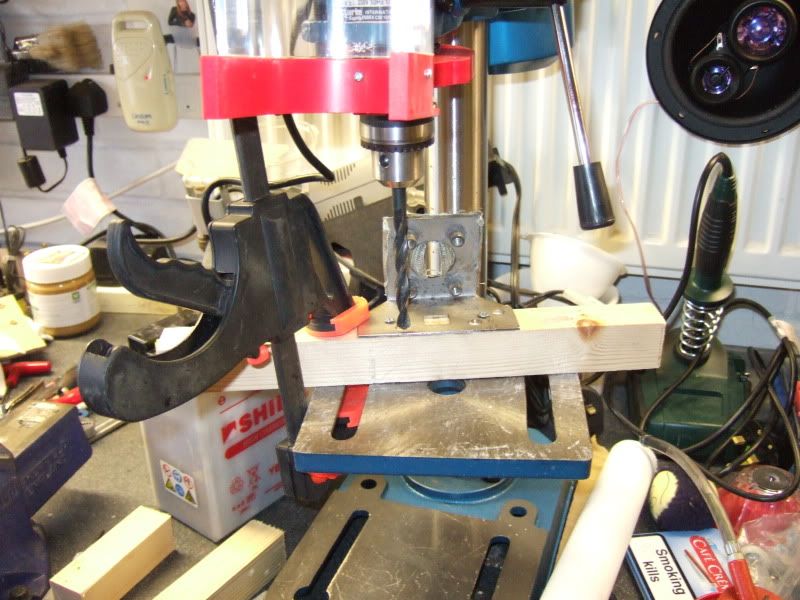
Brackets cut, holes drilled, all fingers still attached, welded in place

Image
Image

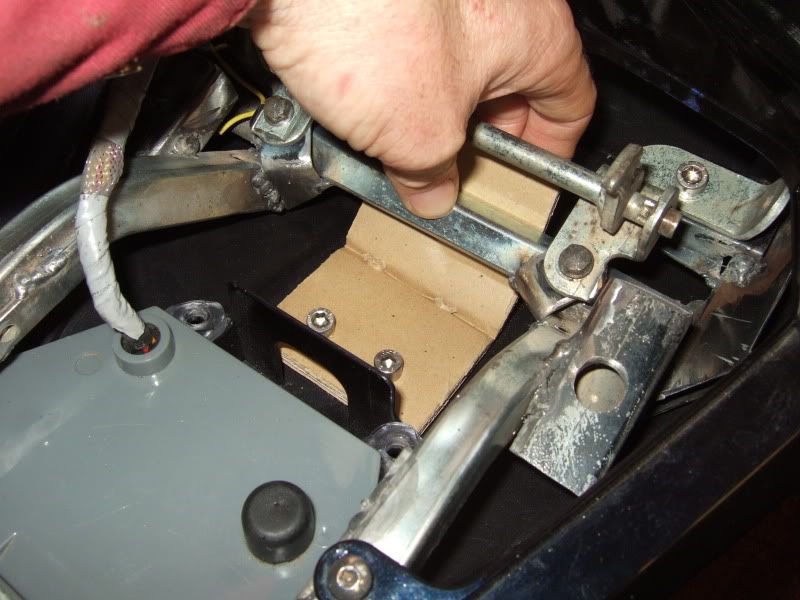
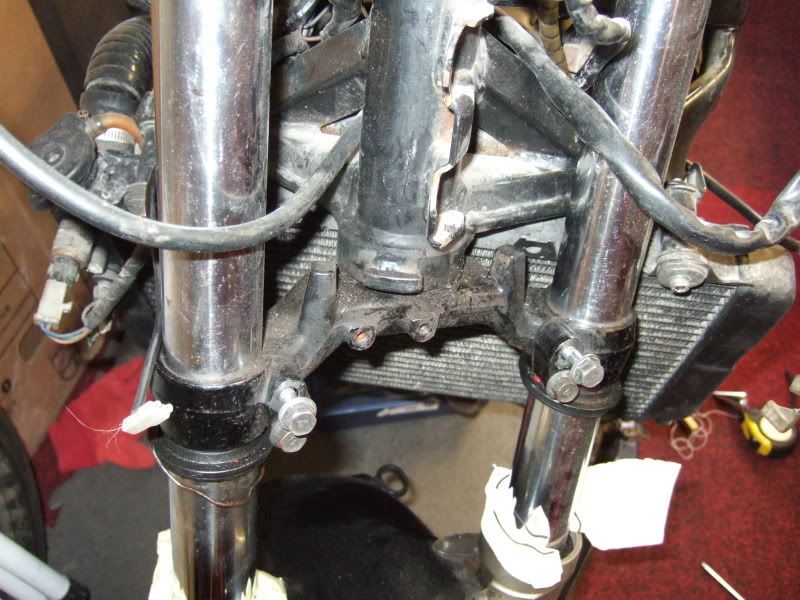
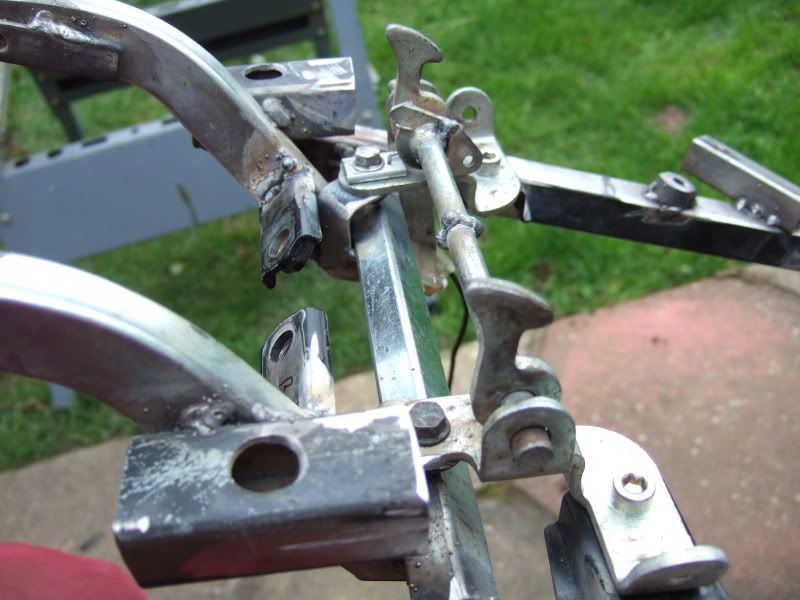
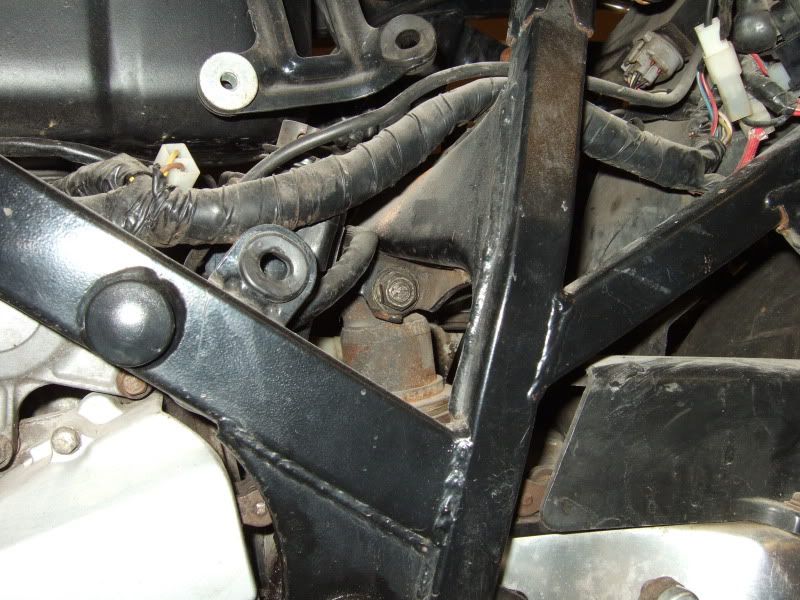
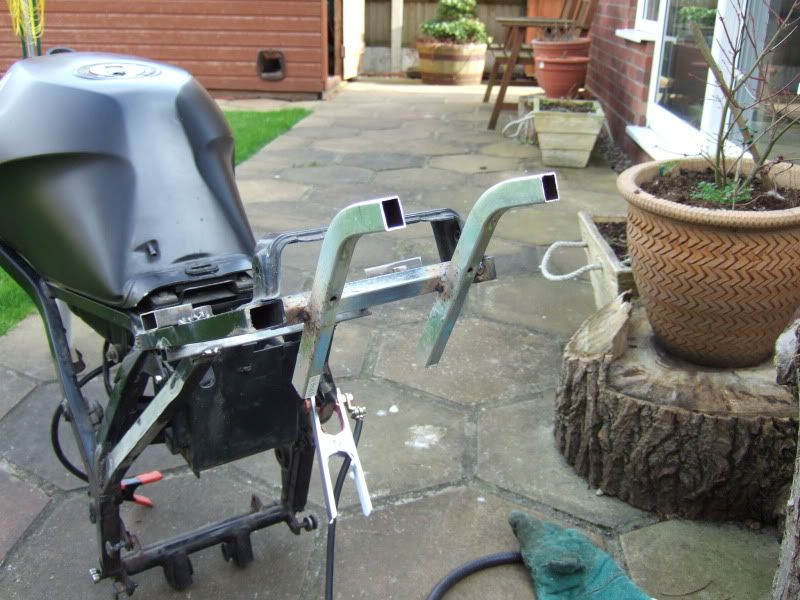
Next up was the removal of the headlight bracket and the addition of lock stops as the Exup bottom yoke's stops are in a different place to the FZ.

This is with the forks touching the rad, as you can see, nowhere near the stops.
about 11mm extra needed
Image
Image

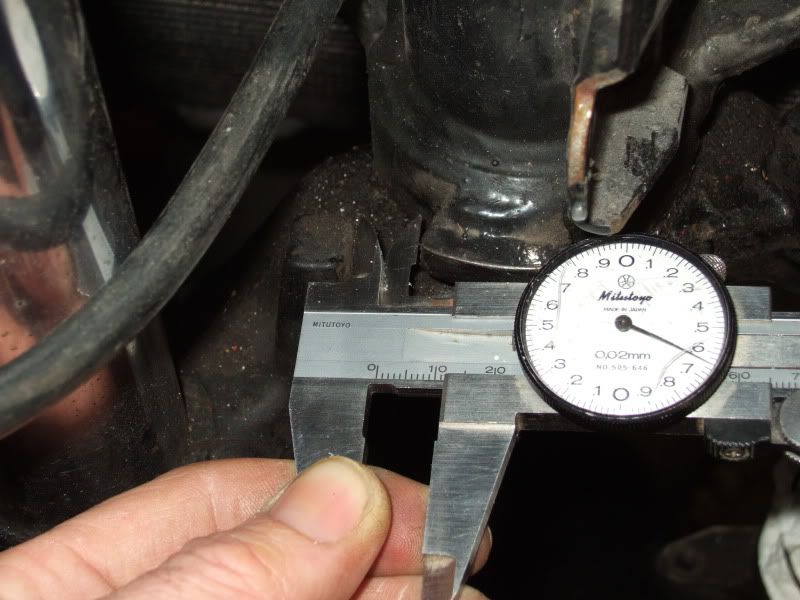
So back to my bucket of lopped off parts, and a suitably thick piece of metal selected
Just doing my bit to recycle :D

Image


Headlight mount off, smoothed down, lock stops added, wider than needed but I can adjust (grind down) them once the Rad and forks are fitted.

Image
Image

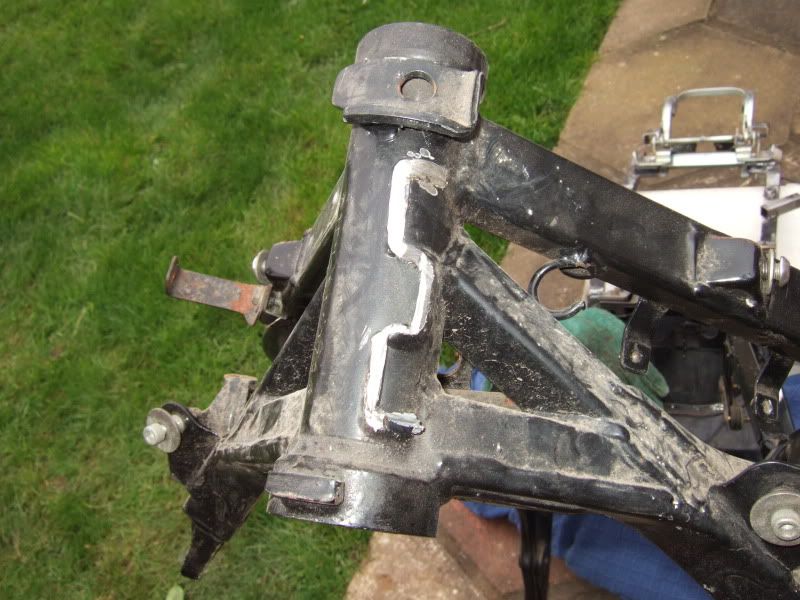
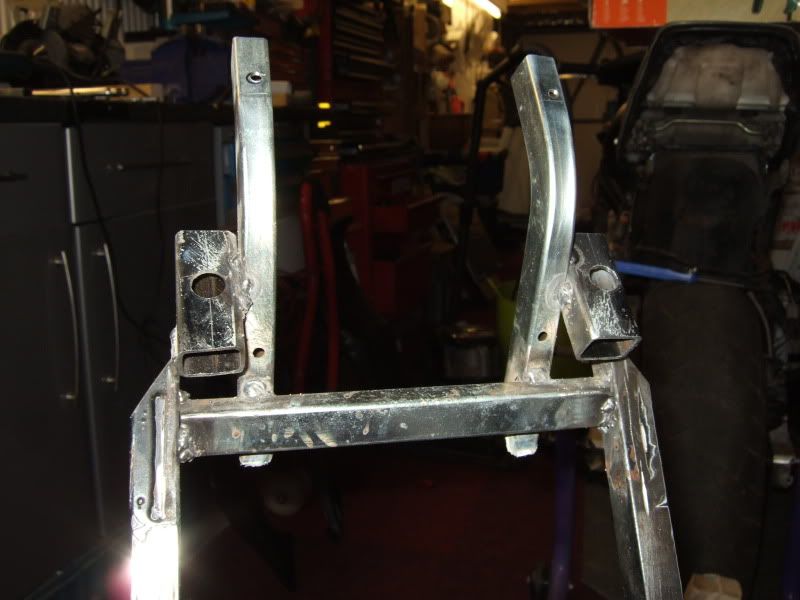
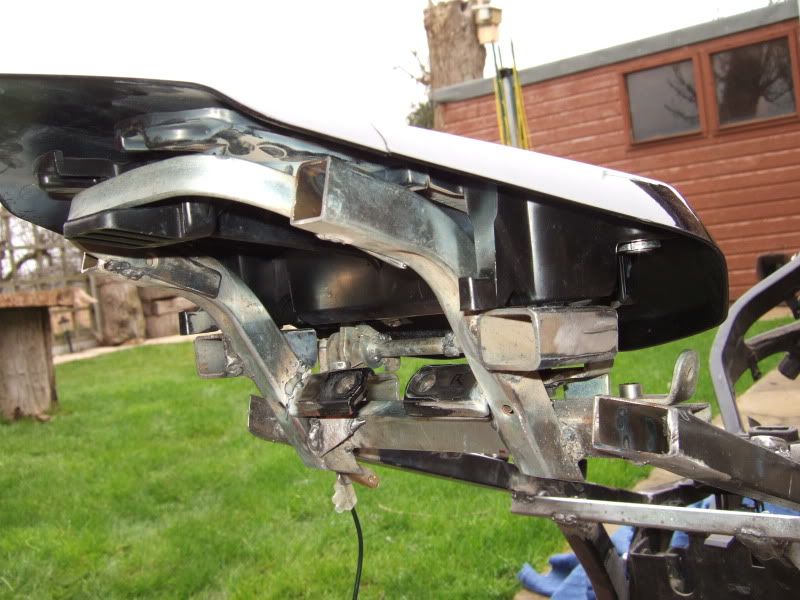
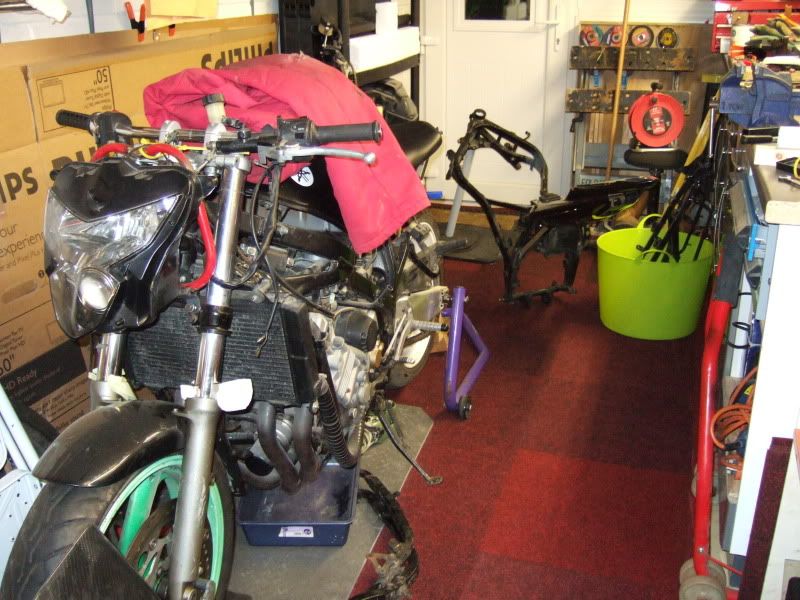
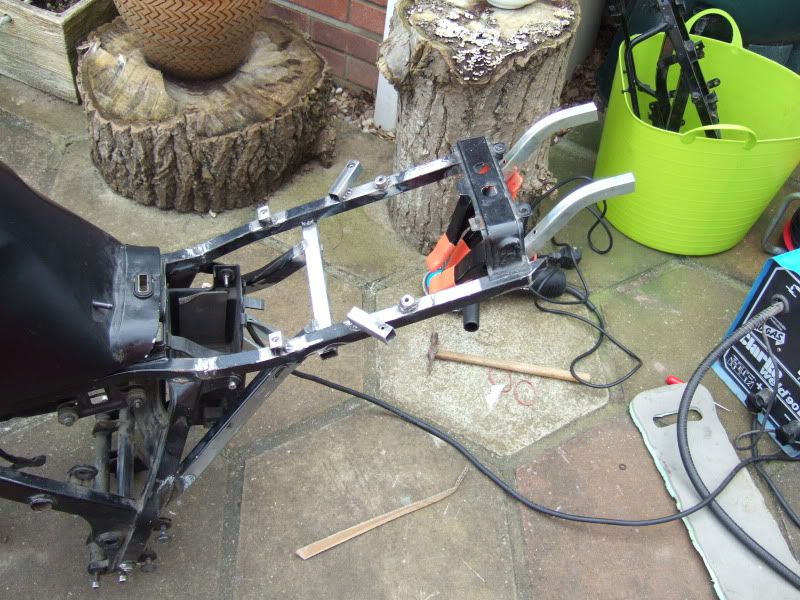
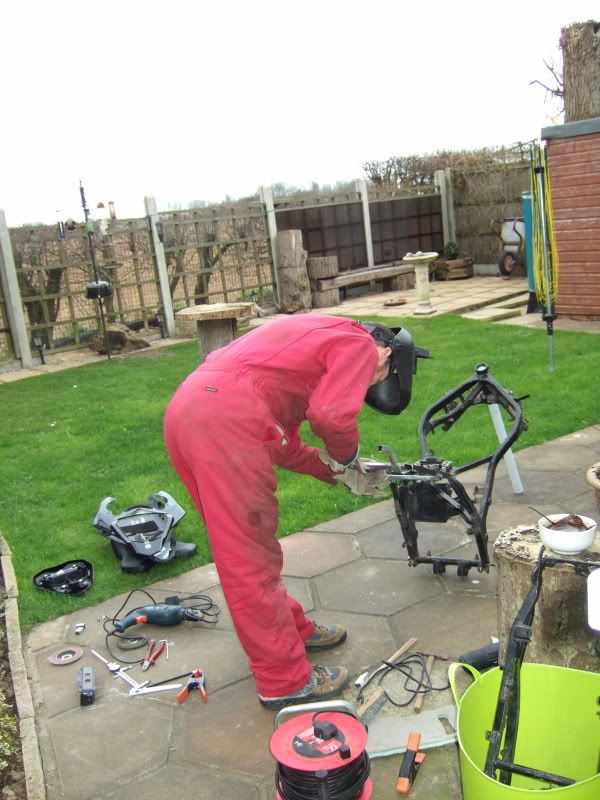
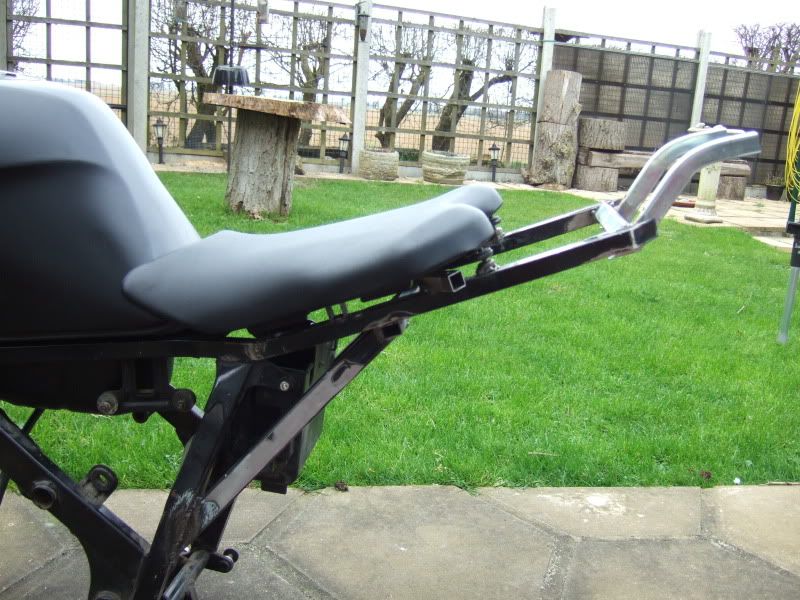
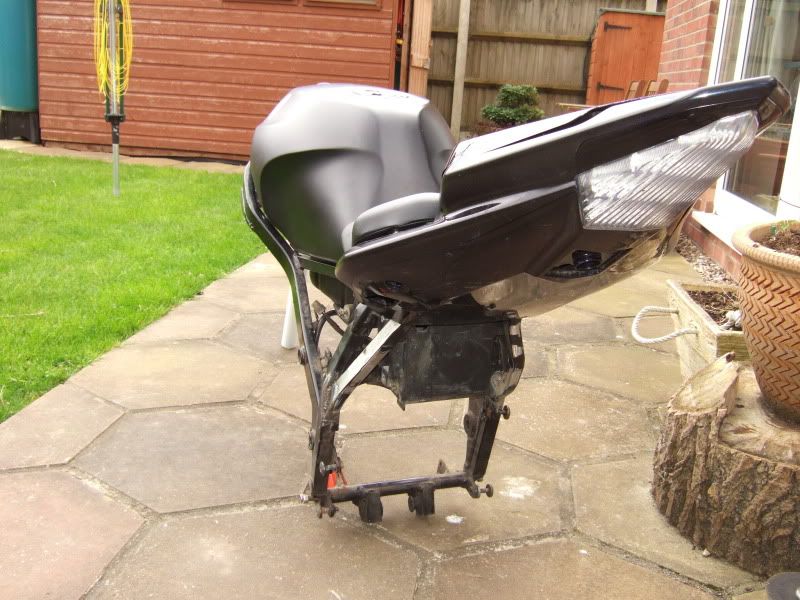
And that is all the frame fabrication done, as far as I can see, obviusly I will need to add the odd bracket for relays etc, but wont know where these have to go until I get to that stage.

So I got the soapy water out and gave the frame a clean, if its warm enough tomorrow I'll give it a quick coat of paint over the bare metal for protection as I cant see it being powder coated this year.

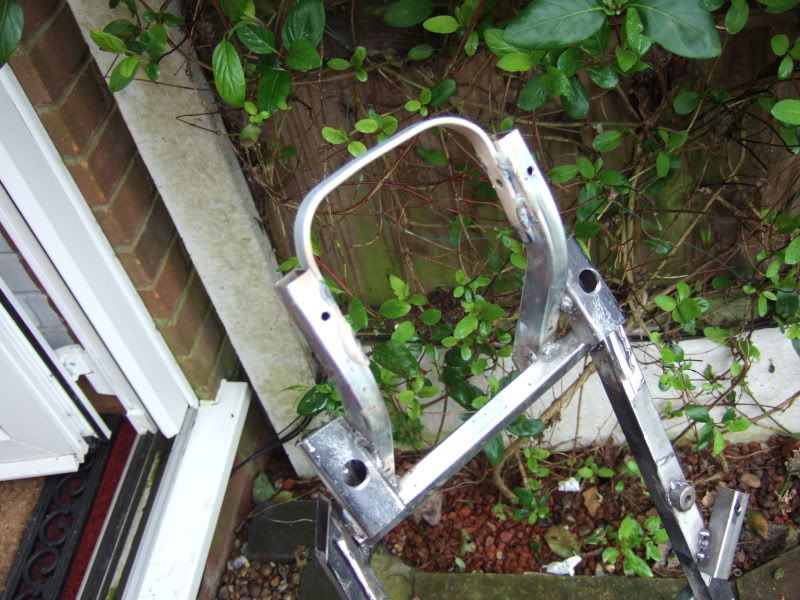
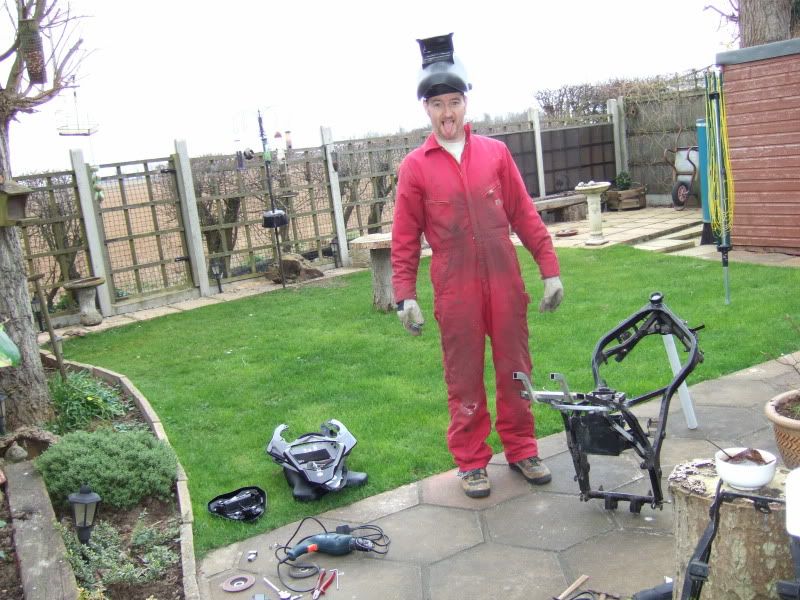
So jobs for tomorrow are, paint frame, change fork seals (had them 2 Years) and maybe start swapping front and back end over, just a rough fit as I will want to change headbearings etc, but you know how it is!!!!

As I'm sure, like me, your all fed up seeing a naked frame, unless it has tits of course!! :evil:

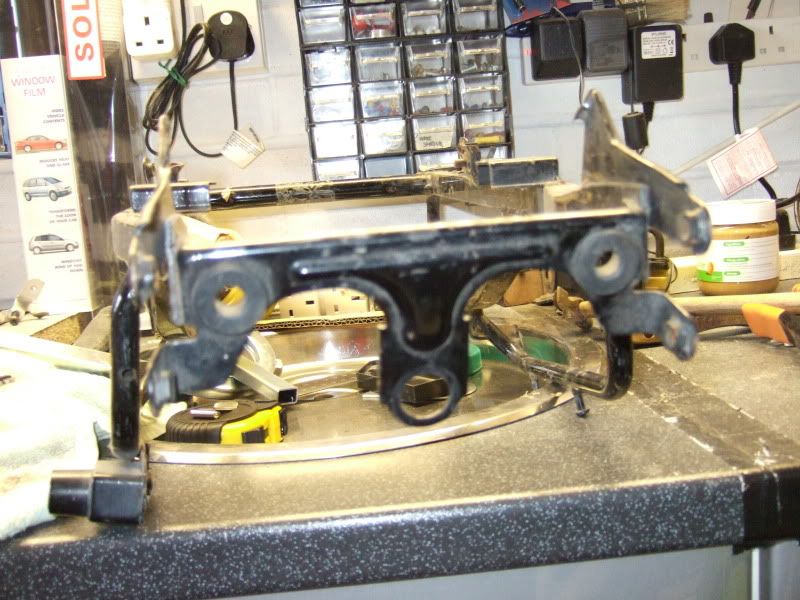
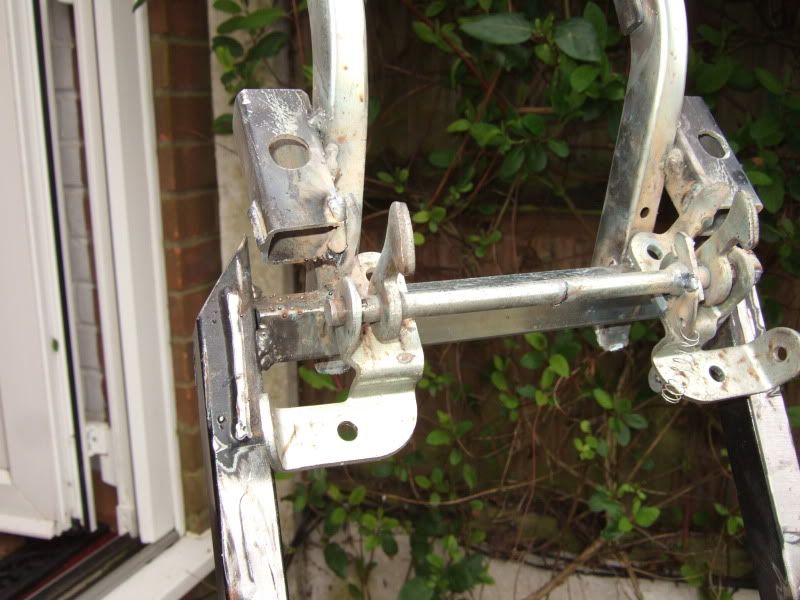
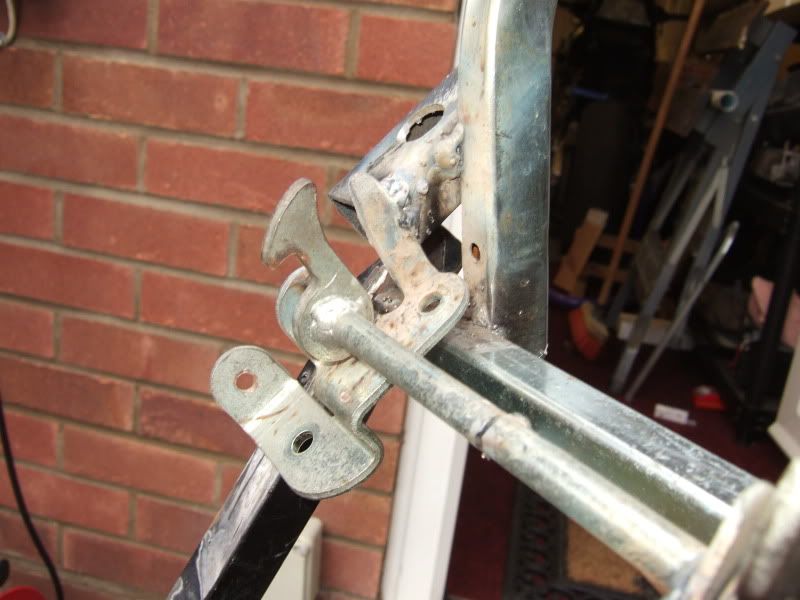
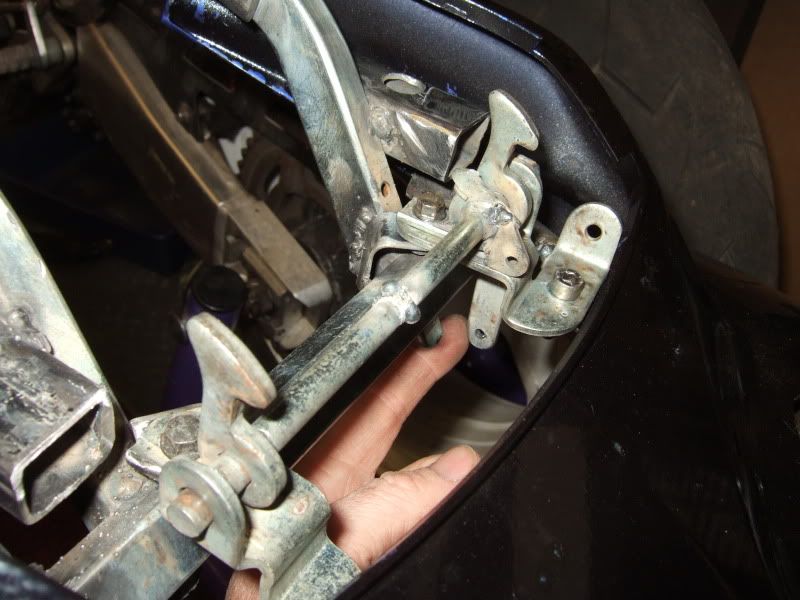
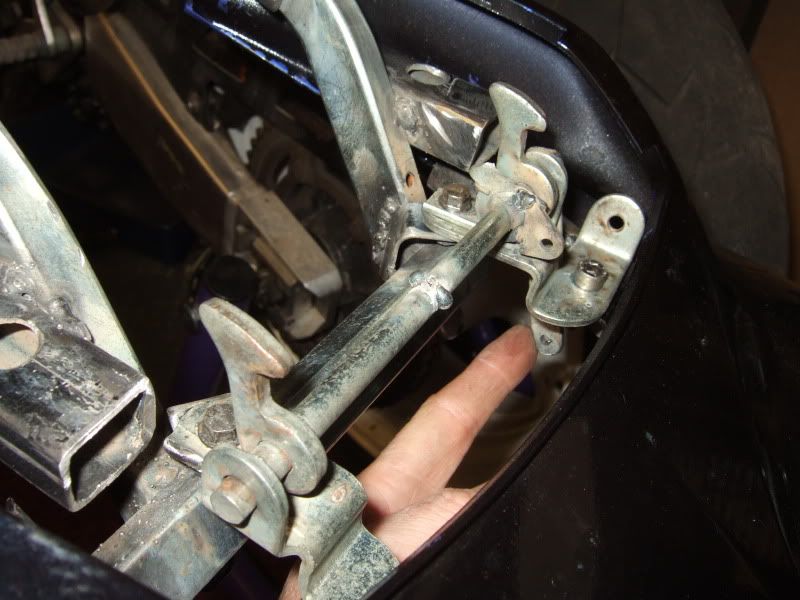
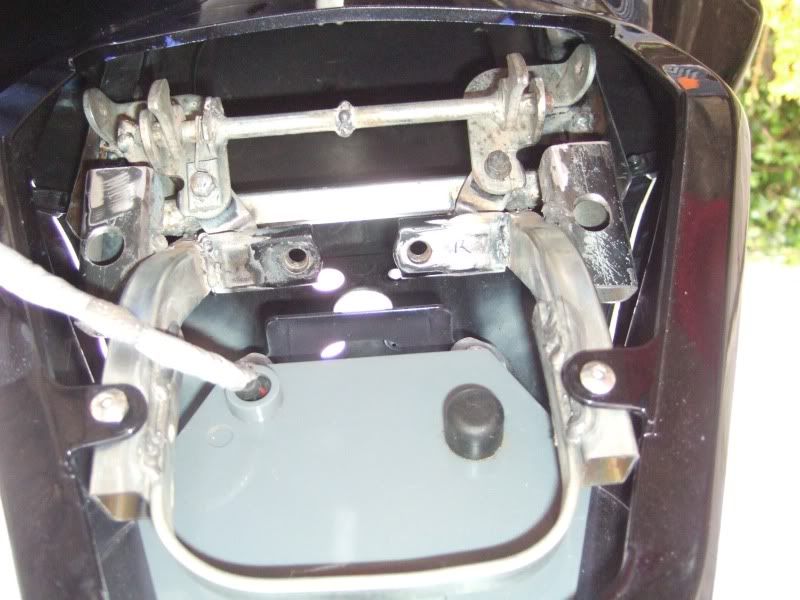
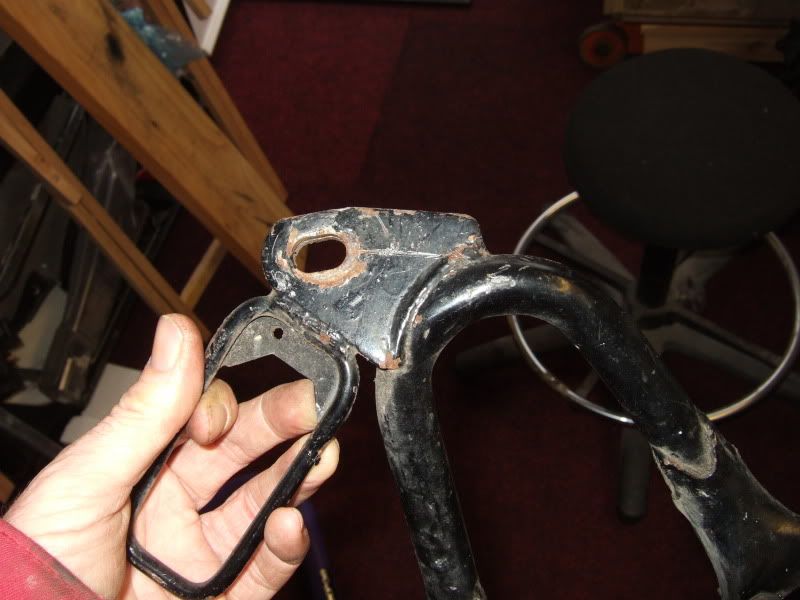
PS i forgot to take pics of the rear seat hump bracketry yesterday so here's a couple today, as you know I love pictures!!!
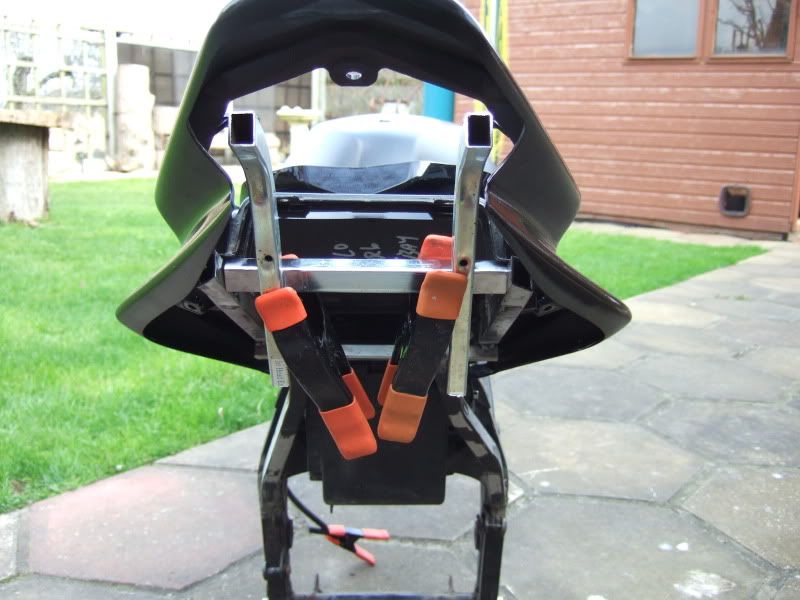
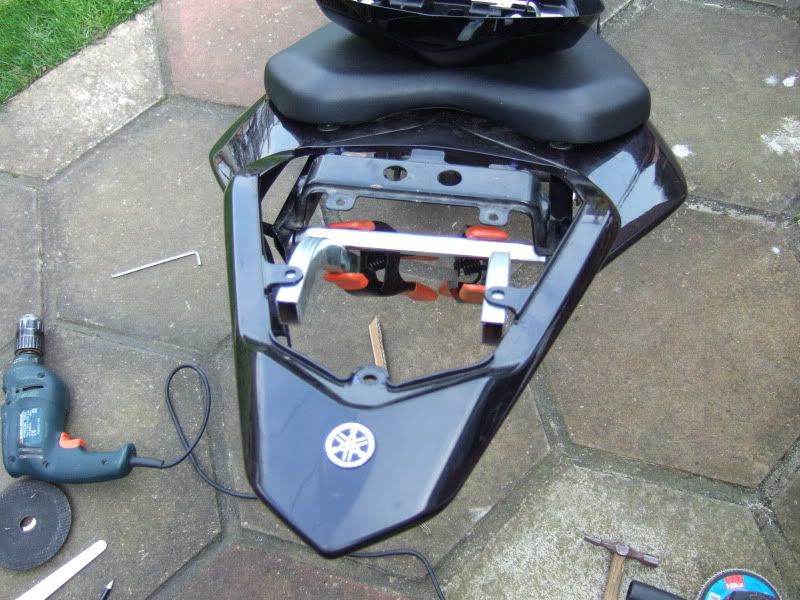
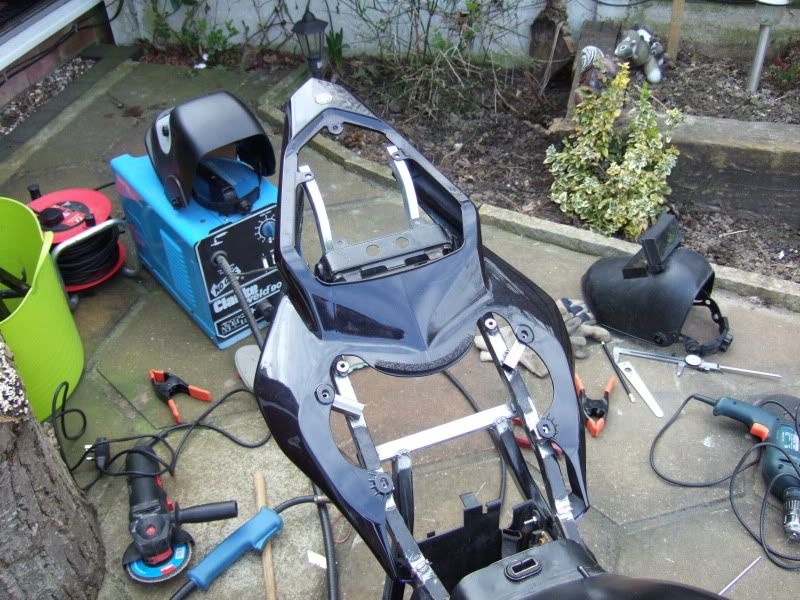
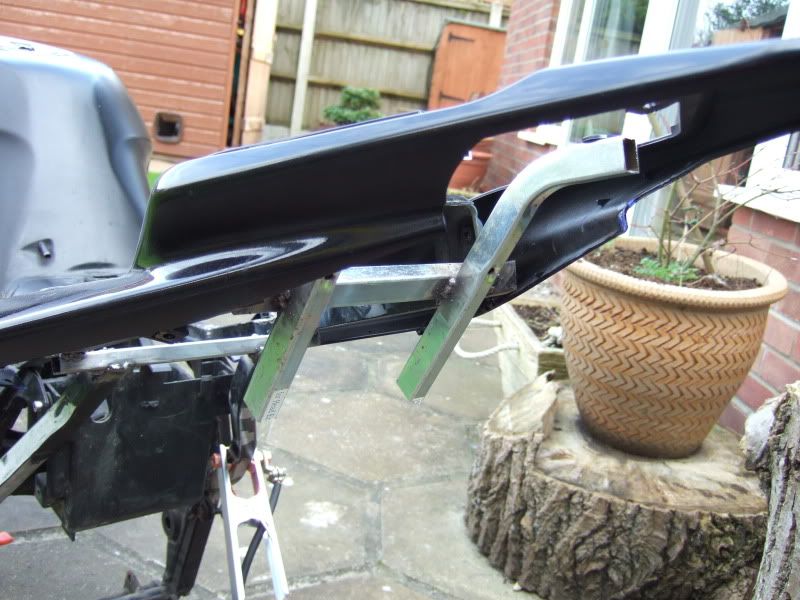
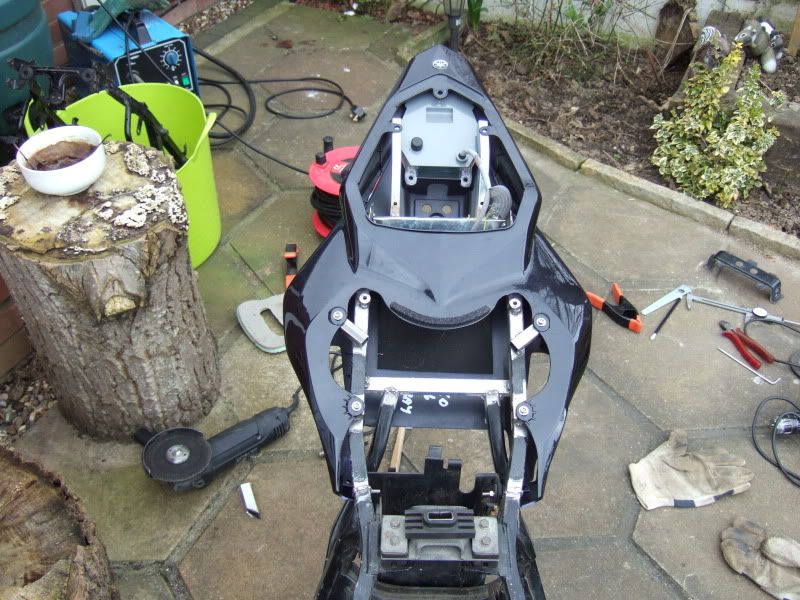
 :finger:

Image
Image
Never Ever Bloody Anything Ever!!!
Post Reply