PROJECT NUMBER 2!


If you want a fuel light on an EXUP then wire in a 5V LED. The positive terminal of the LED goes to the switched +12V (from the ignition switch)and the negative terminal of the LED goes to the green wire on the fuel level sender (conect to the loom side of the connector or you'll have trouble getting the tank off). Connect the wires in parallel using those little blue connectors and do not cut any of the original wires.
I used Maplin part No. CJ64U and soldered it and a couple of wires to a piece of strip type circuit board. I put a bit of black electrical tape round it then zip tied it to the little tab on the front fairing bracket just below the clocks.
Nothing happens until you almost get to reserve, then the LED starts to glow and gradually brightens. You get about 2-4 miles after the LED is on fully before the fuel pump stops and you need to switch to reserve, which is plenty to avoid those "Oh sh*t, I'm overtaking and got no drive" moments. The LED stays lit once on reserve as well.
The mod does not affect the function of the reserve... I've had this installed for about 1000 miles now and never had a problem. Mine's a '91 EXUP.
Converted to pedal power. Now skinny as fook.
Not much to report today viewers!
Sorted the water leak, it turned out a loose clip!
Sorted the petrol leak, removed the seal, cleaned it, put it back on the other way up to how i had it fitted originally, no more leaks!
Tested all the electrics, lights etc, everything works apart from rear brake light, switch is buggered.
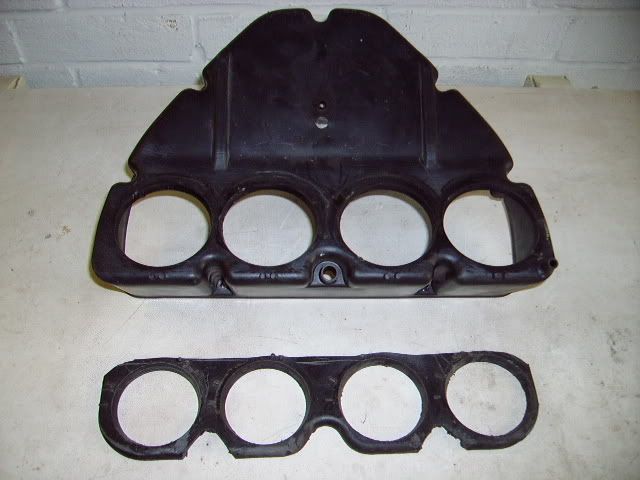
I also made a start on cutting up my 750 airbox, bit of trimming and tidying up tomorrow, then its time to get high on glue fumes.
I also planed and varnished her new pine door, but thats another story!
Sorted the water leak, it turned out a loose clip!
Sorted the petrol leak, removed the seal, cleaned it, put it back on the other way up to how i had it fitted originally, no more leaks!
Tested all the electrics, lights etc, everything works apart from rear brake light, switch is buggered.
I also made a start on cutting up my 750 airbox, bit of trimming and tidying up tomorrow, then its time to get high on glue fumes.
I also planed and varnished her new pine door, but thats another story!

Posts: 512
Joined: Tue Nov 08, 2005 1:14 am
Joined: Tue Nov 08, 2005 1:14 am
Location: West country bumkin teaching northerners how to ride !
Contact:
Thanks plodder perhaps admin would put this in tech archives as its a brilliant tipplodder wrote:If you want a fuel light on an EXUP then wire in a 5V LED. The positive terminal of the LED goes to the switched +12V (from the ignition switch)and the negative terminal of the LED goes to the green wire on the fuel level sender (conect to the loom side of the connector or you'll have trouble getting the tank off). Connect the wires in parallel using those little blue connectors and do not cut any of the original wires.
I used Maplin part No. CJ64U and soldered it and a couple of wires to a piece of strip type circuit board. I put a bit of black electrical tape round it then zip tied it to the little tab on the front fairing bracket just below the clocks.
Nothing happens until you almost get to reserve, then the LED starts to glow and gradually brightens. You get about 2-4 miles after the LED is on fully before the fuel pump stops and you need to switch to reserve, which is plenty to avoid those "Oh sh*t, I'm overtaking and got no drive" moments. The LED stays lit once on reserve as well.
The mod does not affect the function of the reserve... I've had this installed for about 1000 miles now and never had a problem. Mine's a '91 EXUP.
The EXUP stickered zimmer frame is mine and I aint got no friends
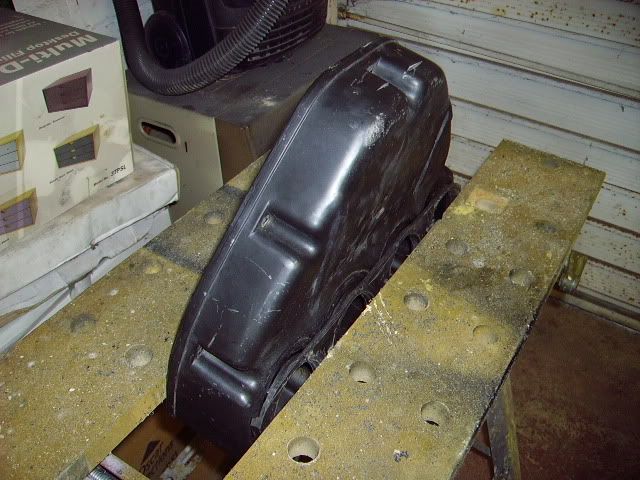
Finally got my 750 box cut out, and stuck onto the bottom of the Thunderace box.
I couldnt stick it inside of box, as the carb rubbers arent long enough, so couldnt fit the clips on where they attach to the carbs.
Only problem i foresee, is the Ace box will be a little higher with the piece stuck on underneath, so might have to lose a little more off the top corners of airbox so tank will fit in original position.
Perhaps another idea is to make a template out of thin metal instead of the plastic piece so as not to raise the overall height of the Ace box.
Will see how this goes then decide.
Well Chaps, fitted proper 750 Exup cables as the R1 cables were too long and not working too good, even with the servo motor turned around, too sharp a bend in them.
Soldered on a new brake light switch into the loom and fitted a new front sprocket nut and lock washer.
Mostly been messing with the airbox, things aint going too well.
With the 750 piece stuck on to bottom of the Ace box, this raises it much too high to fit the tank on, even with a profiled top half of the Ace box, its going to mean taking too much off the corners, so a rethink in order!
Probably going to make a metal template of 750 bottom box, then stick this to Ace box, hoping it wont raise the box too high.
Why not make a plywood template so that you can run a router cutter around the outside of the piece you wish to stick on....clean up the edges so to speak.
then make another template so that the newly cleaned up piece slots into it (try it on some plywood again before committing it to the other airbox and usng the template to cut an exact hole out of the bottom of the box for the cleaned up section to fit into...then bond together with both pieces at the same level as the original boxes
does that make sense to anyone other than me???
1..template to clean original piece thats already been cut
2another template so the cleaned pice will fit into perfectly
3 commit to cutting out the bottom of the box using template from # 2 above
4 bond together the two pieces
Last edited by Stig on Fri Aug 25, 2006 8:13 am, edited 1 time in total.
AKA Bald headed b'stard
Who is online
Users browsing this forum: Bing [Bot], Semrush [Bot] and 1 guest