If he won't send to you he can post to me and I'll send it on to youkboehringer wrote:THANK YOU STIG! That is the best one I've seen anywhere and the price is good too.
I sent a message to the seller that I would like to buy the can. Hopefully, that seller will be willing to send it across the pond.
Repair/Restoration Questions (Photo Request)
Re: Wow! This looks like a great one!
AKA Bald headed b'stard
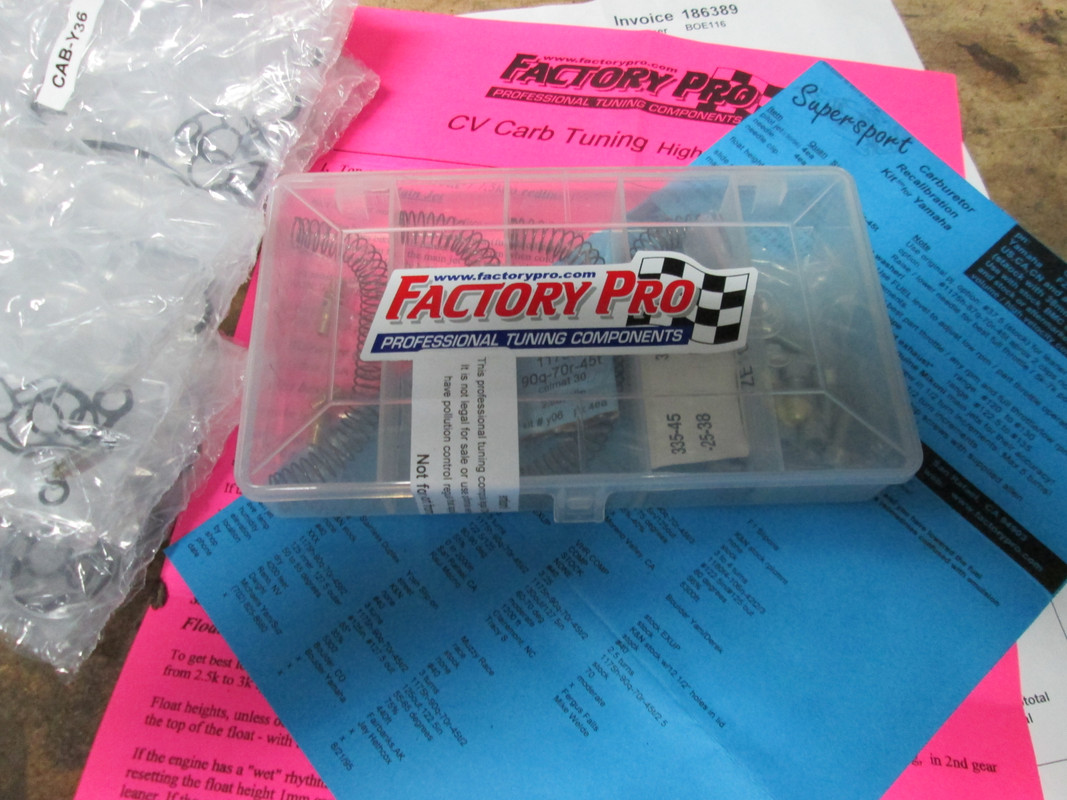
End Can Purchased - Factory Pro Kit ARRIVED!
Gentlemen,Stig wrote:End can
https://www.facebook.com/marketplace/it ... 068050632/
Thank you all so much for the recent help! I purchased the "Exhaust Can" from the seller "ANDY" in England. Seems like a really nice guy and although he was a little reluctant and preferred to send the can to one of my "Mates" in England he has now offered to send the thing over here to me. Thank you Mates for offering to help with this!!!!
Factory Pro Kit:
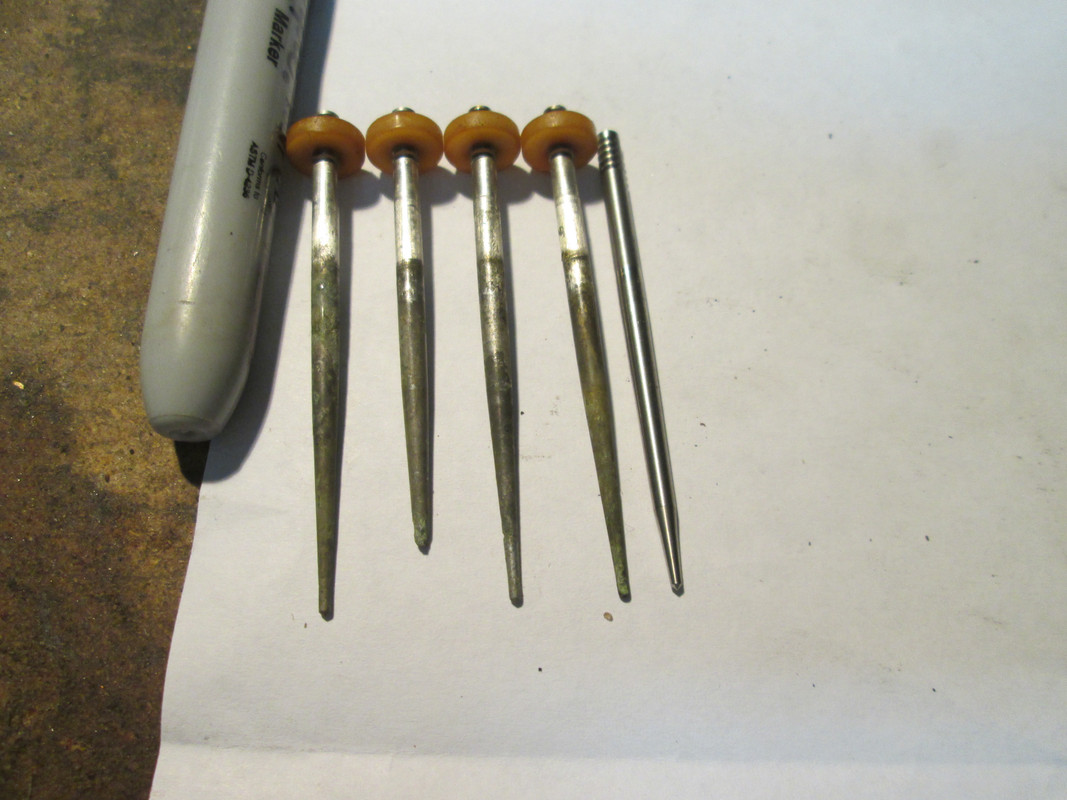
Again, another big thank you. A couple of you Gentlemen recommended Factory Pro and the rebuild kit arrived today. A little pricey but the kit contains an incredible amount of parts and supplies. I have no doubt the machine will run much better with needles that are all the same length
Sincerely,
Kurt Boehringer
Peachtree City, Georgia USA
1992 - FZR1000 - Genesis
Peachtree City, Georgia USA
1992 - FZR1000 - Genesis
Carb Rebuilding w/Questions...
FZR Friends,
Today, I took a personal holiday from work and spent some extra time working on the FZR. As you can see, the OEM needles were severely damaged by sitting in fuel for several years (new FactoryPro needle on right).
The carbs also received new: Main Jets (127.5 & 130), Pilot/Idle Jets, Float Needles, all gaskets & o-rings. Much more tuning work is required as the 4000+rpm results were FANTASTIC.....BUT, the low RPM performance was total POOP. I'm certain it will take several attempts to get the machine performing properly....
Also, I found that the main jets previously installed were very likely drilled out by the PO. The 127.5/130 combination recommended by FactoryPro is a step larger than OEM. YET, the ports in the mains I removed were ENORMOUSLY larger (in terms of jet orifice) than those installed. I suspect strongly that the PO drilled them rather than re-jet with new Mikuni jets. So, re-tuning to proper components will take a bit.
There remain some questions of missing hoses/components for the carbs:
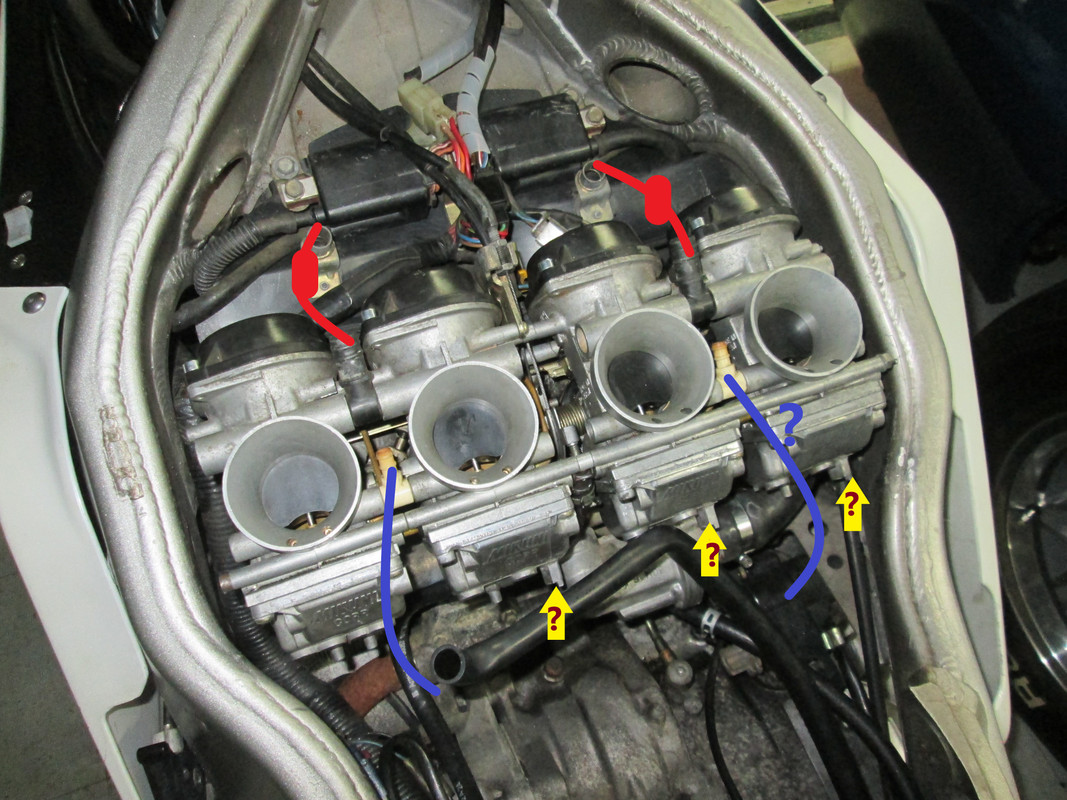
RED - I am aware these atmosphere vent hoses with filter are missing. I am trying to find them on evil bay. Seems when anyone strips/parts one of the machines (assuming the hoses are there) they toss them... The PO had these vents capped off with electrical tape....This is for him
BLUE - Obviously these carbs should have an overflow should a float stick or some other malfunction. Again, removed by the PO and capped off with tape and goo.... The PO gets another one of these...
I'd trying to figure out where Yamaha routed these?
YELLOW ARROWS- Today I noticed one of the formed protrusions on the bottom of one (only 1) of the carb 2->4 bowls was tapped/threaded for a bolt. I'm wondering what was supposed to be mounted on the bottom of a carb? The bowls may have been switched around so I am not sure which one of the 2,3,4 would have something mounted on the bottom of the bowl?
It really is a mess trying to turn one of these back to OEM when so much has been messed around with and or is missing thanks to a stupid PO....
Today, I took a personal holiday from work and spent some extra time working on the FZR. As you can see, the OEM needles were severely damaged by sitting in fuel for several years (new FactoryPro needle on right).

The carbs also received new: Main Jets (127.5 & 130), Pilot/Idle Jets, Float Needles, all gaskets & o-rings. Much more tuning work is required as the 4000+rpm results were FANTASTIC.....BUT, the low RPM performance was total POOP. I'm certain it will take several attempts to get the machine performing properly....
Also, I found that the main jets previously installed were very likely drilled out by the PO. The 127.5/130 combination recommended by FactoryPro is a step larger than OEM. YET, the ports in the mains I removed were ENORMOUSLY larger (in terms of jet orifice) than those installed. I suspect strongly that the PO drilled them rather than re-jet with new Mikuni jets. So, re-tuning to proper components will take a bit.
There remain some questions of missing hoses/components for the carbs:

RED - I am aware these atmosphere vent hoses with filter are missing. I am trying to find them on evil bay. Seems when anyone strips/parts one of the machines (assuming the hoses are there) they toss them... The PO had these vents capped off with electrical tape....This is for him
BLUE - Obviously these carbs should have an overflow should a float stick or some other malfunction. Again, removed by the PO and capped off with tape and goo.... The PO gets another one of these...
I'd trying to figure out where Yamaha routed these?
YELLOW ARROWS- Today I noticed one of the formed protrusions on the bottom of one (only 1) of the carb 2->4 bowls was tapped/threaded for a bolt. I'm wondering what was supposed to be mounted on the bottom of a carb? The bowls may have been switched around so I am not sure which one of the 2,3,4 would have something mounted on the bottom of the bowl?
It really is a mess trying to turn one of these back to OEM when so much has been messed around with and or is missing thanks to a stupid PO....
Kurt Boehringer
Peachtree City, Georgia USA
1992 - FZR1000 - Genesis
Peachtree City, Georgia USA
1992 - FZR1000 - Genesis
In Answer to your YELLOW QUERY
The threaded bolt hole is where a small bracket fits to which holds the idle adjuster knob. The float bowl with the bolt hole in should go on the #1 carb. Looking at your photo it doesn't look like you've got one of those either. The PO needs a bullet by the sound of him.


I'll have a look in my spares to see if I've got some of the bits you need.
As Arnie would say. "I'll be back"
The threaded bolt hole is where a small bracket fits to which holds the idle adjuster knob.
I'll have a look in my spares to see if I've got some of the bits you need.
As Arnie would say. "I'll be back"
Bit of advice. Buy a good bed and a good pair of shoes, because if you aren't in one you'll be in the other.
I'm back.
Here's some photos of the bits you have missing.


I thought I had a spare set of those atmosphere vent hoses but I can't locate them yet. If I find them do you want them?
I don't know why the 3rd photo has gone on the twist???
Here's some photos of the bits you have missing.


I thought I had a spare set of those atmosphere vent hoses but I can't locate them yet. If I find them do you want them?
I don't know why the 3rd photo has gone on the twist???
Bit of advice. Buy a good bed and a good pair of shoes, because if you aren't in one you'll be in the other.
Thank you nuggitt
Thank you.
Yes, I would certainly appreciate any spares you find for my missing pieces. Again, we found another missing piece!
That adjuster would have come in handy several times lately. The wife has to hold up the tank while I a adjust with a socket and driver.
Thanks
Yes, I would certainly appreciate any spares you find for my missing pieces. Again, we found another missing piece!
That adjuster would have come in handy several times lately. The wife has to hold up the tank while I a adjust with a socket and driver.
Thanks
Kurt Boehringer
Peachtree City, Georgia USA
1992 - FZR1000 - Genesis
Peachtree City, Georgia USA
1992 - FZR1000 - Genesis
I've had a good rummage and I've 2 overflow pipes for the float bowls. 1 idle cable and bracket and I don't know why but only 1 atmosphere vent hose??
I'll have another look to see if I can locate it later.
PM me your address etc and if you'll pay the postage they're yours for free.


I'll have another look to see if I can locate it later.
PM me your address etc and if you'll pay the postage they're yours for free.

Bit of advice. Buy a good bed and a good pair of shoes, because if you aren't in one you'll be in the other.
EXHAUST! I was extremely EXCITED..... then.... OH CRAP
FZR Friends,
I returned from a quick overnight riding trip with a few friends and discovered the incredibly fast delivery of my exhaust can from PLYMOUTH Devon PL5 2RE (wherever that is?). In addition, a pair of $20 cables I decided to give at try also arrived!!!!

Looks like I have the makings of a FULL OEM EXHAUST?
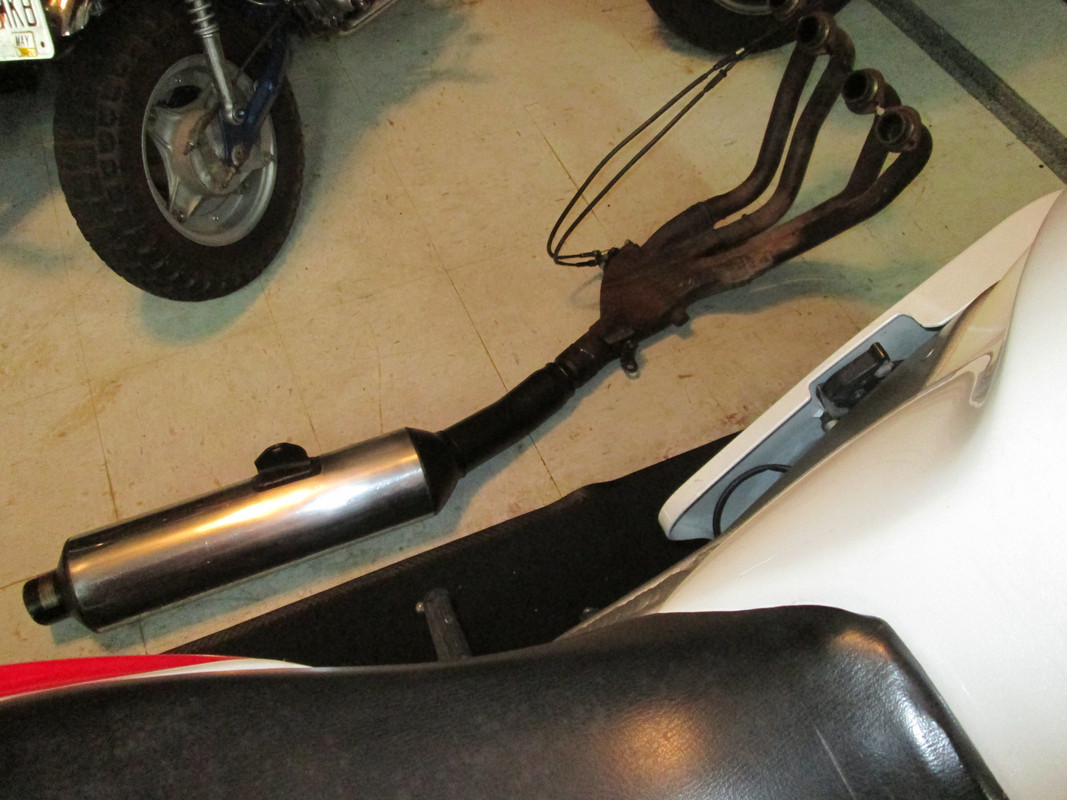
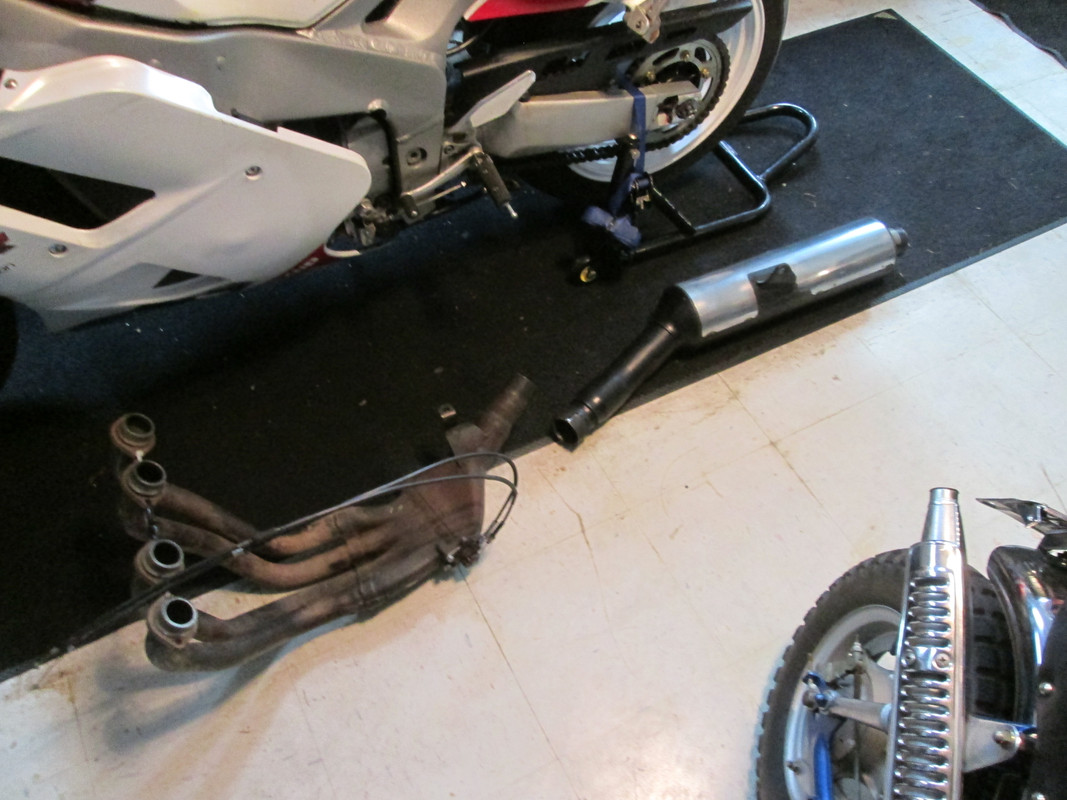
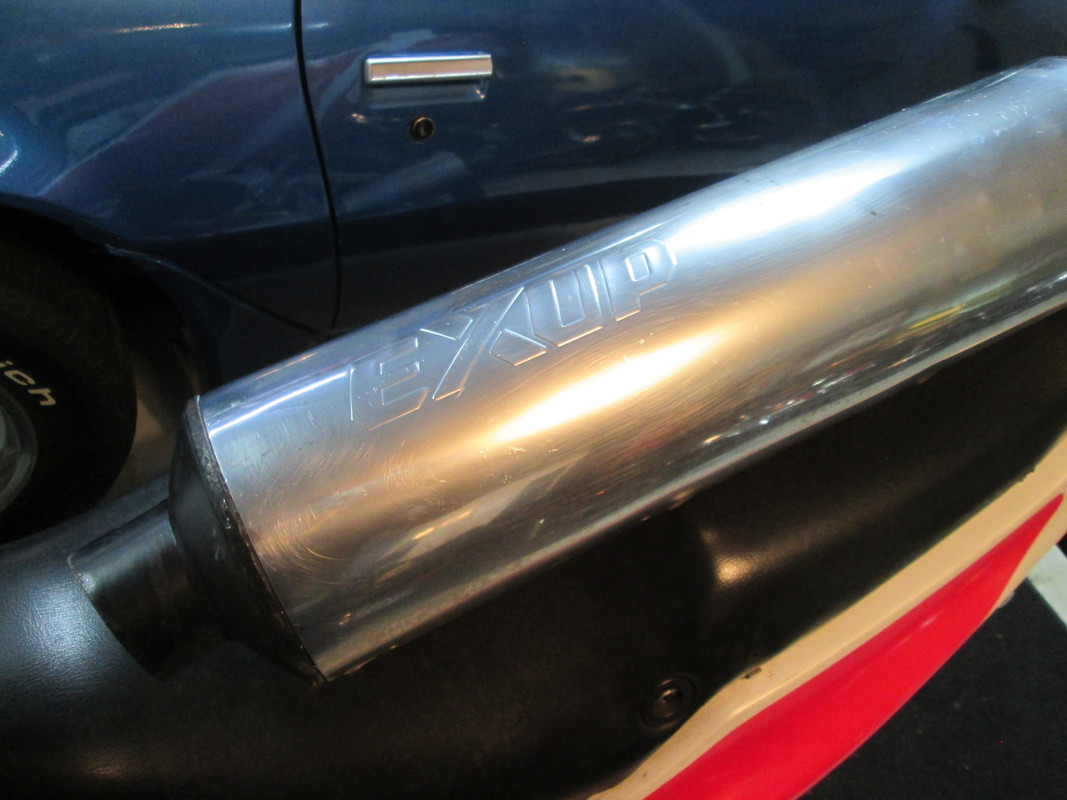
The can is certainly not pristine but it was an extremely good deal and with a bit of cleaning and polishing it should be very attractive AND keep me from be labeled as a HOOLIGAN. I also like that it is one of the older models with EXUP in the stainless cover! The neighbors (and my ears) will certainly your efforts in helping me find this unit!!! Thank you again!

The bracket that came with my header does NOT resemble the one shown and offered by STIG but I'm going to see if I can figure out how the PO of this header used it.... Maybe it could work for temporary until I can make arrangements with STIG.....
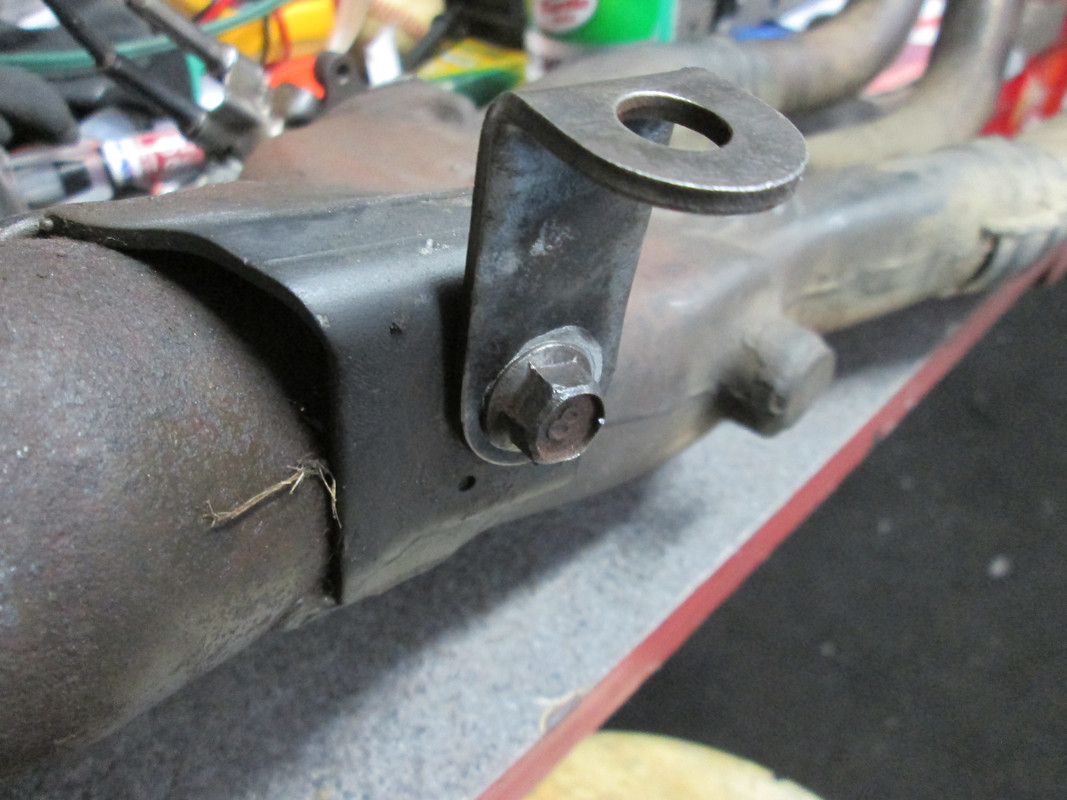
UNFORTUNATELY, my excitement was short lived. As I began a bit of pre-assembly checking, I realized the cable bracket on the header was damaged. Not possessing the necessary cables at the time of delivery, I hadn't checked all the fittings. Seems the PO of the header got a bit aggressive at some point and busted it.... Seems another one of these ( ) is in order for that guy. The cable ends will not be retained without a bit of engineering or a replacement...
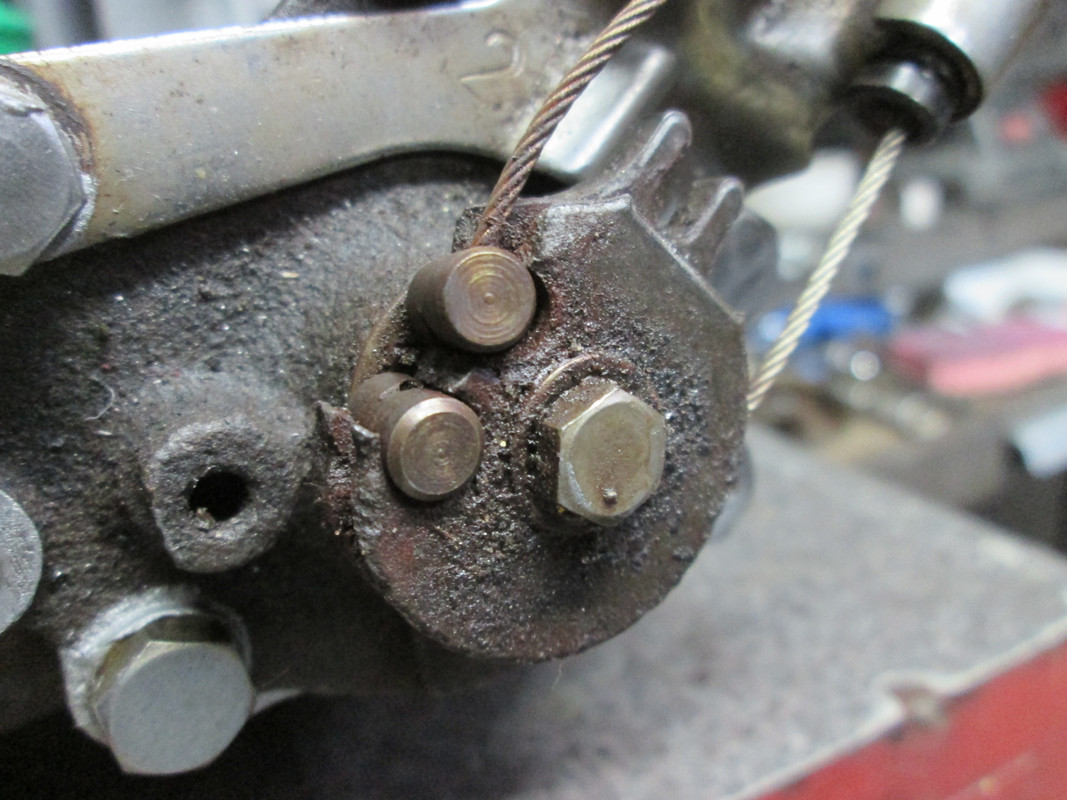
I believe I can fabricate a TEMPORARY retainer (RED) to hold the cables for set-up and testing until another can be acquired. I would use the bolt on the valve to hold a small tin clip of sorts.
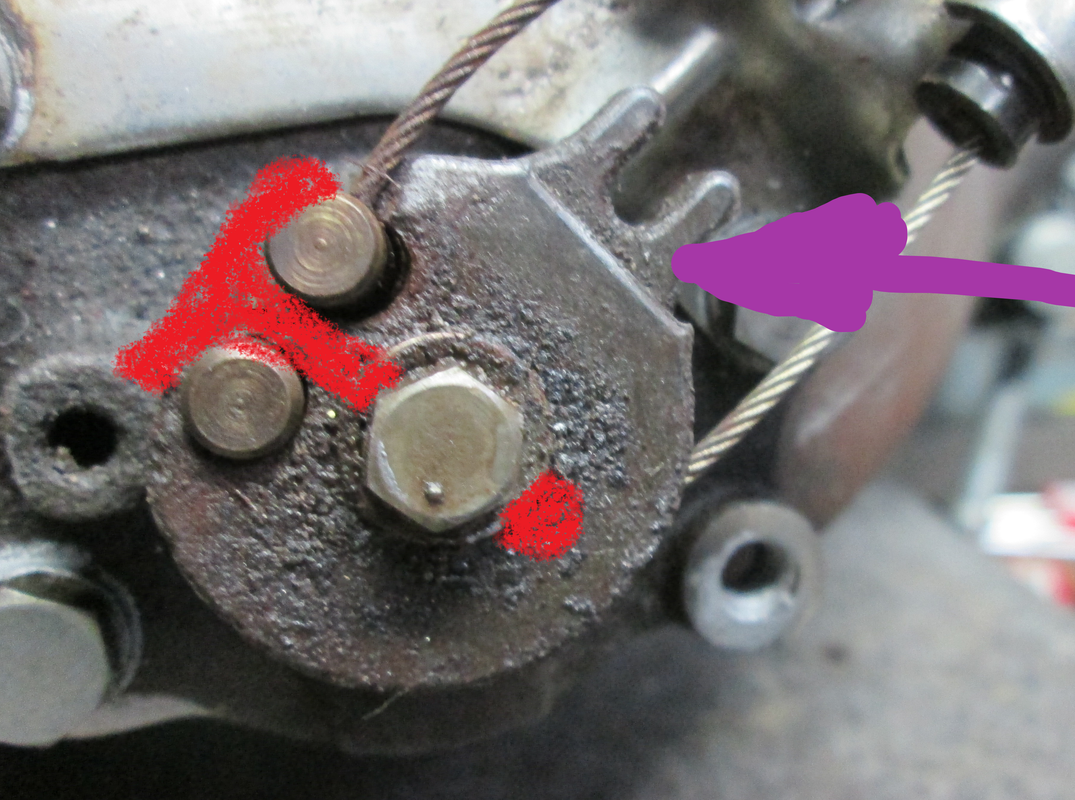
I can't determine what is the purpose of the missing hook (purple) is used for? Anyone have a close up of this properly set-up?
It's past time for bed over here in the states but I may just wake up Sunday morning and decide to make a quick go of it with this.... Maybe sleep will provide some second thoughts...
I returned from a quick overnight riding trip with a few friends and discovered the incredibly fast delivery of my exhaust can from PLYMOUTH Devon PL5 2RE (wherever that is?). In addition, a pair of $20 cables I decided to give at try also arrived!!!!
Looks like I have the makings of a FULL OEM EXHAUST?


The can is certainly not pristine but it was an extremely good deal and with a bit of cleaning and polishing it should be very attractive AND keep me from be labeled as a HOOLIGAN. I also like that it is one of the older models with EXUP in the stainless cover!


The bracket that came with my header does NOT resemble the one shown and offered by STIG but I'm going to see if I can figure out how the PO of this header used it.... Maybe it could work for temporary until I can make arrangements with STIG.....

UNFORTUNATELY, my excitement was short lived. As I began a bit of pre-assembly checking, I realized the cable bracket on the header was damaged. Not possessing the necessary cables at the time of delivery, I hadn't checked all the fittings. Seems the PO of the header got a bit aggressive at some point and busted it.... Seems another one of these (

I believe I can fabricate a TEMPORARY retainer (RED) to hold the cables for set-up and testing until another can be acquired. I would use the bolt on the valve to hold a small tin clip of sorts.

I can't determine what is the purpose of the missing hook (purple) is used for? Anyone have a close up of this properly set-up?
It's past time for bed over here in the states but I may just wake up Sunday morning and decide to make a quick go of it with this.... Maybe sleep will provide some second thoughts...
Kurt Boehringer
Peachtree City, Georgia USA
1992 - FZR1000 - Genesis
Peachtree City, Georgia USA
1992 - FZR1000 - Genesis
I've had to break off from my porridge this morning, to save you going out for a ride and coming back feeling very deflated. 


This is how it should be Kurt.

The little hole behind the fork bit is where you line it up with the two prong fork. You can use a round smooth part of a drill bit which will fit in between the fork prongs and into the hole to keep the fork prongs in place while you adjust the correct tension in the cables.
I'll be back....
This is how it should be Kurt.

The little hole behind the fork bit is where you line it up with the two prong fork. You can use a round smooth part of a drill bit which will fit in between the fork prongs and into the hole to keep the fork prongs in place while you adjust the correct tension in the cables.
I'll be back....
Bit of advice. Buy a good bed and a good pair of shoes, because if you aren't in one you'll be in the other.
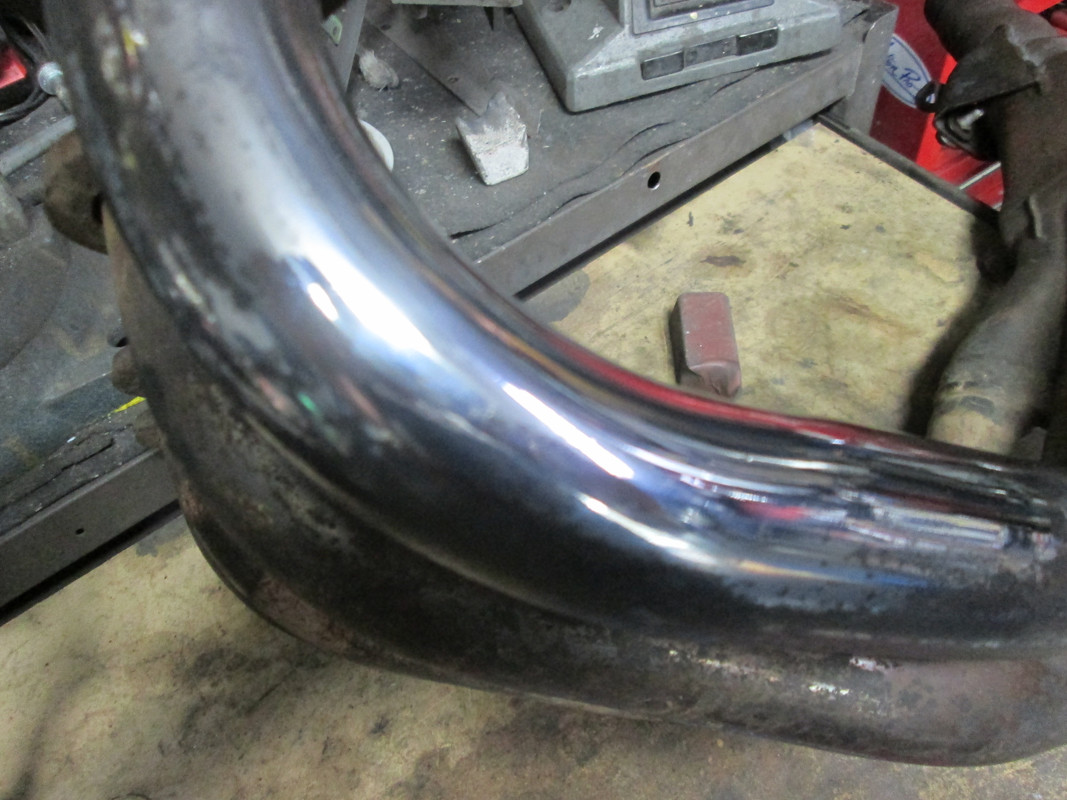
The header pipes are stainless and will clean up with some work
You can still buy the pulley wheels new
Part #. 2TK-14865-01-00
Cable brackets are available too
#2TK-14867-01-00


Bit of sand blast to the cover plate.....

If the valve binds on reassembly, run it between centres in a lathe and adjust accordingly

You can still buy the pulley wheels new
Part #. 2TK-14865-01-00
Cable brackets are available too
#2TK-14867-01-00


Bit of sand blast to the cover plate.....

If the valve binds on reassembly, run it between centres in a lathe and adjust accordingly

AKA Bald headed b'stard
Thanks for stopping me (from the Hooligan)
Nuggitt & Stig,
Thanks for the quick responses and solid information. I feel more than a little foolish not to have found the proper assembly information first before trying to wing it. It's obvious my guesstimates of how this thing went together were totally wrong.
Since I'm such a HOOLIGAN, I didn't bother to check my books before I started playing with this.....
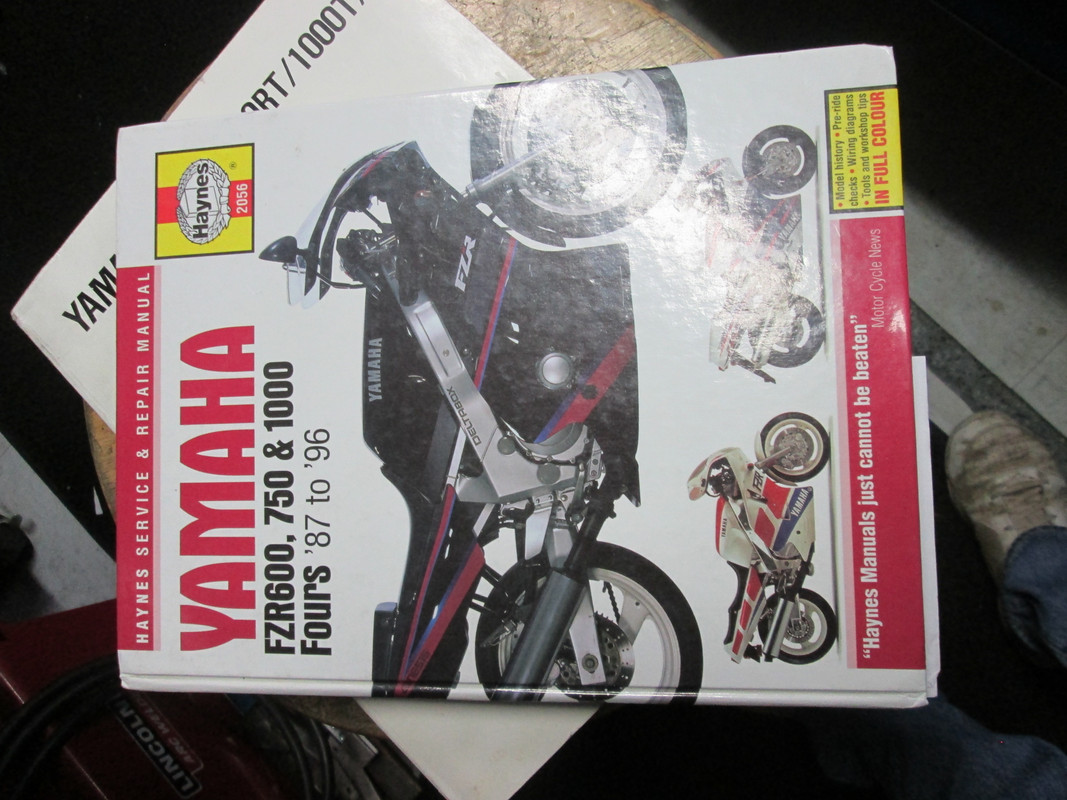
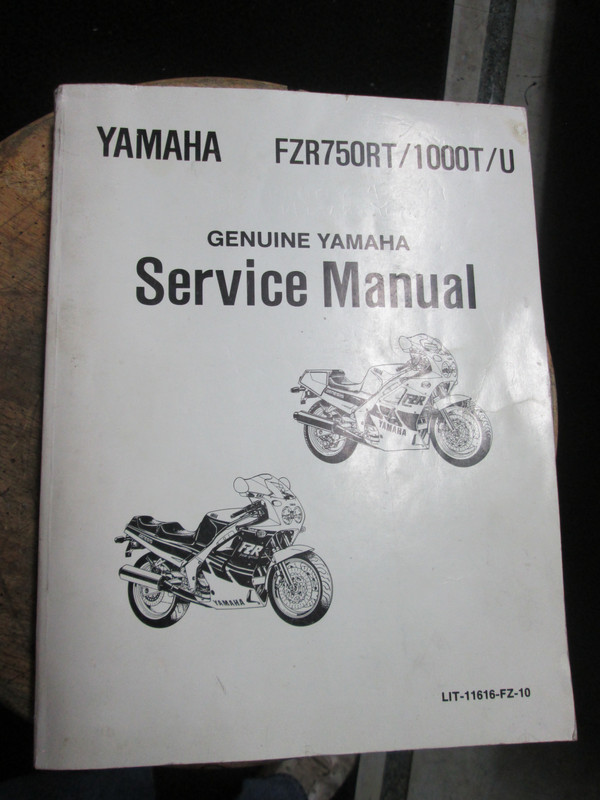
The information on how to do it RIGHT was just a few feet away.
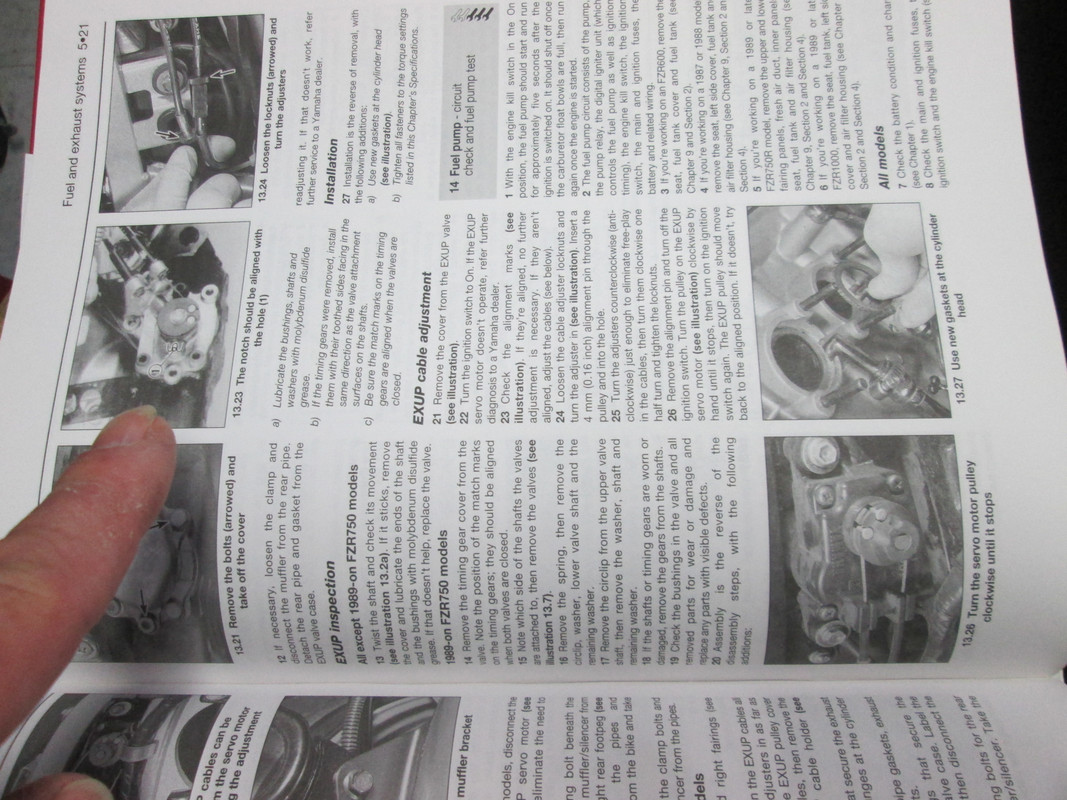
Thankfully, you stopped me in time. I apologize.
I also checked the Yamaha parts supplier web-site (www.partzilla.com) and found the pulley was still available. Apparently this is used on the R1 and a bunch of other high performance machines in the Yamaha stable. Nuggitt, I received your e-mail on this item.
Now that I know how fantastic those headers CAN look I will be delaying my assembly until they can be polished up a bit. I also need to make sure I have ALL the pieces ready.
Where can I buy the Exhaust can with "HOOLIGAN" on it?


Thanks for the quick responses and solid information. I feel more than a little foolish not to have found the proper assembly information first before trying to wing it. It's obvious my guesstimates of how this thing went together were totally wrong.
Since I'm such a HOOLIGAN, I didn't bother to check my books before I started playing with this.....


The information on how to do it RIGHT was just a few feet away.

Thankfully, you stopped me in time. I apologize.
I also checked the Yamaha parts supplier web-site (www.partzilla.com) and found the pulley was still available. Apparently this is used on the R1 and a bunch of other high performance machines in the Yamaha stable. Nuggitt, I received your e-mail on this item.
Now that I know how fantastic those headers CAN look I will be delaying my assembly until they can be polished up a bit. I also need to make sure I have ALL the pieces ready.
Where can I buy the Exhaust can with "HOOLIGAN" on it?
Kurt Boehringer
Peachtree City, Georgia USA
1992 - FZR1000 - Genesis
Peachtree City, Georgia USA
1992 - FZR1000 - Genesis
This will take some work.
I hadn't a clue these were stainless. I now have another project that should keep me busy for a while.....Stig wrote:The header pipes are stainless and will clean up with some work
Kurt Boehringer
Peachtree City, Georgia USA
1992 - FZR1000 - Genesis
Peachtree City, Georgia USA
1992 - FZR1000 - Genesis
I had no idea these were stainless...
Stig,Stig wrote:Sorry, didn't mean to find you extra work
Yes. You did make some extra work for me! But it was worth it!
I'm definitely NOT yet done, and I don't want to get into a competition with your fine work, but a few hours of work resulted in this.....
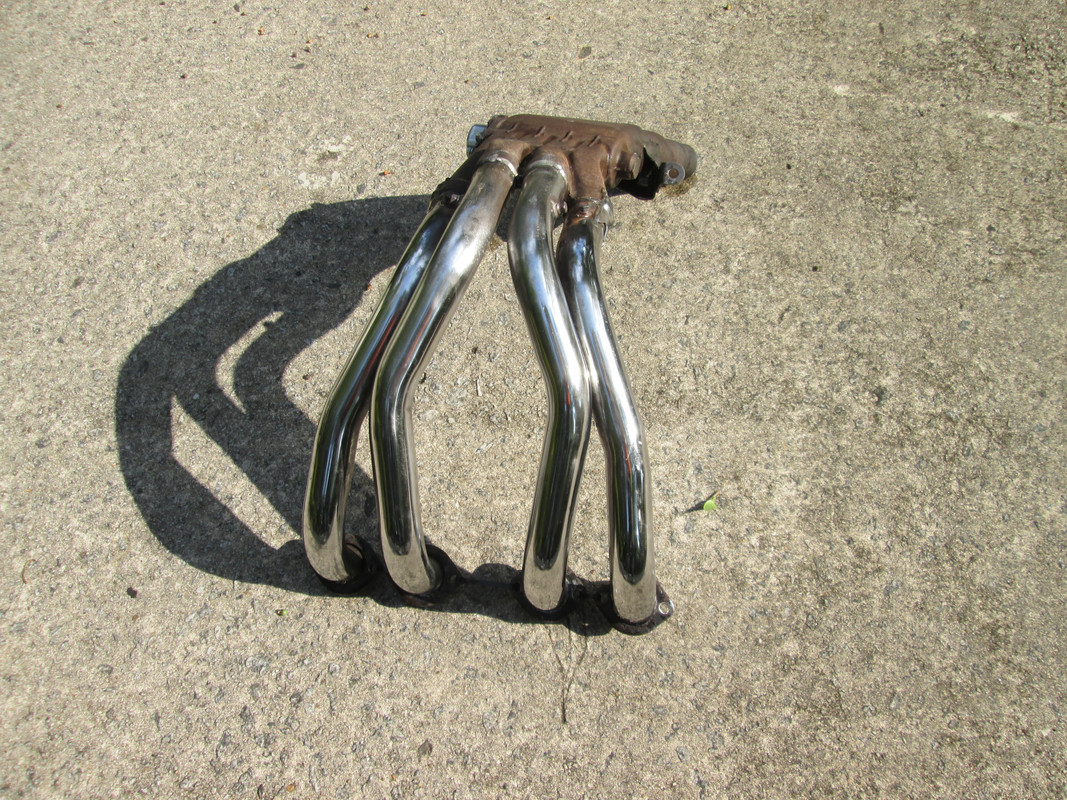
I hope these look CLOSE to as good as yours when they are done!
Kurt Boehringer
Peachtree City, Georgia USA
1992 - FZR1000 - Genesis
Peachtree City, Georgia USA
1992 - FZR1000 - Genesis
Who is online
Users browsing this forum: No registered users and 1 guest


