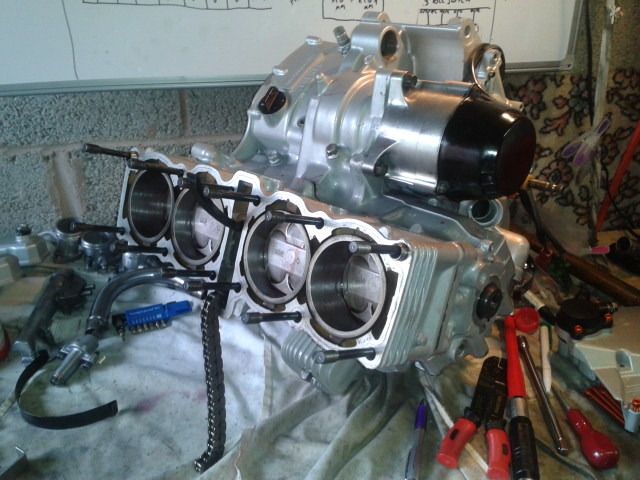
Vivian - Banner's streetfighter experiment.
let the rebuild begin!
wow, its taken a while
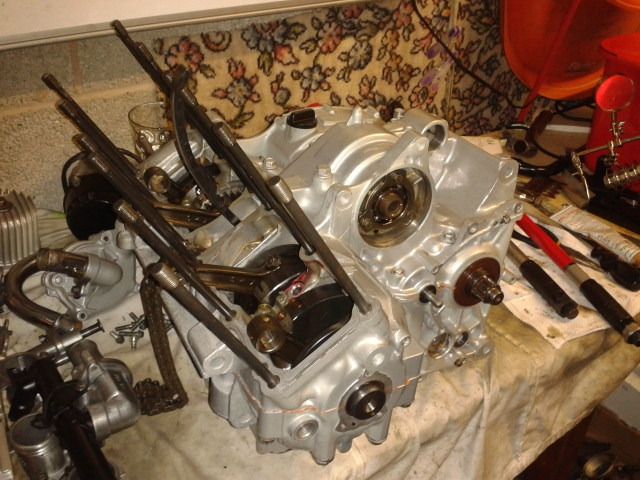
i started taking the thing apart in october 2012, 9 months later and it starts to get built back up...getting the transmission on properly was so far the hardest bit after triple checking the shell bearing colours to be damn sure they are in right.
engine moves freely with no noises when turning by hand, starter is all fine and the gears are correctly located and move at least between N-1st-2nd so thats good
put the oil pan on tomorrow, then im scavenging about for some piston ring compressors - not doing them by hand, its difficult enough with the right gear!
then everything else is easy!
fatdog - how did you manage to get the pistons in the bore
after 3 hours swearing at it in the hot weekend weather i gave up for the time being. did you do it as in the manual, i.e. put all 4 pistons+rings onto the conrods, then fit the middle 2, then the outer 2 cylinders?
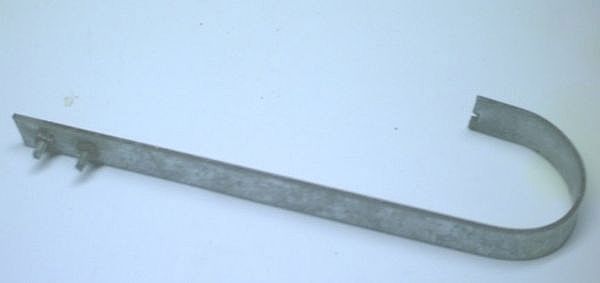
also what ring compressors did you use, did you get some of the "hand ones", mine look like this
RING COMPRESSORS
or did you slide the pistons in at the top of the cylinders, and then fit them to the conrods?
and are your oil scavenger rings as tight as mine! the rest of the rings compress easy enough to be done by hand, but the oil scraper rings are really hard to compress
thanks for any help
john
Hi John,
First off I fitted all the pistons to the condors. I never tried sliding them down from the top as I would think it would be a right bugger trying to get the circlip in with very little room to work with between the crankcase and cylinder block (not saying it can't be done though).
Next I rotated the crank so that the two inner pistons were at their highest point as these were the two that I would feed in first.
Install the ring compressors (two needed and don't clamp them too tight), I bought the Laser ones which worked very well - LASER
Lower the cylinder block and position the pistons just inside the liner bore so that the compressors are up against the bottom skirt. Now tap the top of the block with your hand and steady the pistons with your other and you should see the pistons start to go in (go slow and steady as it should need much force to get them in).
Once all rings are in the bore remove the compressors. Now this was the tricky bit, you need to rotate the crank slightly in order to raise the outer pistons so that you can get the compressors on these ones. But watch the inner ones, if they drop to low then the lower ring will come out of the bore and you have to start again (yes I found this out the hard way). I also put a spacer between the crankcase and block to keep it in position while I installed the compressors.
Now it's just a case of lowering the block in the same way as I did with the inner pistons - I managed to do all this on my own but if you can get an extra pair of hands to help it might make all the difference.
I seem to remember the oil ring was harder to compress than the others, so I wouldn't worry that there is something wrong with them (I assume you have checked the ring gap clearance before fitting them to the piston).
Hope this offers some help, there is no way I could of done this without the compressors (shame your not local as you would more than welcome to borrow them) as I did try and soon realized that I was pissing in the wind!
Best of luck with it and keep us posted.
Dave
1993 YZF750R
EXUP - Knee Down
EXUP - Knee Down
You will need two of them as you need to feed in two pistons at a time.banner001 wrote:im from huddersfield, but every bugger on here is from hull, or the surrounding area...it must be a in"breeding" thing
thanks for the info, was just what i needed, ive sold a top of bits on ebay so ill buy the compressor...did you manage with just one, or did you need 2?
Have fun!!
1993 YZF750R
EXUP - Knee Down
EXUP - Knee Down
ring compressors are here, and my brother in law is down, so we are gonna tackle these today...fingers crossed.
in other news, if you buy a pro-bolt engine kit for the fzr 1000 exup '89-90 kit, dont expect it to fit there are 4 incorrect bolt lengths, 2 for the water pump (both 10mm too long), and 2 for the sprocket cover (one is 10mm too long, the other 30mm too short)...replacements are in the post, along with all the other BRIGHT ORANGE bolts i need for the engine
im coming on with the zxr400 race bike as well, im picking up replacement forks on sunday, just need some part work tyres and a bit of fiberglass and its ready for its maiden voyage
next on the list will be making a modified rear caliper bracket for a scooter front brake (nice and small and lightweight - it doesnt get used on track much anyway the rear brake) and making a short subframe and a quick-and-dirty one-piece fiberglass rear.
- itsnotagenesis
- More Rabbit Than Sainsbury's
- Posts: 2277
- Joined: Mon Oct 10, 2005 8:25 pm
- Location: Paisley
- itsnotagenesis
- More Rabbit Than Sainsbury's
- Posts: 2277
- Joined: Mon Oct 10, 2005 8:25 pm
- Location: Paisley